In today’s modern era, where 16% of the world’s companies are fully remote, no one can negate the importance of a stable WiFi connection. Sometimes, you might have some issues when you have a Lenovo laptop with unique features and qualities. You are facing a problem where your Lenovo laptop keeps disconnecting from WiFi, especially when using Windows 10.
A reliable internet connection makes our lives easier and allows us to work, educate, and save money. If your Lenovo laptop keeps disconnecting from WiFi, your response time decreases, making you more frustrated. In addition, an unreachable cloud is created.
Having a stable and strong WiFi connection is essential for laptops. Therefore, you may need to troubleshoot if you continuously disconnect from your WiFi connection. Here are some steps you can try. Before that, let’s view the causes of this concern.
Why My Lenovo Laptop Keeps Disconnecting From WiFi?

Laptops from Lenovo are among the best laptops preferred by millions of users. Some issues may arise for most users, which causes Lenovo laptops to keep disconnecting from WiFi. The leading causes of the concern are listed below:
- If the BIOS on your Lenovo PC isn’t up-to-date, it can cause this issue
- Something is wrong with the hardware or software of your Lenovo laptop
- The network adapter is not working properly
- The driver is corrupted
- The TCP/IP settings are incorrect
- When your Windows machine sleeps after some time when you keep it idle.
- WiFi issues.
After entering BIOS and enabling Wireless LAN, you can diagnose your Wireless network’s status from Lenovo’s website and download and install the appropriate wireless LAN driver for your PC model.
How to Fix Lenovo Laptop That Keeps Disconnecting From WiFi?

There are several ways to fix WiFi disconnection issues. You can use these to troubleshoot the problem. Make sure the wireless switch is on. Enable WLAN Autoconfiguration. Set up power management for your wireless card. Connect manually to the network.
Reboot Your Network Adapter
Your network adapter should be restarted. Follow these steps after rebooting your network adapter:
- First, press the ‘Window+R’ keys simultaneously, then the ‘Run’ dialogue box will appear.
- In the dialogue box, type ncpa.pl and press Enter to run it.
- Select the ‘Network Adapter,’ right-click on it, and choose the ‘Disable’ option.
- Go back to the network adapter option and right-click it. Now, from the menu option, choose ‘Enable.’
Check Drivers
Firstly, you should check the driver status of your device. Lenovo usually releases updates for their devices regularly. You are probably facing this problem because you have forgotten to update your driver for some time.
- Open the Lenovo support website.
- Pick the specific model of your device from the list.
- Go to the tab labelled ‘Drivers and Software. The device will either search for updates manually or automatically.
- Select automatic and wait for a few minutes.
During the procedure, you will need to reboot your device several times. It is essential to make sure that all the new updates are installed.
Remove Faulty Driver and Reinstall
The most common solution to many problems is removing and reinstalling everything on your system. So, troubleshooting the disconnecting error on your Lenovo laptop can be accomplished by reinstalling the Network Adapters from the web.
- Click on the Windows Start button.
- Select Device Manager.
- Click the Network Adapter option.
- Search for a suitable WiFi adapter for your Lenovo laptop, right-click on it, and then select the ‘Uninstall’ option from there.
- When you have deleted or uninstalled the existing driver, click on ‘Network Adapters’ again and select ‘Scan for hardware changes.’
- Once Windows has identified new WiFi drivers suitable for your system, it will automatically install them. This should fix your problem.
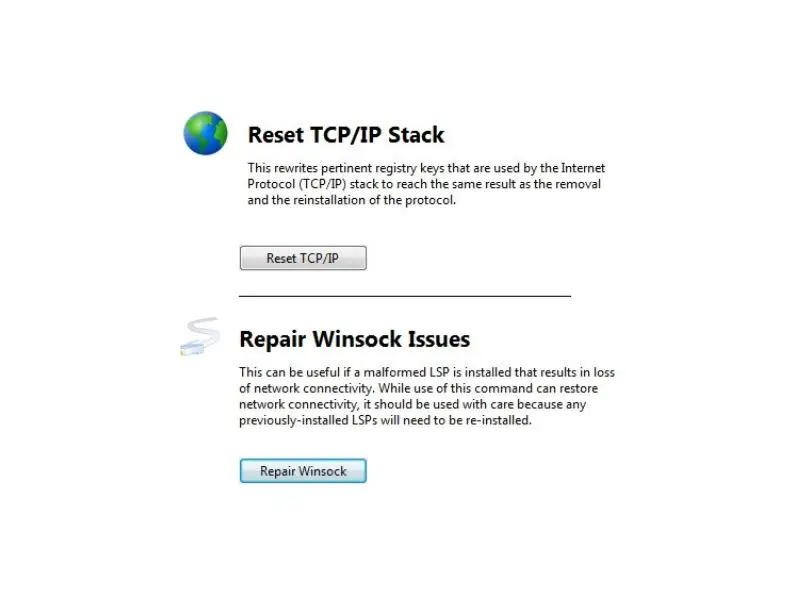
Reset TCP/IP Stack And Auto Tuning

You can use this method by going to the Windows Start menu and searching for the command prompt that must be run as an administrator. Follow the instructions as given.
- Write: ‘netsh int ip reset c: restlog. Txt’ in the given command box and then hit the enter button from the keyboard. Then write: ‘netsh int tcp set heuristics disabled’ and press enter key.
- Similarly, input ‘netsh int tcp set global autotuninglevel=disabled’and also information ‘netsh int tcp set global rss=enabled’Â in the following lines given and then press the enter key from your keyboard by entering each command.
- Try restarting your Lenovo laptop and then relaunching the WiFi to check if you can get a stable and reliable internet connection.
Execution Of The Network Troubleshoot
You can also use the in-built application ‘Network Troubleshoot’ to fix the Lenovo laptop that keeps disconnecting from WiFi. Follow the instructions provided for executing it.
- After pressing the ‘ Windows ‘ key, type network troubleshoot in the search area. Select the option ‘Identify and repair network problems from the search results.
- When you are in the troubleshooter window, follow only the instructions displayed on the screen and let the troubleshooter do the work.
Disable RDC (Remote Differential Compression)
If you do not own a server-based PC, you might not need this feature. Disable the quality to make full use of the connection’s bandwidth. Use the following method.
- Start by clicking Start. Select the Programs category in the Control Panel
- Click the Turn Windows features on or off link in the Programs and Features subcategory.
- Find and uncheck Remote Differential Compression API Support from the list of features.
- Click Ok.
These all above methods act as Wifi boosters.
Conclusion
WiFi instability is not a pleasant experience. There are many reasons why your Lenovo laptop keeps disconnecting from WiFi. You don’t have to worry about this. You can use several methods to fix it. Since you won’t be opening either up or tweaking the settings, none of these will cause a problem with the laptop or router.

