

After dedicating hours to perfecting your masterpiece, you save your video, only to realize that your CapCut creation has miraculously vanished. The question arises: where does CapCut save your video?
CapCut saves your videos in different locations depending on what device you use. On an iPhone, Capcut saves your video directly to your camera roll. On Desktop, your videos are exported into the Projects folder under your User account.
In this article, you will learn exactly where to find your exported CapCut videos on your mobile and desktop devices.
Where does Capcut save videos on a mobile?
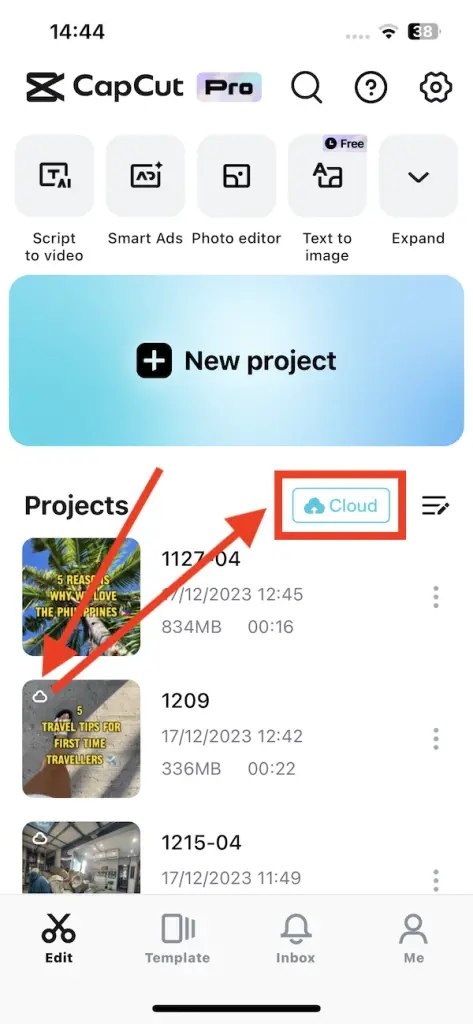
On a mobile device your CapCut videos are saved within your camera roll, ensuring easy access.
Additionally, all of your projects are located neatly under the “Projects” section on the Edit page. CapCut goes the extra mile by automatically saving your projects to the cloud within the app, provided you have auto-upload enabled and a stable internet connection. To confirm whether a video has been successfully uploaded to the cloud, simply check the top left of your project preview screen for the cloud icon.


Where does Capcut save videos on the Desktop App?
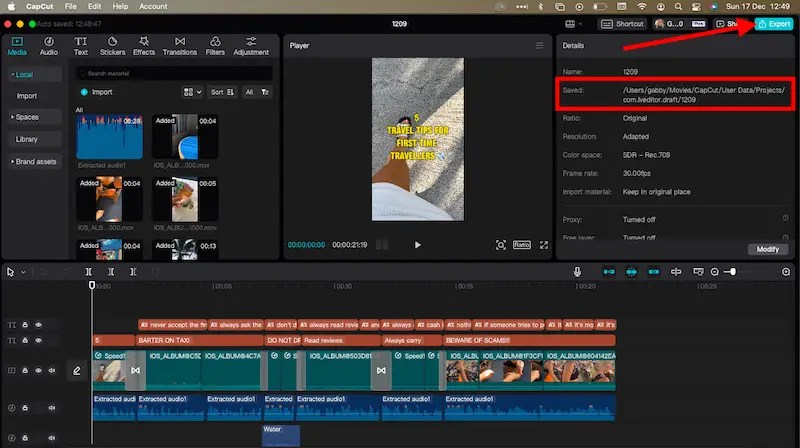
On the desktop app, CapCut automatically creates a designated folder and saves your videos under your user account.
You can find all your exported videos under /User/YourName/Movies/CapCut/User Data/Projects/com.Iveditor.draft.
How do you save a video from CapCut in the Desktop App?
Saving video in the desktop app is just as simple as the mobile:
- Click the Blue Export button located in the top right of your screen.
- Fill in the Title field with your desired name.
- Check the Export to field is set to the area where you want your video saved too.
- Adjust the Video exporting fields to your desired specifications. Here you can select Resolution, Bit rate, Codec, Format and Frame rate.
- Adjust Export audio and Caption exporting to your desired specification.
- Click the blue export button in the bottom right corner of the Export box.
How to save a video on CapCut without the watermark?
CapCut automatically integrates its watermark into your project by appending a black screen featuring their logo to the end of all your projects.
While their intent may be innocent – aimed at promoting their software – the CapCut watermark can inadvertently detract from your content, compromising the aesthetic of your video. Fortunately, there are two effective methods to successfully remove the CapCut watermark.
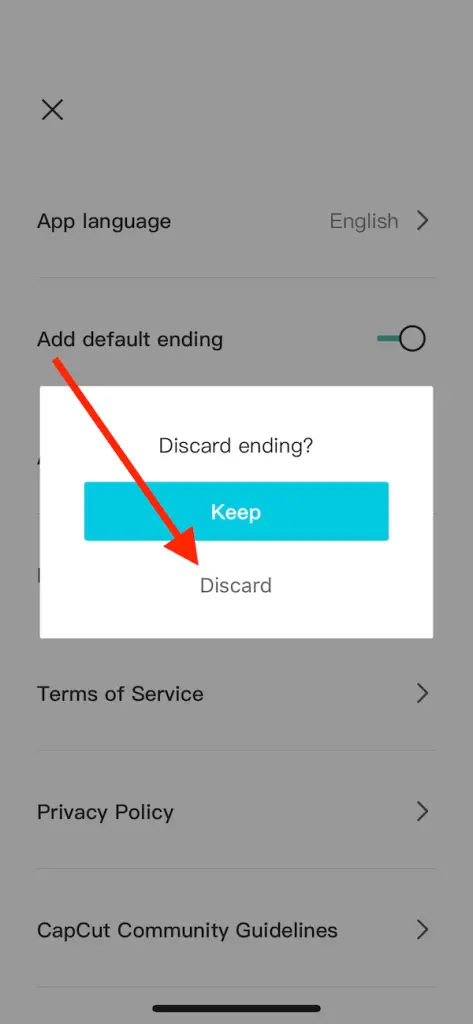
Adjust your Settings
The best way to remove the automated watermark is by adjusting your CapCut settings. It is very easy to do, simply:
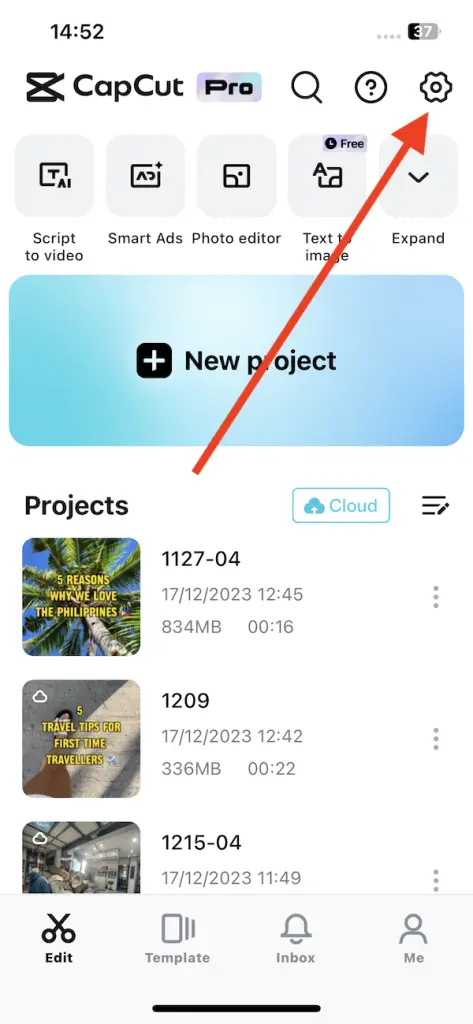
- Click the Settings button (Black Cog Icon) at the top right of your screen.
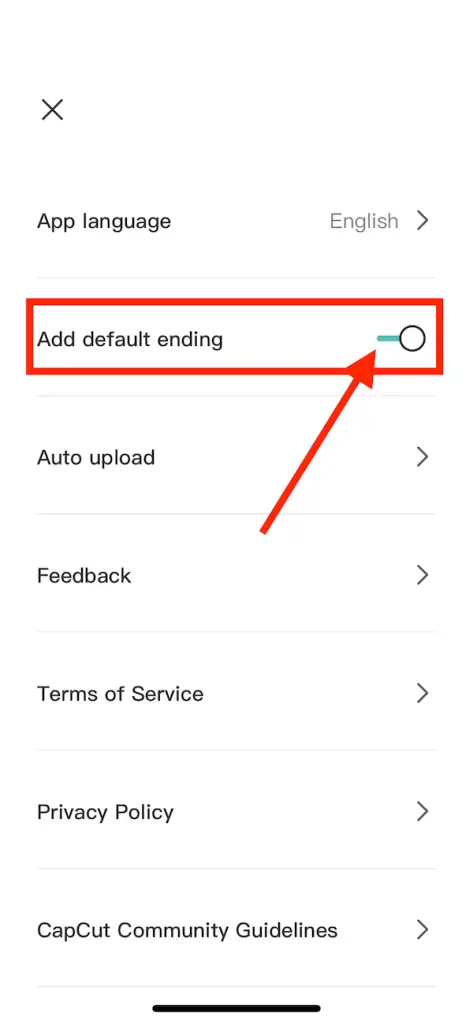
- Toggle the Switch for ‘Add default ending’ from right to left.
- A box will pop up asking ‘Discard ending’ select ‘Discard’.
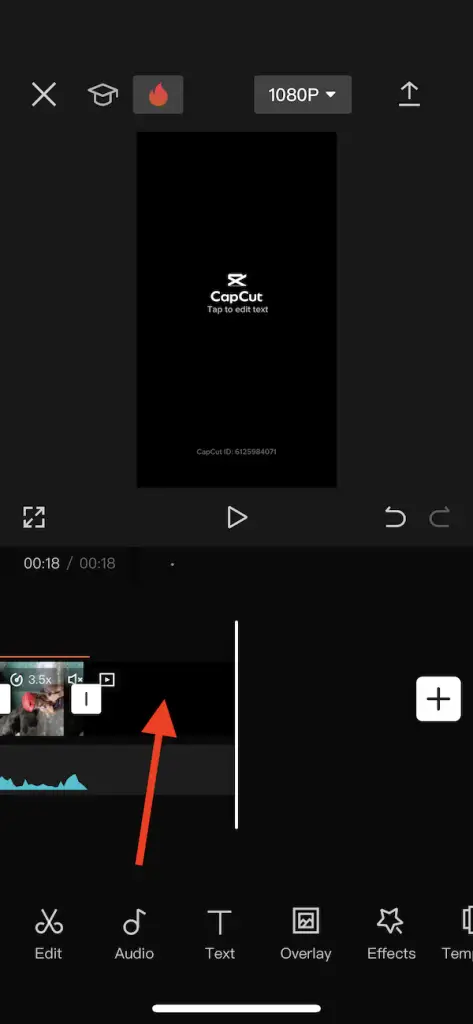
Manually Delete the End Clip
If you opt not to adjust your settings, you can still manually remove the black logo screen at the end of your video by:
- Scroll to the end of your video’s timeline.
- Select the black ending clip by clicking.
- The ‘Edit’ bar will automatically open revealing different icons.
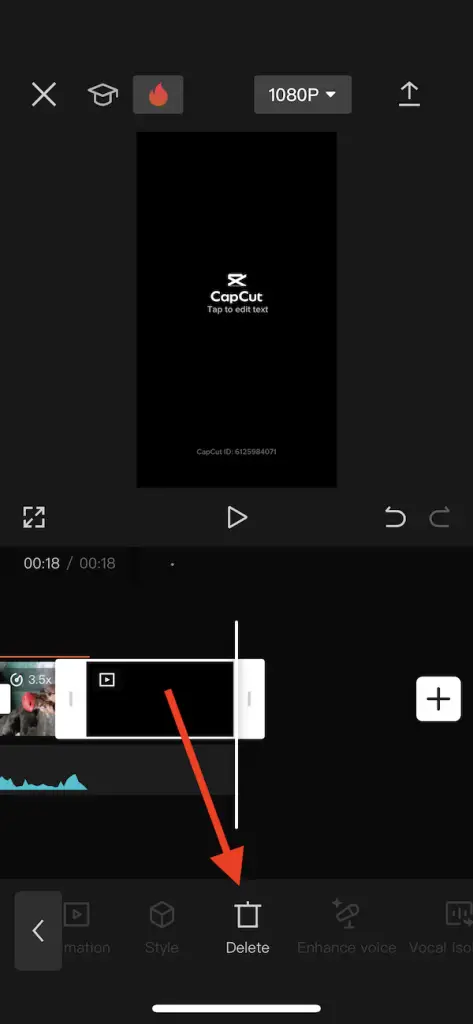
- Swipe to the left to reveal the Delete (waste bin icon) button.
- Click Delete.
