
Has your audio in Premiere Pro stopped working, leaving you puzzled and frustrated?
The two most common reasons for audio issues in Premiere Pro are typically either incorrect Audio Hardware settings or a muted audio track layer. Whether the hardware settings need adjusting or the audio track layer is accidentally muted, identifying and addressing these issues can swiftly restore the audio functionality.
Here are 5 quick & easy fixes for when your Premiere Pro audio is not working.
1. Check your volume settings
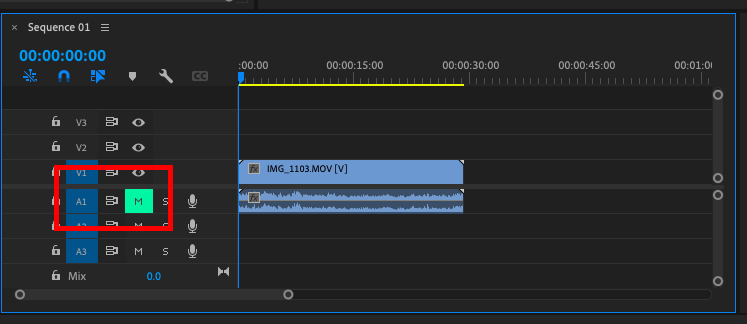
Naturally, you have probably tried turning the volume up on your device. However Premiere Pro has several different volume controls within the software that could be preventing your audio from working. The most common issue is that your audio track is muted.
You can check if the audio track is muted by looking at the left hand side of your timeline. If the audio track is muted then a box will appear around the M on the audio track line. Simply unmute the audio track in the timeline by clicking the M box. Once the highlighted box disappears the audio should resume functionality.
2. Check the audio hardware settings
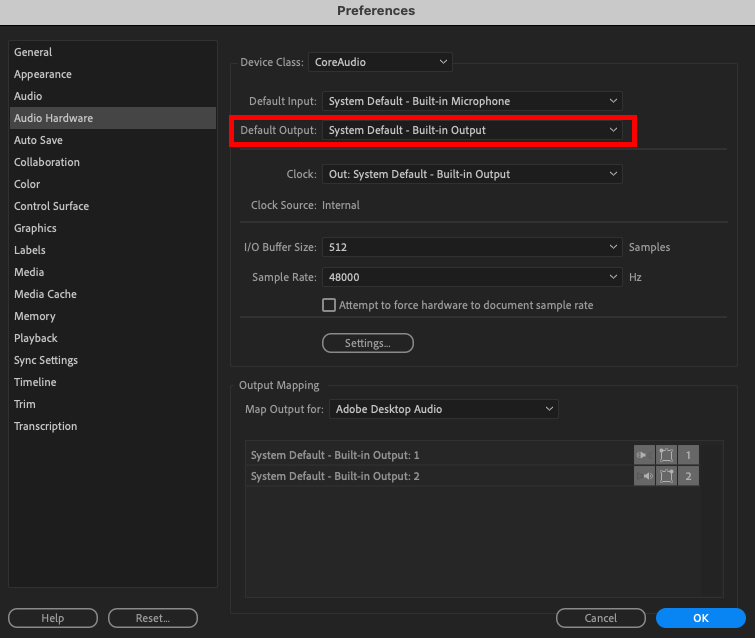
If your audio hardware settings are misconfigured then you may encounter audio problems. Switching between using headphones and speakers can sometimes cause your audio settings to be incorrectly adjusted. Without the correct settings, Adobe will not be able to register which output to play the audio.
You can check your audio hardware settings are correct by:
- Clicking the Premiere Pro Tab at the Top Left of your screen
- Selecting Preferences from the pop up list
- Navigating to the Audio Hardware Tab
- Check that the Default Output drop down is correctly selected as your desired device.
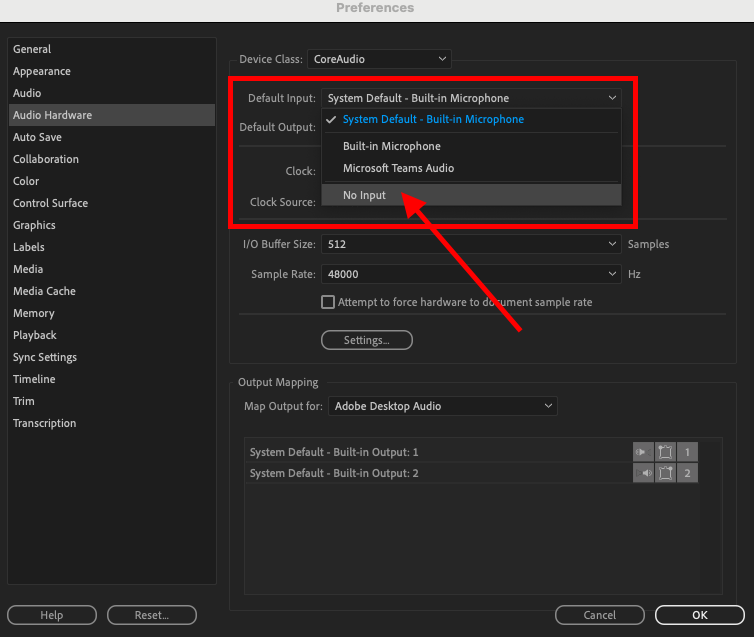
QUICK TIP: If this still doesn’t solve the audio issue then a proven solution is to select ‘No Input’ from the Audio Input dropdown menu.
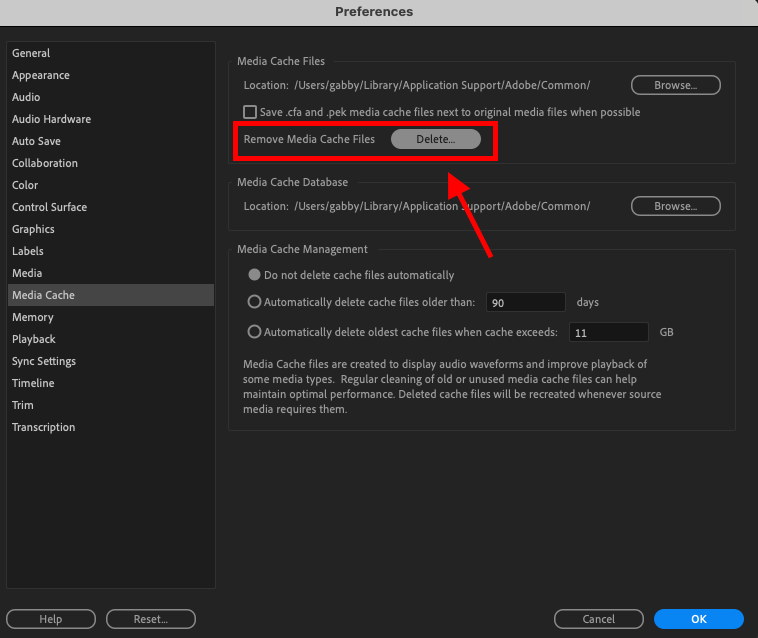
3. Clear your media cache
A cache file is a temporary storage that stores frequently accessed data, improving system or application performance by allowing quicker retrieval. Premiere Pro automatically creates these cached files for your imported media, however after a while these files compound and can cause the software to lag and prevent the audio from functioning.
To stop your cache from becoming too full you need to regularly clear your media cache. Here’s how to do that:
- Click the Premiere Pro Tab at the Top Left of your screen.
- Select Preferences from the pop up list
- Navigate to the Media Cache Tab.
- Click on the ‘Delete’ button to remove unnecessary cache files.
- Exit the program and try reloading your project.
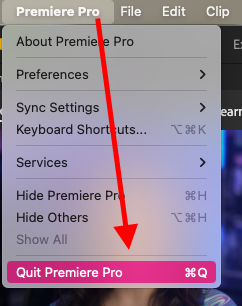
4. Relaunch the Adobe app
Premiere Pro is a demanding software that requires a lot of RAM. Having Premiere Pro open for extensive lengths of time can cause the system to overheat and crash which may cause temporary loss of audio.
An often overlooked solution is to completely close and reopen the app. This can potentially solve a lot of issues relating to adobe premiere pro audio not working.
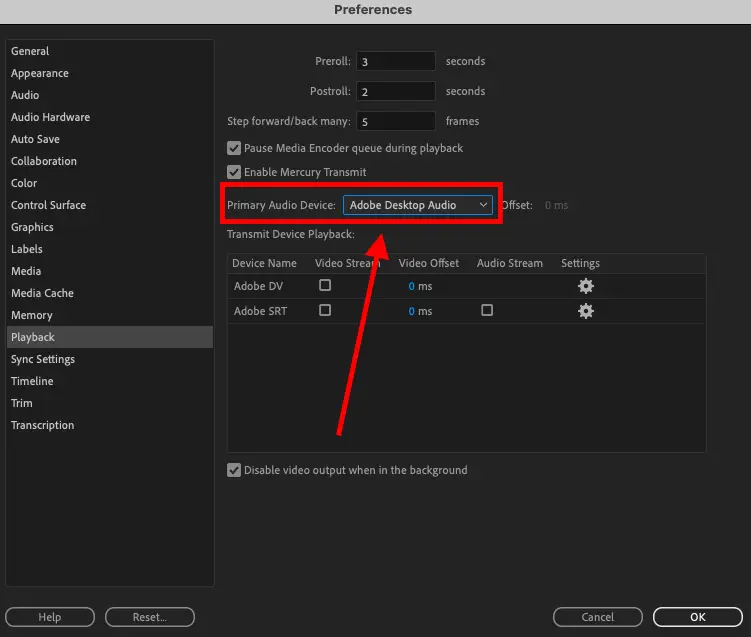
5. Review your playback preferences
Playback preferences are an important setting in Premiere Pro that controls the way your media files are played during post-production. If your playback preferences are set up incorrectly then your audio may stop working.
Here is how you can check your playback preferences :
- Select the Premiere Pro Tab at the top left of your screen.
- Tap Preferences from the pop up menu
- Click the Playback Tab
- Ensure Primary Audio Device field has ‘Adobe desktop audio’ selected.