Home Blog Page 43

Panasonic EUR7737z20 remote codes: 6 easy steps to get your remote working

0

Unleash the full potential of your Panasonic entertainment system with our six-step guide to how to program your EUR7737z20 remote control.

Remote codes are sequences of digits used to program a remote control so it can operate specific functions on a particular device such as changing channels, adjusting volume, or turning the device on and off.

In this article we will teach you how to effortlessly configure your device so you can enjoy an uninterrupted viewing experience.

Does Your Panasonic remote only turns the tv on and off: Lets Fix It

photo of computer code

Panasonic EUR7737z20 remote code – how to set it up

By following the steps below you’ll be able to set up your Panasonic remote control in no time.

  1. Firstly, find the codes for the device you want to program, usually found online, on the device or manual.
  2. Now, make a note of the codes for each device.
  3. Turn off all the devices and make sure there are batteries in the remote control.
  4. Hold down the ‘power’ and ‘action’ buttons together for five seconds.
  5. Select the button on the control that represents the device you want to program and then enter the code.
  6. Finally, press the power button on the remote control and if the device turns on the correct code was entered. If not, repeat steps one to six.

man holding tv remote

What to do once your remote code has been set

It’s useful to know that the remote can be operated in a number of different ways.

If there’s only one device that needs to be turned on, first press the button that represents the device and then press the power button.

You may want to turn on all the devices at once, to do this, make sure all the devices are off and press the power button.

Now, all devices will turn on.

To turn the devices off, press the power button and the devices will go to standby.

If the remote needs a replacement, you can purchase another one from Amazon here.

If you’re unable to find what you are looking for don’t hesitate to contact Your Fix Guide.

 From a Digi Advisor..

What is a wideband Freesat box? Everything you need to know – Freesat, Sky, Freeview and more

0

In 2019 the release of Sky Q meant that subscribers would have to have a new Sky Q LNB fitted. Previous LNBs had four (Quad LNB) or eight (Octo LNB) outputs. But the new version has two outputs which both need to be connected to the main Sky box.

On the plus side, the arrival of Sky Q meant more programmes can be recorded at one time and it even offers wireless multi-room.

Whether you subscribe to Sky TV or are wanting to move over to subscription-free TV, here’s everything you need to know about wideband Freesat boxes…

TV with Freeview and Freesat built-in: Top 5 pre-loaded TVs

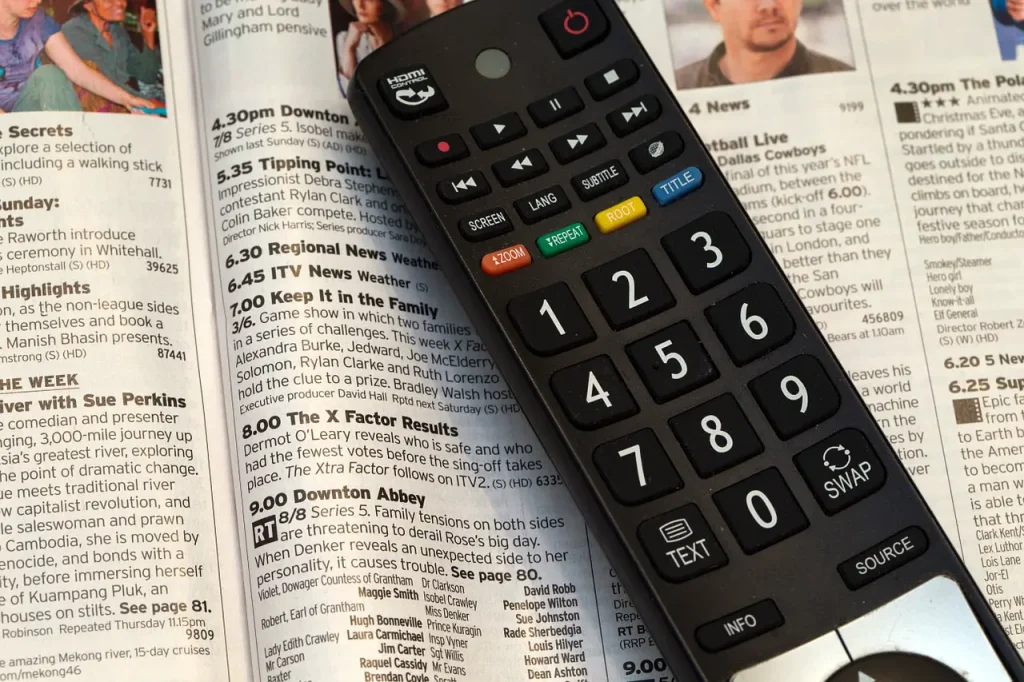
tv remote on newspaper

What is a wideband Freesat box?

The phrase ‘wideband’ refers to the bandwidth of a channel. Wideband aerials can receive a wider range of signals than grouped or ‘standard’ aerials.

A wideband LNB is basically a part of the aerial required to watch Sky TV.

Those who subscribe to Sky TV will have one fitted on their satellite dish in order to receive channels and record multiple programmes.

Can you use a Sky Q satellite for Freesat TV?

Yes. You can use a satellite previously set up for Sky TV if you no longer pay a subscription for Sky.

Normally, you can just connect an aerial cable to your Smart TV or Freesat box and you should have free satellite TV.

This doesn’t apply to Freeview channels, however, Sky is received through a satellite dish and Freeview is a terrestrial service received through an aerial.

What channels will I get with a wideband Freesat box?

If you’re an ex-Sky customer and you want to still use your aerial to receive channels then you should get all the ‘free-to-air’ channels such as BBC, Channel 4, E4, Channel 5, and ITV.

You won’t be able to record your programmes and you won’t have access to channels such as MTV or The Discovery Channel.

This service isn’t technically Freesat or Freeview, it’s ‘Freesat from Sky’.

The service may be completely free, however, you may need to purchase a viewing card which will involve a one-off fee.

tv sateillite dish

Five simple steps to retune your Samsung TV and get access to your digital channels

Everything you need to know about the Panasonic dmr bwt740 – multi region and more!

0

Blu-ray first emerged in 2006 and changed the way we watch movies and play games forever.

While DVDs were still the more popular option for a long time, Blu-rays have made their way into almost everyone’s homes.

According to the British Association for Screen Entertainment (BASE), in 2018 Blu-ray purchases increased year-on-year, with customers purchasing five or more discs rising from 12% to 13%.

Here’s everything you need to know about the Panasonic dmr bwt740, including multi-region and more!

7 reasons why we love the Google Pixel 3a – value for money is an understatement!

Hand holding tv remote

Panasonic dmr bwt740: Multi-region

Blu-ray and DVD discs have set region codes – Blu-ray uses letters A, B and C and DVD uses numbers 1-6.

The region code is read by the media player and if it doesn’t match up then, unfortunately, it won’t play.

You can see a map of Blu-ray and DVD region codes here.

If you bought a Blu-ray player in the UK but purchased some Blu-ray discs while on holiday in America, then your disc won’t be compatible.

However, there are some ways around the issue.

Where can I buy a Panasonic dmr bwt740?

The Panasonic dmr bwt740 features recording capability for both Blu-ray and DVD, 1 TB hard drive, the option to pause and rewind live TV, and internet access to Netflix, iPlayer and more. You can see the full spec list here.

Amazon has the Blu-ray player available to purchase online.

Game of Thrones Bluray DVD

Does the Panasonic dmr bwt740 have a multi-region option?

The Panasonic dmr bwt740 is a 4k Blu-ray Player which provides a multi-region feature.

With any 4K Blu-ray Player, you should be able to watch Blu-rays from all regions.

Standard Blu-ray and DVD players don’t have this benefit and are limited to the region coding of the disc.

There are some ways to override the Blu-ray player to unlock the region coding on Panasonic devices, though.

Option 1: Firstly insert the disc and press the ‘function’ button on your remote control. You should now be given the option to select ‘top menu’, now press ‘OK’. Then repeatedly press the ‘function’ button on your remote.

This should stop the ‘wrong region’ page from appearing, if it does appear it should only be for 1-2 seconds and then disappear.

This process should take you to the function menu again. Next press ‘1’ on your remote, then ‘OK’. Now your Blu-ray should start to play.

Option 2: Alternatively, you can try inserting the disc, press ‘stop’ and then ‘pop-up menu’ on your remote control and the Blu-ray should be ready to watch.


woman holding tv remote

Here’s what to do if your Kindle won’t connect to wifi

0

The tenth generation Kindle was released in April 2019 with a new and improved illuminated, waterproof screen.

And although the newest Kindle is arguably the best yet, the Amazon e-reader is fully reliant on wifi, so if you’re lacking a wireless connection, you may be out of luck.

It is quite common for Amazon Kindles to have issues with wireless connections, so don’t worry.

Here’s what to do if your Kindle 4.1.3 won’t connect to wifi…

Business man in office
Credit: sarawutnirothon

My Kindle 4.1.3 won’t connect to wifi

If you’re struggling to connect to a wireless network the first thing to do is to turn off your Kindle and restart it.

Press and hold the power button at the bottom of the Kindle until a message appears and then choose the ‘restart’ option.

If you’re in a public place you’re probably unable to start rebooting the wireless connection, but if you are at home then always giving restarting your wifi router a go, too.

How to fix Sky Go error codes – get the app up and running as it should

https://twitter.com/TommieKelly/status/1128653006986194946

My kindle keeps losing wifi connection

If your Kindle has previously established a wifi connection but loses it intermittently, then check any other devices you’ve got are successfully connecting.

Also, consider whether you are in range of your router – being right at the end of the garden might not work.

Another thing to consider is whether there lots of other devices causing interference on the wifi.

Try disconnecting other devices from the wifi as the Kindle will be last on the list of priorities to get a wireless connection.

https://www.instagram.com/p/Bxkg0ino3V1/

What mode is your Kindle in?

It’s important to consider whether your Kindle has airplane mode turned on or off.

Have you recently been on a trip? Or turned the mode on by accident?

Make sure that airplane mode is definitely off and attempt to connect to the wifi again.

https://www.instagram.com/p/Bn-1rMclTp7/

Kindle Operating Systems

Lastly, double check that your Amazon Kindle is running on the most up-to-date operating system.

Check that your software is the latest available and this should keep things running smoothly.

If your e-reader still isn’t connecting to wifi after checking the OS system and more, then don’t hesitate to give us a call.

7 reasons why we love the Google Pixel 3a – value for money is an understatement!

7 reasons why we love the Google Pixel 3a – value for money is an understatement!

0

In May 2019 Google’s newest mid-range device was released.

The Pixel 3 and 3XL came out in November 2018 but now the new and improved version is here, and while we’re not sure what the ‘a’ stands for in Pixel 3a, it could certainly be ‘affordable’.

Aside from the fact that it comes in three awesome colours – Just Black, Clearly White and Purple-ish – here are seven reasons we love the Google Pixel 3a!

google pixel phone
Credit: Ayaan Asad Siddiqui Wikimedia Commons

The price of the Google Pixel 3a is impressive

At just £399 the new pixel 3a is half the price of the 3 and 3 XL.

Although a lower price could suggest a lower quality product, the Pixel 3a is anything but that.

The Pixel 3a and 3a XL boast all the features any smartphone user would want and is arguably more impressive in certain areas than leading mobile phone giants.

It features Dragontrail glass

Now, not having a phone made of Gorilla Glass could seem like a negative.

But, the Google Pixel 3a isn’t falling at this hurdle.

The front of the smartphone is made of Dragontrail glass – which is similar to Gorilla Glass – but not the same.

The 5.6-inch screen gets a Vickers hardness test rating of 595 to 673 which isn’t bad compared to Gorilla Glass at 622 to 701.

Most importantly the Pixel 3a screen is scratch proof, and that’s what matters most.

The Google Pixel 3a camera

The camera is really one of its major features as the Pixel 3a comes with ‘night sight’ for low light shots, HDR+, and Super Res Zoom.

It has the same 8-megapixel camera as the Google Pixel 3 and 3 XL.

It’s worth mentioning that the phone isn’t water resistant, though.

https://www.instagram.com/p/BxcaHKUFAyV/

Everything you need to know about the Virgin Media Superhub 3.0

Unlimited Storage

Another great element of Google’s new release is the fact that it has free unlimited photo and video storage.

The Pixel 3a provides solid battery life with it lasting all day and fast charging.

There’s a USB port at the bottom of the phone, stereo speakers, a 3.5 mm headphone jack, and a nano sim slot on the left, however, there’s no Micro SD or dual sim slot.

The RAM and storage mean that the Pixel 3a is fast and doesn’t require any extra payment to store photos and videos.

Pixel 3a: Minimalistic style

Rather than the 3’s glass composition, the 3a is made of plastic.

The plastic back of the phone is glossy, though, and has been created in a similar style to its predecessors.

The smartphone feels perfect in-hand, but its minimalistic style goes father than the exterior.

The Android set up is also minimalist and easy to use with a clear, clean-looking home screen.

Software support on the Pixel 3a

Where costs have been cut it has to be said that the loading time on the 3a is a tiny bit slower than the 3.

However, the phone does come with 3 years of speedy software support.

It’s worth mentioning that the Google Pixel 3a doesn’t support Google’s VR platform ‘Daydream’ due to resolution and frame rate issues.

Bigger is better

Overall, the Pixel 3a is arguably as good, if not better, than the Pixel 3 and 3 XL.

The phone may be without wireless charging, but it is slightly bigger than its predecessors which makes typing much easier.

And, with the Pixel 3a, Google assistant is always available on the OLED touchscreen device.

https://www.instagram.com/p/BxejT2Mh_tA/

Five simple steps to retune your Samsung TV and get access to your digital channels

Everything you need to know about the Virgin Media Superhub 3.0

0

When it comes to your internet connection it goes without saying that everyone is after a reliable, speedy connection.

Now, with Virgin Media’s hub 3.0 this should be easily achievable.

Virgin launched wifi upgrades in early 2019 meaning that wifi performance should be optimal. Their update aimed to improve hardware and reduce wi-fi issues.

Here’s everything you need to know about your hub…

Woman on smartphone

How is the Superhub 3 different from the 2.5?

The Superhub 3 is pretty much the same size as the Virgin Media hub 2.5.

Physically, the Virgin Media hub 3.0 isn’t too different from its predecessors.

However, it does come with a large two-part power lead much like a laptop charger. It’s much longer than previous power leads.

All in all, the hubs are similar, although the 3.0 has a more modern design. The most important change is that the download and upload speeds using the hub 3.0 should be much faster.

My Superhub 3 isn’t working

If you’re struggling to gain internet access using your Virgin Media hub then perhaps try checking if your device is connected correctly.

You can also restart your device or computer to see if it’s that that’s causing the issue.

If this doesn’t work we’d suggest turning off the hub and restarting it.

Check where your hub is positioned in the house. You can check your internet speeds by using the Virgin Media Connect app.

As a last resort, if your internet still isn’t working, then opt for resetting the hub. You can do this by locating the ‘reset’ pinhole on the back of the hub (beneath the ethernet points).

What do the lights mean on the Superhub 3?

The lights on your Virgin Media hub should only flash during the setting up process.

After a couple of minutes of being set up, the lights should all turn off and this means that everything is working perfectly.

The only light you want to see on constantly is the bottom base light. It should be white in colour, however, if this light turns red then that means that your hub is too hot.

Virgin Media Connect app

Virgin Media now have their own wifi app.

With the app, you can test your home wifi performance and source Virgin Media wifi hotspots while out and about.

Download the app for Android and Apple devices here.

Runner with smartphone

How to fix Sky Go error codes – get the app up and running as it should be

Sky Go Error Code 19 c-1009: Quick & Easy Solutions

Seeing Sky Go error code 19 c-1009 and need a quick solution?

We’ve found some different options to get to the bottom of your Sky Go error code problem.

The last thing you need when you want to watch your favourite programme is to be shown an error message.

The 19 c-1009 error code is often found with Windows PC users.

But for whichever device you’re using, here’s how to fix your Sky Go error code 19 c-1009.

couple on laptop
Credit: Rawpixel

Is it my device that’s affecting Sky Go?

Now and again your device may just play up.

If you think this could be the case then go for the old technique of turning your laptop, tablet or phone off and restarting it again.

This will refresh everything and can sometimes take a few attempts before the Sky Go app starts working.

woman browsing the internet
Credit: AYAimages

Sign out of your account

The error code may be appearing due to an account issue.

Whether you’re using a Microsoft account, Google or Apple, it’s always worth signing out of the account and logging back in.

If this still doesn’t work you could create a brand new account and download the Sky Go app.

The app may work if you create another user account on your device and start afresh. But of course, we know you want the Sky Go app to work on your own original account, so only go for this option if you really need to.

Reinstall the Sky Go app

If turning your device off and on again and signing out of the app hasn’t worked for you, then it’s best to uninstall the Sky Go app and reinstall it again.

This is quite simple to do on whichever device you’re using.

Select the Sky Go app and choose the ‘delete’ option, then head to the Google app store or Apple store to redownload the app.

Agree to the Sky Go Terms and Conditions

It may sound strange but more often than not, the Sky Go app can show an error code because you’ve not signed the Terms and Conditions upon signing up.

Make sure you’re fully signed into the app with the Terms and Conditions checked and ticked before trying to use Sky Go.

Could my internet connection be the issue?

It’s always advisable to have a quick check of your wi-fi connection if you’re experiencing problems with the Sky Go app.

Some error codes appear due to a lack of connectivity.

So, make sure your internet hub is turned on and fully functioning before connecting your device and using the Sky Go app.

3 ways to get your box out of dreaded Sky diskless mode

Can’t Pause or Rewind Sky Q? Simple & Quick Solutions

0

Having the ability to pause, rewind, fast-forward, and record live TV is an important feature of any modern television.

However, occasionally your Sky TV viewing experience can be affected by technical hiccups. If you’re having issues pausing and rewinding then the first step would be to turn everything off at the mains for 60 seconds and try turning it back on.

If this doesn’t fix things and you still can’t pause or rewind Sky Q then here’s what to do…

couple watching tv
Credit: dotshock

What to do if you’re unable to pause Sky Q

If you’re having issues pausing live TV or recordings there are a few things you can check.

Firstly, take a look at your Sky Q disk space – is your box at full capacity? If so, this can definitely be a factor in the pause and rewind issue.

Here are general steps to check the disk space on a Sky Q box:

Using your Sky Q remote:

  • Press the Home button to go to the main menu.
  • Navigate to Settings using the arrow keys.
  • In the Settings menu, select System Info or a similar option that provides system information.
  • Look for an option like Storage or Disk Space to see the available and used storage on your Sky Q box.

Clear any recordings you don’t need and regularly keep on top of your disk space.

Is the new Sky Q remote control to blame?

Another aspect to consider is whether it has something to do with your Sky Q remote control.

The new Sky Q remote control is different from those that came before as it has a touch-sensitive pad.

If you’re having issues with your remote control then try re-pairing it with the box by holding the ‘1’ and the ‘3’ buttons down together for a couple of seconds.

If all else fails you can always try a settings reset.

Performing a settings reset on Sky Q can be helpful if you are experiencing issues with your system or if you want to start fresh with default settings. Keep in mind that a settings reset won’t delete your recordings, but it will reset various settings to their default values. Here’s a general guide:

  1. Using your Sky Q remote:
    • Press the Home button to go to the main menu.
    • Navigate to Settings using the arrow keys.
    • In the Settings menu, select System.
    • Scroll down to the System Reset option.
  2. Performing a Settings Reset:
    • Within the System Reset option, you might see various reset options. Look for something like “Settings Reset” or “Reset Settings.”
    • You may be prompted to enter your Sky PIN.
  3. Confirming the Reset:
    • After entering the PIN, you’ll likely see a confirmation screen explaining what the reset will do.
    • Confirm that you want to proceed with the settings reset.
  4. Wait for the Reset to Complete:
    • The Sky Q box will then go through the reset process, which may take a few minutes. During this time, do not turn off or unplug your Sky Q box.
  5. Reconfigure Settings:
    • Once the reset is complete, you will need to go through the initial setup process, including reconnecting to your Wi-Fi network, signing in, and configuring other settings.

Unable to rewind Sky Q?

Here are some suggestions if you’re struggling to rewind a programme on Sky Q.

Consider that the issue could be to do with your remote control. Rather than dragging the touch-sensitive pad just tap the rewind arrows a couple of times to have more control over the speed that you’re rewinding.

If you’re still having problems then try unplugging your Sky box from the mains, removing the viewing card, wait five to ten minutes then plug everything back in, insert the card and wait for your Sky box to power back up.

A settings reset can be another way to re-jig your Sky box back to working normally, but if that doesn’t work then a factory reset may be your only option. However, do consider that your series links and recordings will be deleted this way.

couple sitting on sofa watching tv
Credit: monkeybusiness

Still can’t pause or rewind Sky Q?

If you’ve attempted some of the suggested solutions above and you’re still experiencing issues pausing, rewinding and fast-forwarding on Sky TV then it could be something to do with the programme that you’re watching.

Are you watching live news and the show has been extended?

Sometimes if a TV show overruns its scheduled time or the EPG data or TV guide changes then you may lose the option to pause, rewind or fast-forward.

There is, unfortunately, little that can be done about this.

Sky Q Remote Flashes Twice but Doesn’t Work? Fix the Issue

Stop Sky Go From Buffering on Playstation, Xbox, Mac & More

0

Sky Go, with its diverse range of content, offers an immersive viewing experience that caters to the preferences of a wide audience. However, the frustration of constant buffering can quickly turn this entertainment oasis into a source of frustration.

If you’ve found yourself encountering the buffering wheel more than enjoying your favorite shows, fear not – this article is your comprehensive guide to putting a stop to those annoying Sky Go buffering interruptions.

In the next section, we will dive into the various factors that contribute to buffering issues and provide easy-to-follow solutions to ensure a smooth streaming experience. From optimizing your internet connection to tweaking application settings, we’ve got you covered.

man looking at notes
Credit: simbiothy

How to stop Sky Go buffering – Check your data

If your Sky Go experience is being ruined by constant buffering there are a few reasons as to why this could be.

Firstly, check that data monitoring is turned off.

You don’t want the app to be working hard on things it doesn’t need to. By switching off data monitoring the app should work more efficiently.

What about your internet connection?

It may sound obvious but it’s always good to check your internet connection.

Specifically, it’s a good idea to check your internet speed.

You can check your internet speed using various online tools that measure the speed of your internet connection. Here’s a simple step-by-step guide:

  1. Choose an Internet Speed Test Tool:
    • There are several websites and applications that offer free internet speed tests. Some popular ones include:
  2. Visit the Chosen Speed Test Website:
    • Open your web browser and go to the website of the speed test tool you’ve chosen.
  3. Start the Test:
    • On most speed test websites, you will find a “Start” or “Go” button to initiate the test. Click on it.
  4. Wait for the Test to Complete:
    • The tool will measure your download speed, upload speed, and sometimes ping. This process usually takes only a minute or two.
  5. View the Results:
    • Once the test is complete, the website will display the results. You’ll typically see your download speed in megabits per second (Mbps), your upload speed, and sometimes your ping or latency.

How many people are using Sky Go?

Getting set up with Sky Go and sharing out your subscription can be tempting but it turns out that it’s best to keep your login details to yourself.

If you are using multiple devices this can seriously affect your streaming speed.

If your subscription is for one connection then only use one device. Never overload the service by using more devices that you’ve signed up for as this is sure to increase buffering.

Have a spring clean

Another point to consider is whether you’ve checked up on your devices lately.

Device maintenance is important and by this, we mean resetting your router or modems regularly and clearing your cache to free up any space you can.

Change your DNS servers

Lastly, you can also change your device’s DNS servers to reset your connection for a more seamless viewing experience.

Changing DNS (Domain Name System) servers can help troubleshoot certain internet connectivity issues and improve your internet experience. Here’s a step-by-step guide on how to change DNS servers on different operating systems:

For Windows:

  1. Open Network Settings:
    • Click on the Start menu and select “Settings” (gear icon).
    • Go to “Network & Internet.”
  2. Change Adapter Options:
    • Under “Change your network settings,” click on “Change adapter options.”
  3. Choose Your Network:
    • Right-click on the network you’re currently connected to and select “Properties.”
  4. Internet Protocol Version 4 (TCP/IPv4):
    • In the list, find “Internet Protocol Version 4 (TCP/IPv4)” and click on it.
    • Click the “Properties” button.
  5. Use the Following DNS Server Addresses:
    • Select “Use the following DNS server addresses.”
    • Enter the preferred DNS server and alternate DNS server addresses. Popular public DNS servers include Google’s (8.8.8.8 and 8.8.4.4) or Cloudflare’s (1.1.1.1 and 1.0.0.1).
  6. Save Changes:
    • Click “OK” to save the changes.
  7. Flush DNS Cache:
    • Open Command Prompt as Administrator.
    • Type ipconfig /flushdns and press Enter.
  8. Restart Your Computer:
    • Restart your computer to apply the changes.

For macOS:

  1. Open System Preferences:
    • Click on the Apple logo in the top-left corner and select “System Preferences.”
  2. Network Preferences:
    • Choose “Network.”
  3. Select Your Network:
    • Select the network you’re connected to from the left sidebar.
  4. Advanced Options:
    • Click on the “Advanced” button.
  5. DNS Tab:
    • Go to the “DNS” tab.
    • Remove existing DNS servers by selecting them and clicking the minus (“-“) button.
    • Add new DNS servers by clicking the plus (“+”) button. Enter the preferred and alternate DNS server addresses.
  6. OK and Apply:
    • Click “OK” and then “Apply.”
  7. Restart Your Computer:
    • Restart your computer to apply the changes.

Changing DNS servers can resolve some internet connectivity issues, but it may not fix all problems. If you still experience issues, consider contacting your internet service provider for further assistance.

Credit: dotshock

How To Fix a Greyed-Out Picture Size Menu on Your Samsung TV

0

Are you trying to access the picture size menu on your Samsung TV but keep facing a greyed-out window?

If you are experiencing this or a issue similar, don’t panic! The problem of having the “picture size” menu greyed out on a Samsung TV is fairly common with some users.

In this article, we’ll show you how you can fix the issue and also understand its cause so you can prevent the error from occurring again.

Picture size greyed-out Samsung TV (The Fix)

hand holding television remote
Credit: Rawpixel

When the “picture size” menu is greyed out on your TV it implies that the cable being used with the device being displayed does not allow for the option you desire.

The “picture size” menu usually gives you the ability to select the “wide fit” and “screen fit” display options.

If you’re using a Component Cable, it’ll only support access to the “picture size” menu if the content being displayed is 1080i or 1080p.

If you’re using an HDMI Cable, it will only support access to the “picture size” menu if the content being displayed is either 720p or 1080i or 1080p.

So, to access the “picture size” menu, you need to ensure that the cable being used supports the feature, based on the content being displayed.

With the right cable and content combination, you’ll be able to get the following picture size options from the menu:

  • 16:9
  • 4:3
  • Wide Fit
  • Screen Fit

This issue is not specific to Samsung TVs alone, users of Sony and LG TVs also face the same problem when certain cables are used.

Other reasons why the picture size menu is greyed-out

While using the right cable and content combination should solve the issue, the issue may persist in certain instances.

If this happens, you should try checking the cable again. The issue may be due to improper connection of the cable. So you can remove the cable, clean the connector, and then reconnect the cable.

Hopefully this works some magic and the “picture size” menu should display properly.

https://elements.envato.com/rear-view-of-couple-watching-television-PGVRFWB
Credit: dotshock

What causes the picture menu ‘grey out’ on Samsung TVs?

The picture size of a TV is dependent on two things—the source it’s displaying from and the cable being used by the TV.

When you try to view the TV set in certain sizes you’ll not be able to unless the cable supports the size and the content being displayed.

The issue of having the “picture size” menu greyed out is fairly common.

However, it’s an issue that can easily be resolved when you understand that the issue is with the cable in use as well as the content being displayed.