Home Blog Page 4

S22 Keeps Making Notification Sound: How To Fix Your Audio

0

If your S22 keeps making a notification sound, there are certain alert settings on your Samsung mobile that will need to be changed.

Do you have the ‘snooze notification’ setting enabled? Do you make contactless payments with your S22 mobile?

A change in your notification settings can help fix your mobile device from continuously alerting you.

Did you know you can view your most current alerts? This can help you pinpoint if there’s a specific application that is causing the sound issue.

We have generated this easy to follow guide to help you understand why you keep hearing a sound notification on your S22, as well as provide you with six simple solutions you can use to help rectify this noise error on your Samsung.

Why does my S22 keeps making a notification sound?
Woman touching face and on phone

Your S22 will keep making a notification sound if you have snoozed an alert on your mobile device. If the ‘allow notification snoozing’ setting has been enabled on your S22, your phone will stop the notification sound for a set period before it will alert you again. This will go on until you read the alert.

Other reasons why your S22 keeps making the notification sound include;

1. Emergency alert

Your phone will send you a wireless emergency alert if there is a current safety concern. This is part of the public safety system that you can opt in.

If you have enabled these alerts on your mobile, you will need to clear this message for the notification sound to stop.

2. Near-Field Communication app is enabled

Do you have the NFC app enabled on your device?

This app will alert you every time your device connects to a service such as a contactless card payment.

3. App in the background

There may be an app running in the background of your S22 that is causing the notification sound.

If you have not exited out completely from a program, it will still be active even if it’s not displayed on your screen.

4. System error

Your S22 may have experienced a system glitch that has created an alert error on your device.

Corrupt software or a faulty app can cause a system error.

How do I stop my S22 from making a notification sound?

man looking at smartphone

Disable the ‘allow notification snoozing’ setting on your S22 to get rid of your S22 from making the notification sound. This will stop your mobile from continuously alerting you until you read the notification. Go to Settings > Apps & Notifications > Advanced > Disable Allow Notification Snoozing.

Once this has been turned off, you will only receive one alert when it has first come through to your phone.

Other ways in which you can stop your S22 from making a notification sound include;

1. Disable emergency alert

Step 1. Open ‘Settings’

Step 2. Click on ‘Notifications’ followed by ‘Advanced Settings’

Step 3. Press ‘Wireless emergency alerts’

Here, you will be able to turn this feature off.

2. Turn the NFC app off

Step 1. Launch ‘Settings’

Step 2. Find and select ‘Connections’

Step 3. Click on ‘NFC’ and toggle this off

Note, when this feature is off, your device will no longer automatically pick up a payment terminal to complete a wireless payment.

3. Force stop apps

This will get rid of any applications running in the background of your device.

Step 1. Access ‘Settings’

Step 2. Go into ‘Apps’ and choose ‘Manage Apps’

Step 3. After ‘Application Manager’ go through all recent apps

Step 4. Click on ‘Force Quit’

Tip, restart your Samsung to refresh the changes.

4. Restart your S22

If your mobile had a momentary system glitch, action a power off and on to ensure you get rid of any faulty files or corrupt software.

5. Reset app permissions

Other Samsung users have advised that a reset of the app’s permissions helped stop their S22 from making the notification sound.

Step 1. Open ‘Settings’

Step 2. Click on ‘Apps & Notifications’

Step 3. Select ‘See all apps’ and press the three dots

Step 4. Choose ‘Reset app preferences’

Reboot your Samsung after these changes.

How to view old notifications on Samsung Galaxy

woman on mobile phone smiling

You can view your notifications history on your S22 by accessing the notifications tab under settings. Here, you will be given a list of all the recent alerts that have come through onto your phone. You will be able to choose between the ‘Most Recent’, ‘Most Frequent’, your ‘Blocked’ alerts, or all of them.

You will be able to see which applications have alerted you within the period of your S22 making the notification sound. If you can pinpoint the exact app, you can disable all alerts that may come from that program.

To access your notification history, simply follow these five steps;

Step 1. Launch Settings

Step 2. Click on ‘Notifications’

Step 3. From the ‘Recently Sent’ option press ‘More’

You will now be able to view all your recent alerts. If you want to separate these, press the drop-down menu and choose between ‘Most Recent’, ‘Most Frequent’ or ‘Blocked’.

Why am I not getting notifications even though they are turned on?

woman looking at mobile phone

If your S22 is on airplane mode, you will not get notifications even though the setting has been enabled. When your mobile is on airplane mode, the setting will block your device from connecting to a Wifi connection or network service provider. Your Samsung won’t be able to receive any notifications or perform any actions that require internet. 

Additional reasons why you’re not receiving notifications include;

  • Your mobile data is depleted
  • A specific app has its notifications turned off
  • Outdated firmware is on the device
  • Wifi connection is problematic

Make sure your S22 is not set on airplane mode or do not disturb. If you are on mobile data, ensure you still have an available amount to use.

Steps you can take to fix your S22 from not alerting you when a notification has come through include;

  • Check the app settings
  • Update your operating system
  • Reset your Wifi connection

Tip, check what your internet speed is. If this seems too low, this could be why your Samsung is having a problem with its notifications coming through.

WoW Error Codes: What They Mean And How To Fix Them

0

Have you recently experienced a World of Warcraft malfunction, and now you’re wondering what the WoW error codes are?

There are multiple different errors that your game can experience. These codes will vary depending on what the issue is with your Warcraft account.

If Blizzard has a server issue, your screen may display the WoW51900319 error.

With this guide, we will expand on what the most common WoW error codes are, and what causes them. We will also provide you with simple fixes that you will be able to execute on your device, which should solve any one of the War of Warcraft error codes listed.

What are the WoW error codes?

world of warcraft game scene

The most common World of Warcraft error code is the WoW51900319. This code will appear on your screen when your game has lost its connection to the Warcraft server. The error will be accompanied by the message; ‘You have been disconnected from the server’. If your device does not have access to the WoW server, you won’t be able to reach the database. 

The other frequent Wow error codes that players experience are;

1. WoW51900118

The Wow51900118 is an error code that will appear when World of Warcraft disconnects on your device.

This WoW error code will occur when Blizzard schedules maintenance work on their server.

2. WoW51900314

Error code WoW51900314 will transpire if Blizzard.net has recognized suspicious activity on your account, and has taken further action to lock your account.

When you try and log in to your profile, the WoW error code 51900314 should include the message;

  • ‘Due to suspicious activity, this account has been locked. A message has been sent to this account’s email address containing details on how to resolve this issue.’

3. WoW51900101

This WoW error code will stop you from being able to establish a secure connection when you’re in the middle of the game.

It will disconnect you from the World of Warcraft server and stop you from being able to reconnect.

4. WoW51900312

WoW51900312 will transpire if you connect to the incorrect Warsong realm.

When this happens, it will block you from logging in to your profile.

5. WoW51900328

This error will appear after patching has taken place, and will disconnect you from your realm.

What causes a WoW error code?

frustrated gamer

The cause of the WoW error code 51900319 is due to an offline World of Warcraft server. This can be a result of an unexpected server issue, or, the Blizzard technicians have maintenance work to complete. If there is a lag on the server, this will also cause your game to disconnect if it times out before the WoW database can process your request.

An additional cause for the WoW error code 51900319 is if your network is experiencing a latency issue. A slow internet connection can interfere with your game reaching the World of Warcraft database in time, and therefore, disconnect from the server.

A weak network connection can be the cause for not only the WoW51900319 error but for many of the other codes too.

Besides poor internet, the most common catalysts for the WoW error codes include;

1. Faulty game data

If the game files on your device are damaged, it can create issues when you try and play World of Warcraft.

Corrupt game data can occur from a faulty software update, or after you scan your device’s system.

2. Enabled anti-virus program

Do you make use of anti-virus software on your device? This program can sometimes interfere with World of Warcraft, and block your game from having access to the internet.

(Did you know; you can visit a Azeroth inspired theme park in China. The rides are based on Warcraft and Starcraft).

3. Corrupt cache files

Every time you launch World of Warcraft, cache files will download onto your device. This is to quicken the processing time and improve the game’s performance.

Over time, however, these files can become corrupt, and instigate one of the WoW error codes the next time you come to open your game.

4. Outdated graphics driver

An outdated graphics driver on your device has been known to be the cause for the WoWs51900314 error.

Your GPU (graphics processing unit) should always be up to date to ensure there are no issues when World of Warcraft is open.

How to fix WoW error codes

man playing with playstation controller

If the World of Warcraft server is down, you won’t be able to do anything to fix this. You will be able to check the server status of the game to confirm whether or not the problem is on Blizzard’s side, or your device. If the site confirms the WoW server is offline, you will need to be patient until the issue gets fixed. 

If World of Warcraft is functioning properly, you can fix the WoW error codes by executing one or a few of the following solutions;

1. Refresh your network connection

A weak internet connection can play a big part in a WoW error code to occur.

Restart your Wifi router to refresh your network. Unplug the modem to ensure all power gets drained. This will force the device to re-establish a connection to your network service provider.

Tip, check out your internet speed to ensure you’re receiving an adequate amount of bandwidth to play online.

2. Update background FPS to 30

This solution is particular to the WoW51900319 error code.

Step 1. With World of Warcraft open, press ‘ESC’ followed by ‘System’

Step 2. Press ‘Advanced’

Step 3. From the options provided, select ‘Max Background FPS’

Step 4. Change the slider to be set on ’30’

Exit out of WoW and relaunch the game.

3. Reset user interface

A reset of the user interface will help fix any corrupt files.

Step 1. Make sure you exit out of WoW

Step 2. Uninstall any addon managers you may have active

Step 3. Launch Battle.net and click on ‘Options’

Step 4. From here, press ‘Show in Explorer’

Step 5. Double click on War of Warcraft and open the game folder that has the error code issue

You will now need to find the folders ‘Cache’, ‘WTF’ and ‘Interface’. Rename these to include ‘Old’ at the end.

Once this is done, open Blizzard.net and WoW again.

4. Disable anti-virus program

If there is a current anti-virus program that is active,  you should disable this to make sure it does not block World of Warcraft’s access to the internet.

Once you have turned this off, restart your device and relaunch the game to see you still incur one of the WoW error codes.

5. Update graphics driver

It’s important to make sure you update your graphics driver to the latest available version. Your PC should automatically complete this upgrade along with its operating system update

If you’re unsure, you can check this in the ‘Device Manager’ section on your PC.

From here, you will be able to right-click on your graphics driver, and select ‘Update’.

How to unlock my World of Warcraft account

teenage boys high-fiving while playing video game

If the WoW51900314 error code has appeared on your screen when you try and log in to your World of Warcraft account, you will need to reset your password to regain access to your profile. You can update your password through the use of this link. Remember to keep a note of what your new credentials are.

If you’re able to log into WoW through Battle.net, you should be able to update your password under the ‘My Account’ tab.

For more serious cases, where you’re unable to recover your account because you don’t have access to your email address, you can contact Blizzard directly.

They do recommend that you connect your mobile number to your account, so you can receive a code sent by text to unlock your account.

Conclusion

Now that know what the most common WoW error codes are, you can act accordingly with the solutions we have provided in this guide.

If you need to contact Blizzard regarding your World of Warcraft account, you can make use of their online help page. Here, you will also be able to check out if there’s any scheduled maintenance that has been planned.

Pixel 4A Random Notification Sound: 5 Easy Fixes For Alerts

0

Does your Pixel 4A make a random notification sound, even when there is nothing coming through on your screen?

Do you use your Google mobile to perform wireless card transactions? If the NFC app is in use on your phone, this is known to be one of the main causes of your Pixel to make an alert sound.

A dirty charging port can sometimes confuse your smart device into thinking a power cable is connected. This will result in your Pixel making the charging noise.

A change in sound settings, or app preferences can help stop this sound error from occurring.

We have generated this simple guide to help you understand why your Pixel 4A will make a random notification sound, and what methods will rectify this problem on your mobile.

Why is my Pixel 4A making random notification sounds?

woman on mobile phone

Your Pixel 4A will make a random notification sound every time it tries to connect to a Bluetooth device. If the Bluetooth connection between your mobile and device is weak, or the distance between the two is too much, your Pixel will keep trying to establish a successful connection. 

Other causes for this random notification alert on your Pixel include;

1. NFC app-enabled

The NFC (near-field communication) app is the program that automatically initiates a connection between your mobile and a wireless payment device (card machine) when your Pixel is near the device.

Every time your 4A is in this zone, your phone will make a notification sound.

Note, that this will also occur if you have paired your Pixel mobile to any other electronic device that allows you to take instructions from your phone. Eg; printer.

2. Problematic USB port

If the Pixel 4A random notification sound is similar to that of a charging alert, the port on your mobile could be damaged or contain too much dust/debris.

This can cause your device to falsely recognize a charging cable.

3. Software error

The operating system on your device could contain corrupt files which are affecting the performance of your Pixel 4A.

4. Faulty app

A faulty app on your mobile could keep making a notification sound due to a problem with its files installed on your device.

How to fix Pixel 4A random notification sound

two middle aged woman looking an a mobile phone screen

Turn your Bluetooth off on your Pixel 4A to stop it from trying to connect to a Bluetooth enabled device. This will block the auto connection between the two devices. Only switch your Bluetooth on when you are due to pair with a device, and in close proximity. You should only then experience a single notification sound. 

Other methods you can follow to fix your Pixel 4A from making a random notification sound include;

1. Disable the NFC app

Step 1. Open ‘Settings’

Step 2. Click on ‘Connected Devices’

Step 3. Select ‘Connection Preferences’ followed by ‘NFC’

Step 4. Toggle this ‘Off’

Keep in mind, that once this feature is off, you won’t be able to use your Pixel 4A to complete a wireless card transaction.

2. Clean USB port

If your USB port is dirty, this may cause your Pixel 4A to incorrectly pick up a charging cable and keep making the charging alert sound.

You can clear out the port by blowing air into it or using an air blower.

(Did you know; the Google Image search feature on the web page was released in 2001 and included 250 million images on the first day available for people to browse).

3. Update Pixel 4A firmware

Upgrade your Pixel 4A’s system software to ensure your phone operates on the latest available version.

This will improve your phone’s performance and get rid of any corrupt files that may be causing your Pixel 4A to make a random notification sound.

4. View notification log

If there is a specific app installed on your device that is creating problems on your device, you can check to see which program it is by opening the notification log.

Step 1. Press down on the ‘Home’ screen

Step 2. Launch ‘Widgets’

Step 3. Click on ‘Settings Shortcut’

Step 4. Select ‘Notifications log’

You will be able to see here which app is continuously notifying you. To rectify this problem you can uninstall and reinstall the application.

5. Update app preferences

Other Pixel 4A owners who have experienced this very problem have reported that when they reset their app preferences, it got rid of the random alert sound.

Step 1. Access ‘Settings’

Step 2. Click on ‘Apps and Notifications’

Step 3. Select ‘See all Apps’

Step 4. Press the ‘three dots’ and press ‘Reset App Preferences’

Once this step is done, you can go back and amend any specific app.

How do I turn off notification sounds in Pixel 4A?

woman smiling down at her mobile phone in a park.

Access the settings tab on your Pixel 4A to turn notifications off on your mobile. This will need to be  changed on each individual app. Keep in mind, when this setting has been updated, you will not get an alert as soon as a notification comes through from an app or function feature. 

Step 1. Open ‘Settings’

Step 2. Click on ‘Notifications’ followed by ‘App Settings’

Step 3. Find ‘Most Recent’ to choose an app that has just notified you

Step 4. Turn the notification setting off

If you still want to receive notifications, but not be alerted for them, you can set your Pixel 4A device to stay silent;

If you have a pending notification;

Step 1. Swipe the top of your screen down

Step 2. Press down on the notification

Step 3. Select ‘Silent’

Step 4. Confirm this by pressing ‘Apply’

Tip, you can put your Google Pixel phone on silent if you want to temporarily mute your Pixel 4A.

Pixel keeps making charging sound

woman looking at mobile phone shocked

Your Pixel will keep making the charging sound if the sound setting for this feature has been enabled on your Google mobile. With this configuration, your mobile will notify you every time you place your phone on charge. You can disable this setting so no audio will come through.

Other Pixel users have also stated that their mobile will display the charging icon when the sound comes through even when their phone is not connected to a charging cable.

To turn this setting off, simply go into ‘Settings > Sounds > Advanced Settings > Disable sound settings for charging sounds and vibrations’.

A faulty operating system on your Pixel 4A as well as a dirty charging port can cause this audio issue on your device.

Conclusion

With this straightforward guide, we hope you were able to follow all the reasons why your Pixel 4A will make a random notification sound, and that you were able to stop this issue with one the six easy fixes provided.

You may have a hardware issue with your Google mobile if this sound problem persists even after you have tried all methods.

We recommend you first utilise the Google Pixel Help Center for an immediate solution. if this page does not help, you can contact them directly

MLB TV Not Working On Roku: How To Fix Your App In 5 Steps

0

Is your MLB TV not working on your Roku device?

Have you checked to make sure your Roku is operating on the latest system version? If not, outdated firmware can be a cause for your MLB app to experience issues.

Is your MLB.TV screen blacked out? This will happen when a local game is being played, and the TV broadcaster has preferential rights to show it.

A simple update of the app and a refresh of your internet connection can help fix the MLB TV error.

We have created this straightforward guide to explain why MLB TV is not working on your Roku and expand on all the possible solutions that will help fix this streaming issue, so you can get back to watching your Major League Baseball games without any further interferences.

Why is my MLB TV not working on Roku?

little boy cheering holding a baseball and baseball glove up

Major League Baseball TV won’t work on your Roku if there is an outstanding system update on your device. For MLB to work without any issues, the platform from which you launch the streaming service needs to be operating on the latest software available. This will prevent your device from kicking you out of MLB.TV, or experiencing playback issues.

if your device is already on the latest system version, the MLB TV not working on your Roku could be due to the following;

1. Network connection error

If your Roku is connected to the wrong network, or your internet connection is experiencing problems, this can cause MLB TV to start to buffer, freeze or lag.

MLB.TV requires at least 3Mbps bandwidth to be able to stream high-quality content. If it’s anything lower, you will receive a standard image display.

For an HD display, MLB TV recommends 5Mbps.

2. MLB application data is full

Application data can be otherwise known as ‘cache files’. This data will download onto your Roku every time you launch MLB.TV.

Over some time, these files can become too full, or end up being corrupt which can cause MLB TV to not work when you attempt to stream a game.

3. Roku model not supported

Older Roku models will not support the MLB TV app.

Other Roku holders that have experienced the same issue, have advised that they were trying to watch their MLB app off a Roku 2 XS, which ended up being incompatible.

(Did you know, in 2021 the MLB.TV streaming platform performed 10.5 billion minutes of game consumption. This was the most-watched it has ever been since the service was launched in 2002).

4. Outdated MLB app

Your Major League Baseball TV app could be due for an update. If you keep the app running on an outdated version, the software will start to conflict with the MLB server.

Your request to access the database may get rejected due to your app containing expired information.

5. MLB.TV server is down

If the MLB.TV server is down, you won’t be able to broadcast games on your Roku device. This problem can occur if there’s been an outage, or maintenance work is being completed.

You can check the MLB service status to confirm whether or not your MLB subscription is not working due to an issue on your side or not.

How do I fix MLB TV not working on Roku?

baseball fans gathered around a mobile to watch the game

Update the system software on your Roku device to ensure the MLB TV app will work. To complete a firmware update on your smart TV, open ‘Settings’ followed by ‘System’. From here, you should be able to select ‘System Update’. To confirm you want to proceed, press ‘Check Now’. Once the system update is finished, launch MLB TV to see if it works.

Make sure you restart your Roku before you open MLB.TV to ensure the upgrade software has been refreshed.

If this does not fix your MLB TV from not working, you can proceed with the following solutions;

1. Power reset internet connection

A power reset on your Wifi router will refresh your network connection, and help improve your internet speeds.

Unplug your modem from the wall socket and wait no less than a minute to connect it again. Be sure to switch your router off before you complete this step.

Test your bandwidth speed to confirm you are receiving an adequate amount to broadcast from Major League baseball TV.

2. Clear MLB TV application data

You won’t be able to clear only the application data from MLB TV on your Roku device. You can, however, erase all cache files currently stored on your TV through the use of your Roku remote.

Step 1. From the main menu, click on the ‘Home’ button

Step 2. With your remote control press the following button sequence;

  • Home X5
  • Up X1
  • Rewind X2
  • Fast Forward X2

Allow your Roku to complete the process. It should automatically restart.

3. Upgrade the Roku model

If your Roku model does not support the MLB TV app, you will need to upgrade to a newer version.

The firmware on your Roku TV should be at 9.4, otherwise, your MLB subscription will not work.

4. Update MLB TV app

Your Roku should update the MLB TV app automatically by completing a download overnight, as long as it is connected to your network.

If you want to make sure your streaming service has successfully been installed, you will need to remove the MLB channel off of your device and reinstall it.

Why does my MLB app keep stopping?

grandfather, son and dad watching baseball game together

Your MLB app will keep stopping if you do not have enough bandwidth to stream videos online. If you want to watch high-quality games over MLB TV, you will need at least 5Mbps. A poor internet connection will prevent the service from obtaining this system requirement.

If you have multiple devices connected to your network while you are active on MLB, this can cause ‘throttling’ issues.

It’s advised to disconnect any devices that do not need to be connected to Wifi while you stream over the app.

Your MLB.TV will keep stopping when it needs to buffer. Buffering issues transpire when the app has been unable to download the necessary amount of data before you launch a game. It will need to stop to download more data to proceed with the stream.

To help prevent your MLB TV from not working on your Roku, you should reset your Wifi router, and contact your network service provider if this is an ongoing issue.

Why is my MLB TV game blacked out?

group of friends gathered around tv with some beers watching the game

Your MLB TV game will be blacked out if you cannot verify on your subscription that you have a valid cable or video service provider. This will happen because a live TV channel will have exclusive broadcasting rights over the MLB TV app, specifically if the game is being played by a local broadcaster.

This is because they will have priority to show a game over television, compared to a national broadcaster.

Another reason why your Major League Baseball game will be blacked out on the app is because it is a way to get more fans into the stadium to attend the game live.

How do I get around blackout restrictions?

You can get around the blackout restriction on MLB TV by making use of a VPN.

If you access your MLB TV through a VPN, it will keep your network private and secure. If you choose the correct server location, the MLB app will not recognize that you are from a region that does not have broadcasting rights for the baseball game.

Conclusion

With this easy to follow guide, we hope we were able to help you understand why your MLB TV was not working on your Roku device, and that one of the solutions provided has fixed this issue for you.

If you’ve tried all five methods and you are still experiencing problems, we suggest you contact MLB.TV directly.

You can email them, or make use of their virtual assistant. You can also check out their help centre to see if you can resolve your query online.

HTC U20 Keeps Making Notification Sound: Easy Steps To Fix

0

If your HTC U20 keeps making a notification sound, you may have the emergency alert feature turned on. This alerts you every time there is a safety warning unless you disable the setting.

Another reason why your HTC will make a noise is if the NFC (near field communication) app is enabled. This will notify you when you are near a wireless transaction device. Besides a card payment machine, if you have paired your mobile to a printer, this can also cause an alert.

A change in notification settings will help stop your HTC from making a noise.

We have created this easy to follow guide to help you understand why your HTC U20 keeps making a notification sound, and what methods you can execute on your mobile to fix this sound issue, so you can stop being disturbed with unnecessary alerts.

Why does my HTC U20 keep making notification sound?

angry man yelling at mobile phone

If you have enabled the NFC (near field communication) app on your mobile, your HTC U20 will keep making a notification sound every time it comes into contact with a contactless payment device. If you have enabled your card details on your phone, it will automatically notify you when it thinks you want to complete a transaction.

This can also include an electronic device that you have paired your phone with to perform certain actions, like a printer.

Other reasons why your HTC U20 is making alert sounds include;

1. Faulty app

If you have an app installed on your device that is faulty from corrupt software, it may be continuously making a notification sound for no specific reason.

There may have been an error when the program was first downloaded onto your HTC U20.

2. Emergency alerts

If the emergency alerts feature is enabled on your HTC U20, your mobile will make a notification sound every time there is a safety warning in your area.

3. App permissions

When you give one of the programs on your HTC U20 permissions, it will allow the app to access data features such as the storage on your mobile, or its location.

Your HTC U20 will keep making a notification sound if an app is running out of storage space.

4. Hardware error

Your U20 device may have a hardware malfunction. This can transpire when the phone was manufactured, or if you recently dropped it.

A result of this type of issue can be your HTC mobile keeps making an alert sound when there is no new notification on your device.

How to fix HTC U20 keeps making notification sound

woman sat on chair with her legs crossed, smiling down at her mobile phone

If you disable the NFC (near field communication) app, your HTC U20 will no longer keep making the notification sound when it comes into the range of a wireless transaction device.  Once this feature has been switched off, your phone will no longer automatically detect a contactless payment method. 

To turn this function off, simply;

Step 1. Launch ‘Settings’

Step 2. Click on ‘More’ followed by ‘Wireless and Networks’

Step 3. Press ‘NFC’

Step 4. Toggle this to ‘Off’ 

Select ‘OK’ to confirm you want to disable the NFC.

Other solutions you can execute on your HTC U20 to get rid of the continuous alert sound include;

1. Uninstall and reinstall app

To first find out which application is the culprit for your HTC U20 to keep making a notification sound, you can download a program from your Play Store that will provide you with your notification history.

An example of such an app is Notification History.

Once you know which app is causing the error, uninstall and reinstall it back on your mobile.

Tip, restart your HTC before you download it again to make sure you erase all remaining data.

2. Disable emergency alerts

Once you disable the emergency alerts on your mobile, you will no longer be alerted when there is a safety concern in your area.

Step 1. From your main menu screen, click on ‘Settings’

Step 2. Select ‘Apps and Notifications’ followed by ‘Advanced Settings’

Step 3. Press ‘Wireless Emergency Alerts’

You should now be able to turn the alerts off for each option provided. If this step does not stop the notification sound on your mobile, we suggest you turn this feature back on.

3. Turn app permissions off

This step will stop your selected apps from having access to storage, location and any other data on your mobile.

Step 1. Open ‘Settings’

Step 2. Go to ‘Apps and Notifications’

Step 3. Click on ‘Advanced’

Step 4. Press ‘Permissions Manager’

You will now be able to go through each data type and see which apps have access. Click on an app to ‘Deny’ it. Keep in mind, that once this has been updated, the programs will have limited functionality and may interfere with their performance.

4. Troubleshoot device

If you have a hardware issue with your HTC U20, you may need to send it in to get repaired. For more information on this process, you can read through HTC’s repair guide.

How to clear cache on HTC U20 Pro

asian man in white t-shirt looking down at his mobile phone

You can clear the cache files on your HTC U20 by going; ‘Settings > Apps > Choose App > Storage > Clear Cache > Confirm’. This step will help free up memory space on your mobile and get rid of any faulty files that have been downloaded into the internal storage of your HTC. 

When the cache files on your device are too full, it will interfere with the overall performance and could be a reason why your HTC U20 keeps making a notification sound. Specifically, if your apps have permission to access the storage data.

If your HTC U20 is still making alert sounds, you may need to complete a factory reset on your device, however, you will need to perform a backup first.

How to backup my HTC phone

woman with glasses sat on sofa reading her mobile phone

You should back up your system files to a Google Drive. This can be done by going; ‘Settings > Google > Back-Up > Toggle on Back Up to Google Drive’. Using Google Drive is a safer option to always ensure you will have a copy of your data once you perform a factory reset, or your HTC U20 gets wiped.

You can also complete a backup on your HTC device without the use of a third-party program. To do this, simply go; ‘Settings > About the Device > Backup and Restore > Mobile Device > Tick each data option > Create a Backup’

This backup will stay in your U20’s memory, and you should be able to restore all the data onto the device under settings.

Once you’ve backed up your mobile’s information, you can perform the factory reset to help stop your HTC U20 from making the notification sound;

How to factory reset HTC U20

Step 1. Open ‘Settings’ 

Step 2. Click on ‘System’ followed by ‘Advanced’

Step 3. Choose ‘Reset Options’

Step 4. Select ‘Erase all Data’

Confirm you want to go ahead with this step. Once the reset has been complete, restore your files and make sure your device is no longer making the notification sound.

Conclusion

We hope this guide has helped you understand why your HTC U20 keeps making a notification sound, and that you were able to fix this sound issue with one of the five simple solutions provided.

If, however, the issue persists even after a factory reset, we recommend you contact HTC directly. You can make use of their support guide where you will be able to troubleshoot your device and track your repair status if you need to send it in to be fixed.

LG V20 Keeps Making Notification Sounds: Fix Your Alert Here

0

You must be wondering why your LG V20 keeps making notification sounds? Does the alert occur without a pop up being displayed on your home screen?

Do you make use of the LG Health app? If you do, and you have the noise switched on for this feature, your mobile will send you notifications when you have reached a goal, or to remind you your target still needs to be met.

Are you in an area with a weak signal? Your LG may ping you every time your service drops.

An update in configuration settings or changes with certain applications can help this sound issue on your phone.

We have generated this easy to follow guide to expand on why your LG V20 keeps making notification sounds, and what steps you can take to rectify this problem so you can stop hearing unnecessary alerts come through on your mobile.

Why does my LG V20 keep making notification sounds?

two woman with towels on their heads and dressing gowns looking down at mobile phone annoyed

Your LG V20 will keep making a notification sound if you have enabled the LG Health alert setting on your mobile. This program should have a different alert noise than your standard apps. This program will notify you for different things, such as a reminder to reach your daily targets or if you have completed a goal. 

If you do not have the LG Health app turned on, your V20 will keep making a notification sound from one of the following reasons;

1. Loss of signal

You LG can ping you every time you have a loss of signal on your phone. This can be frequent depending on what location you’re in and whether or not there is little or no coverage for your network service provider.

2. Enabled emergency alerts

Emergency alerts will notify you every time there is a security concern in your area. This will be automatic unless you turn this feature off.

3. Faulty app

You may have a corrupt app installed on your LG V20 that is continuously sending a notification to your device.

Faulty software can transpire during the download phase, or over time through general use.

4. NFC turned on

NFC (Near Field Communication) is a program that allows your LG V20 to exchange online information with other wireless devices, like a card payment device.

When your mobile gets close to one of these items, it will connect and make a notification sound when it does.

5. LG V20 device issue

The firmware on your mobile may be faulty, or, the actual hardware of your device is problematic.

A problem like this will originate from the manufacturer of the phone.

How to fix LG V20 keep making notification sound

young woman smiling down at phone

Turn the LG Health alert feature off to stop your V20 from making notification sounds. You can do this by; Press Display > Click Home Screen > Toggle Off LG Health/Smart Bulletin. Once this has been changed, make sure the icon does not show on your home screen. Keep in mind you will now need to go into the LG Health app to see your activity progress.

Other solutions you can use to help fix your LG V20 from making notification sounds include;

1. Move to an area with coverage

If you are in a location that does not have any signal, move to a different area that is in coverage for your network service provider.

This will prevent your LG V20 from pinging you every time your service drops.

2. Disable emergency alerts

Turn the emergency alert program off. This will block your mobile from receiving an alert every time there is a safety warning near you.

Step 1. On the home screen click ‘Messaging’

Step 2. Click on ‘Menu’ followed by ‘Settings’

Step 3. From ‘General’ select ‘More’

Step 4. Press ‘Emergency Alerts’

Now you’ll be clear the boxes for all three options (Imminent extreme, Imminent severe, or amber alert).

3. Uninstall and reinstall app

If you have a faulty app, you can uninstall and reinstall it to get rid of the corrupt software that is downloaded onto your device.

How do I know which app is making a specific notification sound?

You can download a program from Google Play store that will allow you to view where your most recent alerts came from.

Notif Log Notification History is an example of such an app.

4. Disable NFC app

Once this feature has been turned off, your LG V20 will no longer connect to wireless transaction devices automatically.

How to disable NFC app on LG V20

Step 1. Open ‘Settings’

Step 2. Click on ‘Connected Devices’

Step 3. Toggle the ‘NFC’ option to ‘Off’

Your display should have a prompt option that you turn on. This will allow you to use the NFC feature manually.

How do I turn off notifications on my LG V20?

Business woman holding mobile phone in both hands

You can turn off notifications for specific apps through the settings section on your LG V20. You will need to go onto each individual app to prevent any alerts from coming through. Keep in mind, when notifications have been switched off, you won’t know you have received an alert until you launch the specific app.

To switch notifications off for a specific app on your LG V20;

Step 1. Open ‘Settings’

Step 2. Select ‘General’

Step 3. Click on ‘Apps and Notifications’ followed by ‘App Info’

Step 4. Choose the app you want to change

Step 5. Press ‘App Notifications’

You can now toggle off ‘Allow’. 

Why does my LG V20 keep turning off?

man with both hands up looking confused

Your LG V20 will keep turning off if your battery has been completely drained, and is unable to withhold power from a charging cable. This can occur if the battery in your LG V20 has a defect, or, if you have been leaving your mobile on charge even after it has reached full capacity.

Another reason why your LG V20 will keep turning off is if there is a problem with the operating system. Sometimes, this will cause a problem with your device being able to withstand requests from all your applications.

To help troubleshoot this error, you can;

  • Update your software
  • Replace the battery
  • Complete a factory reset

If none of these steps work, there may be a hardware issue that will need to be looked at by a LG professional.

Conclusion

We hope this guide has provided you with everything you need to know to understand why your LG V20 keeps making notification sounds, and that you were able to fix this sound issue with one of the fixes provided.

If, after using every step in this directory, your mobile is still making notification sounds, or keeps turning off, we recommend you contact LG directly.

Nokia G20 Keeps Making Notification Sound: What This Means

0

If your Nokia G20 keeps making a notification sound, there are certain settings on your mobile that you will need to change to get rid of the continuous alerts.

Did you know your Nokia smart device will keep notifying you when you’re lacking storage space until you free up your memory?

In some instances, the firmware on your mobile can be faulty, and you will need to activate a software repair.

We have generated this easy to follow directory to help you understand why your Nokia G20 keeps making a notification sound, as well as provide you with an array of simple fixes you will be able to choose from to get the Nokia sound issue on your G20 rectified.

Why is my Nokia G20 making notification sound?

woman in office looking at mobile phone annoyed

An enabled NFC (Near-Field Communication) app will cause your Nokia G20 to keep making a notification sound when it is in close proximity to a contactless payment terminal. Your mobile will try and read your card details because it will think you are trying to make a wireless payment. 

If you do not make use of the NFC app on your Nokia G20, you may be experiencing a continuous notification sound due to the following reasons;

1. Alarm reminder is on

If you have enabled your alarm reminder, your Nokia G20 will keep notifying you before your alarm is due, or until you turn it off.

This will also happen if you have ‘snoozed’ your alarm.

2. Delay in app alerts

There may be a delay in your notifications coming through for your installed apps. This could be for programs like Facebook, Instagram etc.

Sometimes, if the apps server is experiencing issues, alerts will be postponed.

3. Ambient display setting is on

If you have ‘Ambient Display’ setting enabled on your mobile, this could be why your Nokia G20 keeps making a notification sound.

This setting will alert you periodically.

4. Auto update notification is on

When auto updates has been enabled on your Google Play store with the notifications, your Nokia will make a sound every time an app auto-updates in the background.

5. Nokia G20 out of storage space

Your mobile device may be out of storage. Your Nokia will continuously remind you of the lack of memory until you free up the space on your phone.

How to stop notification sound on Nokia G20

woman looking down at mobile phone smiling

If you turn off the NFC app on your Nokia G20, you won’t receive a notification sound every time your device gets in close radius of a wireless transaction device. To switch this feature off, simply go; ‘Settings > Connected Devices > Connection Preferences > NFC > Disable.’ Moving forward, your mobile will not be able to complete a wireless transaction on behalf of your card. 

Other methods you can use to stop your Nokia G20 from making the notification sound include;

1. Disable alarm reminder

This will stop your Nokia from reminding you of your set alarm time before it goes off.

Step 1. Launch ‘Settings’

Step 2. Select ‘Apps and Notifications’ followed by ‘Notification’

Step 3. Choose ‘Clock’

Step 4. Toggle off ‘Upcoming alarms’

If you have an alarm set, your phone should only alert you when the set time has been reached.

2. Restart device

If your installed apps have experienced a connection issue, you can restart your Nokia to refresh the programs.

You can also check to see if a specific app is having server related issues, which is causing a delay in alerts to your phone.

3. Turn ambient display setting off

Step 1. Open ‘Settings’

Step 2. Access ‘Display’ followed by ‘Advanced’

Step 3. Choose ‘Ambient Display’

Step 4. Click on ‘New Notifications’

Change this from ‘Periodically to ‘Once Only’.

4. Disable auto update notifications

Step 1. Launch Google Play store

Step 2. Access ‘Settings’

Step 3. By the notifications for auto updates turn it ‘Off’

Your Nokia should no longer notify you every time an update takes place.

5. Free up storage space

Increase the storage space on your Nokia G20 to get rid of the notification sound. You will know it is connected to this issue because a message will appear on your screen.

How do I turn off the notification Sound on my Nokia G20?

woman holding a coffee cup and holding phone to face

You can turn off the notification sound on your Nokia G20 for all apps installed on your device. This will result in no alerts coming through on your phone. You will still receive a notification icon. To complete this you can go; Settings > Apps > All Apps > Choose your desired app > Notifications > Toggle Off ‘Allow Notifications’.

For messages and calls, you will need to block the notifications from coming through. To disable this, in the ‘Settings’  section you will need to go into the ‘Phone’ and ‘Message’ tabs.
(Did you know; the name ‘Nokia’ came from the river ‘Nokianvirta’ which can be found in Finland. This is where the company was created).

From here, press ‘Disable’.

Why is my Nokia G20 not ringing?

woman holding a phone to her ear

Your Nokia G20 will not ring if you have put your mobile on silent mode. Silent mode will still allow notifications to come through to your phone, but you will not be alerted when they do. Silent mode does not prohibit any other functions on your phone other than its sound.

Another reason why your Nokia G20 may not be ringing will be if you have turned airplane or DND mode on. .

Unlike silent mode, this configuration will block any form of notification to come through on your Nokia G20.

Only once you disable this setting will your outstanding alerts come through.

Conclusion

We hope this straightforward guide has helped you make send of why your Nokia G20 keeps making a notification sound, and that you were able to stop this alert with one of the straightforward fixes supplied.

If the sound issue carries on even after you have tried all six solutions, we suggest you contact Nokia directly as there may be an issue with the hardware of your mobile.

From their online support guide, you can either send them an email, call or make use of their online chat.

S21 Keeps Disconnecting From WIFI: How To Stay Online

0

If your S21 keeps disconnecting from Wifi, there could be an issue with your Samsung mobile as well as your Wifi router.

Did you know, an additional program like an adblocker or VPN can interfere with the network connection on your Galaxy S21?

Have you checked to see if there is a pending software update on your phone?

For more serious cases, there could be a hardware problem with your smartphone. Fortunately, Samsung provides online troubleshooting steps to help diagnose the issue and arrange a repair.

With this guide, we will expand on the reasons why your S21 keeps disconnecting from your Wifi, as well as provide you will enough solutions you will be able to execute so you can get your Samsung mobile back to staying connected.

Why does my Samsung S21 keep disconnecting from Wifi?

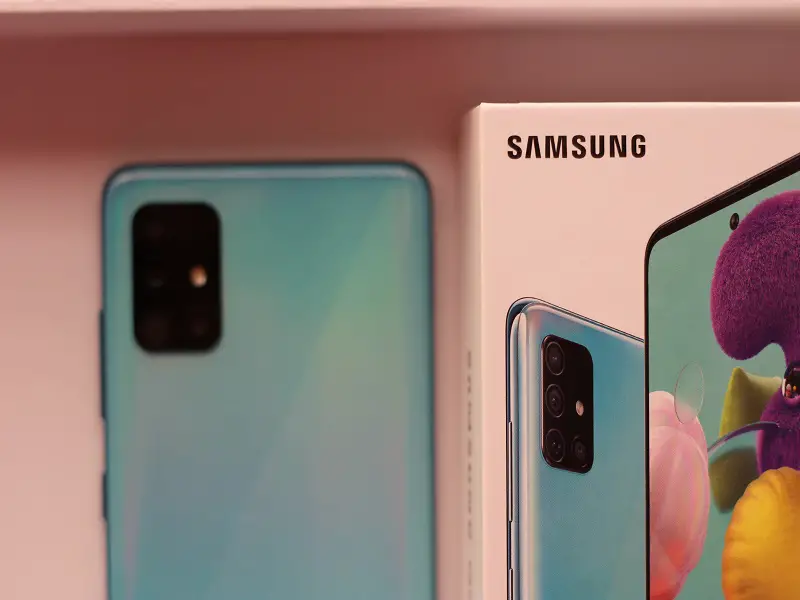
Samsung phone next to the box

If there is a problem with the Wifi router your Samsung Galaxy is connected to, this will cause your S21 to keep disconnecting from its paired internet connection. The network service provider could be down, or the Wifi connection may be dropping due to a latency error. 

This issue is with your router and not your Samsung Galaxy S21, however, the additional reasons why your S21 keeps disconnecting from Wifi is mainly to do with your mobile device. These include;

1. Faulty Wifi connection between device and router

Your S21 could have experienced a fault when it paired to your router the first time round. If your mobile cannot secure a stable network connection, your phone won’t be able to stay online.

2. Outstanding software update

Your S21 may keep disconnecting from Wifi if your mobile is due a software update.

Once Samsung rolls out a new version of firmware for their Galaxy to function on, you should update your phone otherwise system errors will start to occur.

3. Adblocker enabled

If you have an ad blocker enabled on your S21, this program can block your device from connecting Wifi.

The same can be said if you use your phone with a VPN installed.

4. Hardware issue

Your Samsung Galaxy S21 model could have a hardware issue that is causing your device to keep losing signal.

Sometimes, faulty devices are manufactured that have an unfixable problem.

How to stop S21 disconnecting from Wifi

man holding phone and smiling

Power reset your Wifi router to help fix your S21 from losing signal. Because this issue can arise from your modem and not your phone, it is recommended to turn your router off and unplug it from its wall socket. Once its been a couple of minutes, plug the device back in and switch it back on. 

Once your Wifi is back up and running, wait for your Samsung mobile to reconnect. Test its Wifi connection by launching the internet.

If this step does not work, and your S21 still keeps disconnecting from Wifi, you can try these additional methods;

1. Re-establish connection to current network on S21

If there was an error when you paired your Samsung mobile to your Wifi network, you should forget the network, and reconnect.

Step 1. Open ‘Settings’

Step 2. Select ‘Connections’ followed by ‘Wifi’

Step 3. From the ‘Current Network’ option press the settings icon

Step 4. Press ‘Forget’

Your mobile will no longer be paired to your Wifi network.

Tip, restart your Galaxy S21 to refresh the changes before you reconnect to your network service provider.

2. Reset S21 network settings

This will reset the network services on your mobile;

Step 1. Launch ‘Settings’

Step 2. Find and select ‘General Management’

Step 3. Click ‘Reset’ followed by ‘Reset Network Settings’

You may be asked to input your security code

Step 4. Confirm by selecting ‘Reset’

Once this is complete, you will need to connect your S21 mobile again.

3. Check for software update

If a software update is due on your mobile, you should download this version to improve your Samsung performance and get rid of any system errors that may be the reason why your S21 keeps disconnecting from Wifi.

How to check for software updates on Android

Step 1. Open ‘Settings’

Step 2. Click on ‘System’ followed by ‘System Update’

You will be able to update your phone’s firmware from here.

4. Disable additional programs

If you have an adblocker or a VPN enabled on your smart mobile, try to turn these off and see if your S21 still disconnects from Wifi.

To check if your Samsung is using a VPN, you can check it here;

Step 1. Open ‘Settings’

Step 2. Press ‘Connections’ followed by ‘More Connections’

You will now be able to choose ‘VPN’. If one is on, it will show here.

5. Troubleshoot your S21

If none of these fixes has worked on your S21, you may have a hardware issue.

You can troubleshoot your Samsung mobile for a repair online.

Why does my S21 keep saying no service?

phone with no signal

If your sim card has not been inserted into your Samsung S21 mobile correctly, your device will display the ‘No Service’ error on your screen. A sim card is what connects your mobile to the internet, over your chosen network service provider. When this little device is not put in the sim card holder the right way, it won’t be able to activate.

A sim card can be faulty, where it won’t work even if you insert it correctly, although this is quite a rare occurrence.

Further reasons why your S21 has no service include;

1. No service in your area

Your network service provider may be completely down which is why there is no signal in your area, or as a widespread outage.

2. Disabled radio signal

If there is conflict between a radio signal and your Samsung’s GPS, the radio signal will automatically turn off.

3. Momentary system failure

Your Galaxy S21 may have just had a system failure. This can cause your mobile to lose any active connection when this error occurs.

How do I fix no signal on my S21?

man holding phone

Re-insert your sim card to get rid of the S21 no signal issue. Make sure the device is facing the correct way, and that you place it in the sim card holder correctly. Before you place the sim back into your Samsung Galaxy, check that it is not damaged. If it is scratched, specifically on the side with the chip, it may need to be replaced.

Other steps you can take to fix the no service error include;

1. Check if your network provider is down

You can check to see if your network service provider is down by using this link.

If the site confirms there is a server issue, you will need to wait until your provider resolves the issue.

2. Reboot in safe mode

If the radio signal is off, you can reboot your Samsung in safe mode.

Step 1. Hold down on the power button

Step 2. Hold down on the ‘Power Off’ button

Confirm you want to reboot in safe mode.

3. Restart the device

If your S21 had a system failure, a quick restart can get rid of the error and reconnect your mobile.

Tip, leave your phone off for no less than thirty seconds before you turn it back on.

Conclusion

With this easy to follow guide, we hope we were able to help you make sense of your S21 keeps disconnecting from Wifi, and that you were able to fix this problem with one of the simple steps provided.

If the issue persists, we suggest you contact Samsung directly. You can make use of their online chat feature, or give them a call.

Freeview Won’t Work On My Smart TV: Fix Your Service Here

0

If Freeview won’t work on your smart TV, you may be experiencing poor signal coverage. This can result from a fault with your aerial.

Did you know that although the Freeview on Demand app requires a stable internet connection, it still needs to be connected to a satellite?

Your smart TV may be due to a firmware update, or a simple power cycle on your device is required.

We have created this straightforward guide to help you understand why Freeview won’t work on your smart TV, and provide you with simple fixes you can act on your smart TV so you can get back to enjoying one of the UK’s best digital television services.

Why won’t Freeview work on my Smart TV?

bored man watching tv

If your home network is down, Freeview won’t work on your smart TV. The television app needs to be connected to secure the internet to function properly. Your Wifi may have gone down due to your network service provider, or there was a temporary internet glitch.

Other possible reasons why your Freeview is not working include;

1. System error

Is your TV operating on the latest operating system available?

If the firmware on your smart TV is out of date, this will create issues with the apps downloaded on your device.

2. Faulty installation

Freeview won’t work on your smart TV if the app’s installation was unsuccessful.

The download phase could have been interrupted, or corrupt files were stored in your TV’s software.

3. Weak signal coverage

You may be in an area that does not have an adequate signal to pick up Freeview channels. if your coverage is too low. the app won’t be able to operate successfully and broadcast on local channels.

4. Freeview services are down

If Freeview is down, it will affect all its services and you won’t be able to watch any channels until the television platform is back up.

The TV service could be down due to planned maintenance, or an unexpected outage.

5. Smart TV not compatible

Freeview is available on the 2017 model and newer smart TVs. You may be trying to get the TV platform to work on a TV that does not support the app.

How to get Freeview to work on Smart TV

woman eating popcorn and holding tv remote

Reset your internet connection to get Freeview to work on your Smart TV. The TV app needs to be paired to a stable network to supply on-demand services. If you refresh your Wifi, you will improve your internet speeds and strengthen your connection. Freeview requires at least 2Mbps to stream at a standard level.

You can complete the reset;

Step 1. Turn your Wifi router off and remove it from its wall socket

Step 2. Wait a few minutes before you plug it back in

Step 3. Switch your modem back on

Once your Wifi has connected again, launch Freeview.

Other fixes you can execute to get Freeview to work on your smart TV include;

1. Update system software

Update your smart TV’s operating system to ensure your device operates on the latest firmware. This will ensure any faulty files are removed, and your TV’s performance is improved.

Step 1. Open your TV’s ‘Settings’

Step 2. Click on ‘Support’

Step 3. Check for ‘Software Updates’

If an update is available, allow the download to take place without any interruptions.

2. Reinstall Freeview

With smart TVs, Freeview should already be a download on your device, with updates completed automatically.

If however, the app was programmed onto your TV with errors, or the manual install was faulty, you will need to reinstall the Freeview app as this is a reason why the service won’t work.

You should find Freeview in the ‘Apps’ section of your smart TV. Here, you will have the option to ‘Install’ it.

3. Check cables

If you experience a weak signal, your cables may not be secure, or they are faulty.

Check to see that you did connect them properly. Try to test the cable with a different device to see if it works.

Disconnect your aerial for a few moments to refresh the signal.

You may need to replace your cables if they interfere with Freeview picking up a signal.

4. Make sure your smart TV is compatible

Most smart TVs from 2017 and newer are compatible with the app, however, Freeview won’t work on your smart TV if it is too old.

Does Smart TV have built-in Freeview?

man and woman watching tv together

All-new smart TVs will include Freeview as a pre-installed program and television service or as a downloadable application that you can find in the app settings of your TV. If you own a smart TV that was manufactured between 2014 and 2016, you will need to check if it is capable of Freeview On Demand. 

Although the Freeview On Demand service is based over an internet connection, you will still need to connect your TV to a satellite.

What equipment do you need for Freeview?

If you want to make sure your smart TV is equipped for Freeview so you don’t experience any further issues with the app not working on your device, make sure you have the following;

  • A Freeview supported smart TV
  • A working aerial
  • Valid TV license
  • Stable internet connection

The Freeview catch up and On Demand, the content will require at least a 2Mbps broadband speed to be able to play without any playback issues.

Freeview TV guide not working

man and woman arguing about watching tv

Your Freeview TV guide will not work if your smart TV is not receiving at least 2Mbps of bandwidth from your Wifi network. A poor internet connection can cause some information from the Freeview TV guide to be missing.

Additional reasons why your Freeview TV guide is not working include;

  • Smart TV’s OS is out of date
  • There’s been channel updates
  • Aerial issues

The first thing you should do to help rectify your Freeview TV guide is to restart your smart TV. This will refresh the connection, and update any changes that may have taken place.

Conclusion

With this easy to follow guide, we hope you were able to understand why Freeview won’t work on your smart TV, and that you were able to rectify this problem with one of the five easy fixes provided.

If this issue persists, even after you have executed each method, there may be an underlying issue with your Freeview app or your smart TV.

You can make use of Freeview’s Help Guide to troubleshoot your program.