Home Blog Page 5

Here’s How To Cast from Samsung Phone To Vizio TV

Do you need to cast from Samsung phone to Vizio TV but are facing issues when doing so? Are your phone applications causing trouble while casting to TV? Don’t worry; it’s a common issue experienced by numerous users. 

Screencasting is the process of streaming your phone’s screen onto another device, such as TV, so that you can view content from your phone on TV. However, you can’t see the content from both devices simultaneously — it is only visible to the device receiving the signal.

While this appears to be a straightforward process, some problems could prevent a good experience. However, some excellent solutions could solve these problems to ensure you get the best casting experience possible. 

Can I Cast My Phone to My Vizio TV
man watching tv

With the introduction of Smart TVs, it has become common to use various TV applications, including screen casting. Therefore, you can cast from Samsung phone to Vizio TV, but make sure your phone is Android 4.4.2 or higher. Also, your Vizio TV needs to be a smart TV or have smart tv features. Since 2018, Vizio has been adding its SmartCast OS to all TV models.

The SmartCast operating system allows you to stream content from all of your favourite apps and services, including Netflix, YouTube and more, onto the TV screen. Once the Vizio SmartCast Mobile app is installed on your Samsung phone, you can access programs you can cast on your Vizio TV.  

Many users get confused when they hear the terms SmartCast and Chromecast. If your Vizio TV is equipped with SmartCast, it must have the features of Chromecast. In other words, Vizio TVs with SmartCast have a built-in Chromecast technology. These technologies combine to provide users with the best Smart TV experience. 

How Do I Cast to My Vizio TV
tv and mobile

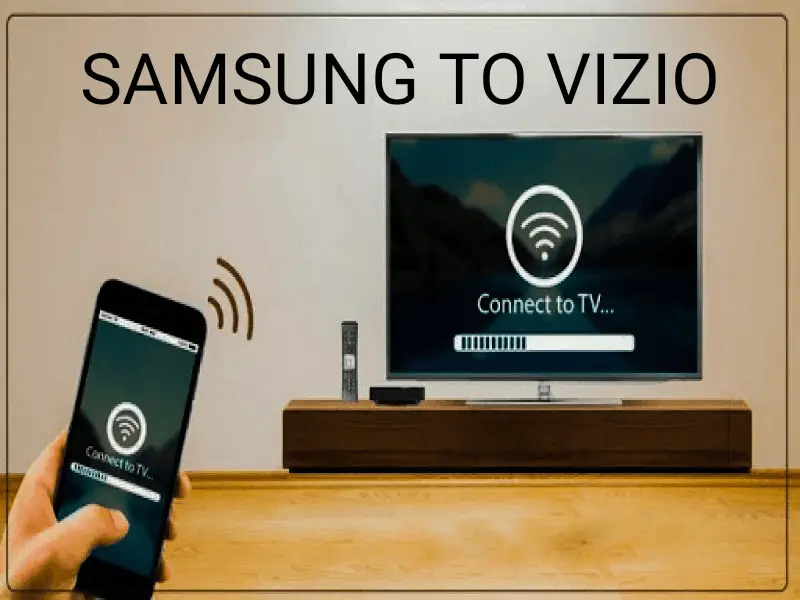
Casting your phone to Vizio TV is simple and easy. Go through the following steps to connect and cast from Samsung phone to Vizio TV:

  • First of all, you need to check whether your phone and Vizio TV are connected to the same WiFi network. You can also go for the Bluetooth option.   
  • Download and install the Vizio SmartCast Mobile application from the Google Play Store.
  • Sign up if you don’t have an account.
  • Once started, tap on the toolbar and select the new device you need to configure.
  • Next, you will see a list of available Vizio SmartCast devices in your home. Tap on your TV name (Vizio TV) and select Start.
  • You will be asked to confirm your pairing. A four-digit code will be displayed on your Vizio TV screen. Type that code on your phone to connect your phone to Vizio TV.  

To cast the screen of your Samsung phone to Vizio TV, follow these steps:

  • Open the Settings app on your phone.
  • Look out for the cast, screencast, screen share, or wireless display options. You will find different options on different devices. 
  • Select your option, and your device will start searching for the nearby devices it can pair.  
  • You will find a list of devices. Select Vizio Smart TV from the list to pair your Samsung phone to TV.  

How Do I Fix the Cast on My Vizio TV
samsung to vizio screenshot

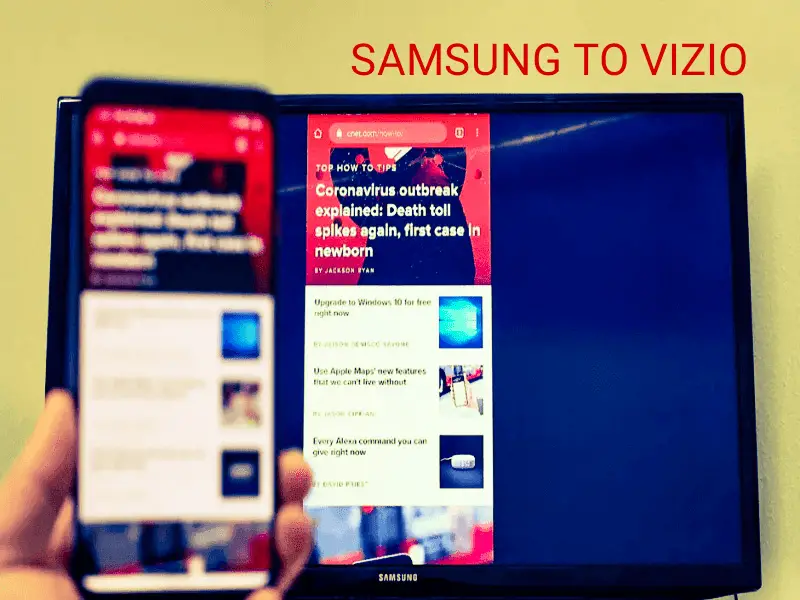
If you are unable to cast from Samsung Phone to Vizio TV, here are the possible solutions to fix the problem:

Reboot device

Rebooting both the devices (Vizio TV and Samsung phone) should be the first thing to do if you cannot share your phone’s screen with Vizio TV. First, turn off your phone, wait for a few seconds, and then turn it on.

To power cycle the Vizio TV, you should:

  • Press the Menu button on your remote
  • Select System and go to Reset & Admin
  • Select Soft Power Cycle to restart your Vizio TV     

You can also reboot your router and modem. Sometimes, restarting the router fixes the communication issues. 

Cast from a different phone 

If your Samsung phone cannot cast, you can use another phone to start casting. This will make sure that your previous phone was causing the problem. Also, sometimes, specific applications fail to cast from phones to Smart TVs. If this is the case, try casting another application to check if it works. 

Update the application

An outdated application can also cause casting issues. Make sure the application you are casting is up to date by following these steps.

  • Go to the Google Play Store
  • Tap on the three-horizontal lines available on the top-left corner of your screen.
  • Select My apps & games.
  • Tap on Updates and look out for the application you need to cast.
  • Select the Update button next to that app.

Update the firmware of your Vizio TV

If the SmartCast is not working, try to update the firmware of your Vizio TV. Although firmware updates are installed automatically; however, sometimes they get missed. To update your TV’s firmware, follow the below steps:

  • On your remote, press the Menu button.
  • A window of TV Settings will appear on the screen.
  • Select System and then choose Check for Updates.
  • If there is an update available, your TV will start installing it automatically.

Factory reset your Vizio TV

If you are still dealing with SmartCast issues, factory reset your TV. This will erase all your settings, and you will need to redo all the settings. To do this, follow these steps to factory reset your TV:

  • Press the Menu button on your Vizio TV remote.
  • Select System and open Reset & Admin
  • Choose the Reset TV to Factory Settings option.
  • Your TV will start the process automatically.
  • Once completed, it will restart.

Conclusion

Casting from a Samsung phone to Vizio TV is quite easy. However, casting is not foolproof, and you should be mentally prepared to encounter issues. The solutions mentioned above should help resolve casting problems with your Samsung-Vizio combination. Hopefully, you can now stream photos, videos, music, and favourite apps on your Vizio TV.  
Here’s What To Do When Hulu Wont Play On HDMI

0

With technology making its mark in every industry nowadays, online movie streaming apps like Hulu have gained significant traction. Watching your favorite tv shows on those big TV screens has its charm but, sorry to burst your bubble, what if your Hulu wont play on HDMI?

Hulu is an on-demand American movie streaming app with the majority shares of The Walt Disney Company. Users can choose any one of the subscription plans and watch thousands of movies and tv shows on the go. 

A weekend movie night with friends on Hulu is a cherry on top for anyone who has had a tiring week at work. Sometimes, an HDCP error may occur that can disrupt the streaming experience for its users. Here are some of the tips that can help you resolve these streaming issues.

Can you stream Hulu through HDMI?

Hulu advert

Hulu can be viewed easily on your Smart TV since it can automatically connect to the internet. If you don’t have a smart TV, connecting your laptop to your TV screen using an HDMI cable will do the trick.

You can also use a gaming console to download and install the Hulu app. After launching the app and creating an account, you can use the HDMI cable to connect your console to your TV and watch your favorite TV shows. 

Why can’t I watch Hulu through HDMI?

Hulu on laptop

There can be multiple reasons why Hulu wont play on HDMI. Some of the solutions you can practice are:

  • The HDMI cable may have loose ends. You can switch the ends by plugging the side in the TV’s port to the laptop and vice versa since HDMI cables are bidirectional.
  • The cable may be faulty. Try using another HDMI cable but, you must make sure that it has been used previously for Hulu on a different device.
  • An HDCP error may have occurred on any one of the ports. You can try switching to a different port on your TV.
  • If nothing works, you can try plugging your laptop into another TV screen as a last resort.

Why is Hulu not casting to my TV?

hulu advert on tv

Hulu is available on most major operating systems and supports Chromecast, so you can watch your favorite TV shows on the big screen. At times it might stop working on Chromecast as well. This error occurs due to network problems or software-related issues. Factors like server errors, issues with third-party apps, and corrupted files could also be the reason for this problem. 

How do I fix my HDCP on Hulu?

man and woman watching Hulu

Sometimes, when users connect their laptops to an LED screen via an HDMI cable or use an Apple TV, a device-specific error called High-bandwidth Digital Content Protection (HDCP) may arise. The error may appear as the following two phrases on your screen:

  • This content requires HDCP for playback.
  • HDCP isn’t supported by your HDMI connection.

The anti-piracy tech error may arise if your TV screen is too old to support this communication or if the HDMI cable has problems. If your Hulu wont play on HDMI, here’s how to fix this issue:

  1. Disconnect the HDMI cable from your laptop and television screen.
  2. Turn both the systems off and unplug them from the power source.
  3. Reconnect the cable with the TV screen and laptop.
  4. Plug your laptop and TV with the power socket and switch on both systems.

How to perform a complete system reboot?

Hulu not working

If you have tried everything and the problems persist, then below are a few other things that you can try to get your system up and running:

  • You can restart your Smart TV, Game console, or the device you are using to stream Hulu.
  • You may have problems with your internet connection. Restart your router and unplug all devices from power for at least 60 seconds.
  • Switch off your modem from an internet connection for 30 to 60 seconds.
  • Change the location of your router. When the router is behind an object, your streaming devices may have connectivity issues. Place your WiFi router someplace higher for improving internet signal strength. 

Sometimes errors can be easily solved by a complete system reboot. If this fixes the issue then the problem is probably with your router. You can either buy a whole-home WiFi system or purchase a new router.

If Hulu wont play on HDMI, how can we check if the app is down?

Sometimes you try every approach to fix application bugs but still, the app isn’t working. It might be due to problems at the server end. To check if a website link is down, you can use services like Downdetector to see if other people are also having Hulu problems. This will not help you fix the Hulu error code but will help you identify the root cause of the problem.

The steps you need to follow are:

  • Open the Downdetector website.
  • Click on the search bar and type Hulu. Then click the search/magnifier icon or press Enter on your keyboard.
  • See the pattern on the chart for recent activity on the website. The spikes indicate the number of problems reported by users throughout the day. 
  • Scroll down in the same window and click on the Live Outages Map button.
  • Look for the red spots in the map to find where the outrages occurred.

If you see a lot of red spots, it means that the problem is with the Hulu server and you won’t be able to fix it yourself.  

Conclusion

The potential to change our lives through technology is more apparent than ever, given how a simple task of connecting a TV screen with a video streaming device via an HDMI cable can be performed by anyone who can follow a few steps. Furthermore, you can browse Hulu’s community and find answers to all your questions regarding this platform.

When Your Nintendo Switch Keeps Making Noise: Do This

In 2022, the Nintendo Switch enjoys a good reputation among seasonal gamers, but it can have issues, primarily when used for prolonged periods. One example is that Nintendo Switch keeps making noise, which gets louder over time. Nobody likes interruptions while playing video games. So, it is not very pleasant.  

You can use Nintendo Switch as a tablet and a gaming console. Its software supports online gaming via internet connectivity. You can also connect it with other consoles. A Nintendo Switch contains versatile features like switches on the TV, supports voice calls, and talks to your friends while chatting.

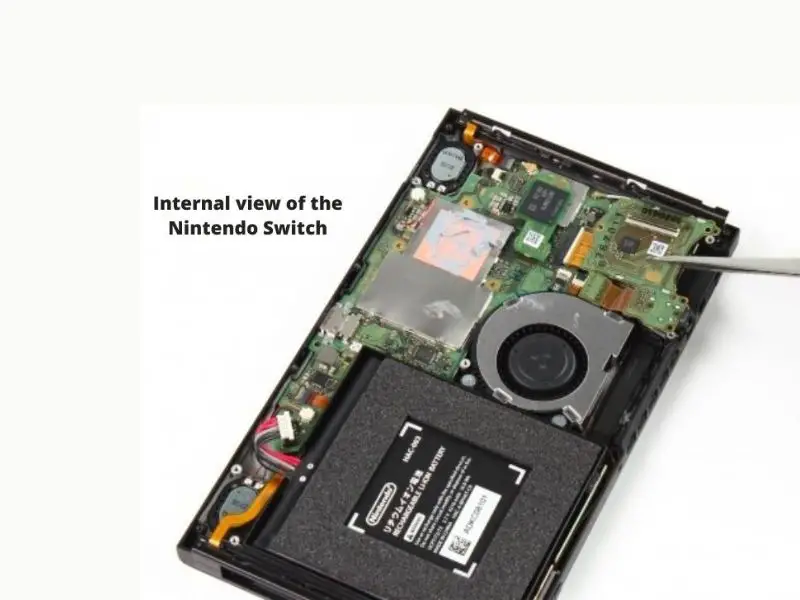
There could be multiple reasons causing weird noises in the Nintendo Switch. The Nintendo Switch consists of a fan along with its other components. The fan in the Nintendo Switch keeps making noise while running. If you face a similar problem, then here is your guide. Here, you will know why it happens and how to fix it.

Is it normal for Nintendo Switch fan to be loud?

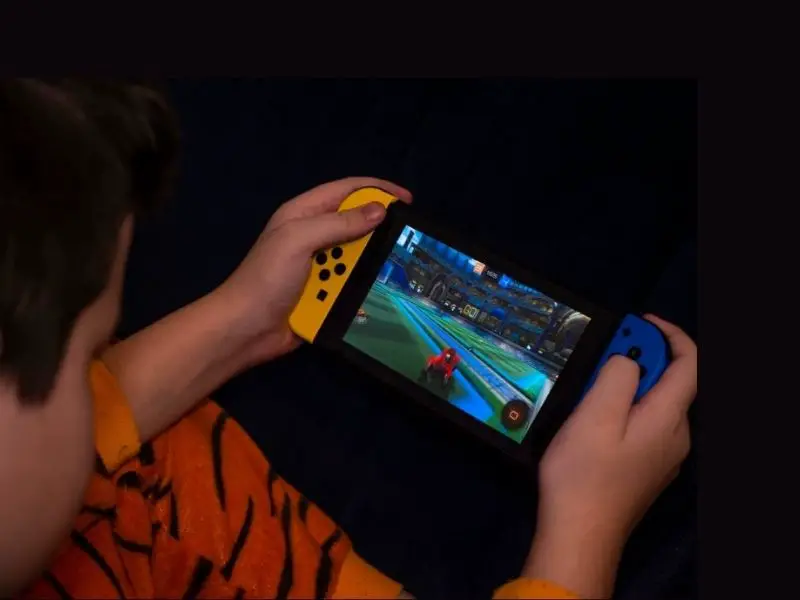
Man playing Nintendo switch

Well, some of the fan noise is normal. When the unit becomes loaded while playing video games, the fan blows to cool down the unit before it shuts off. If it happens occasionally, then you can expect it to be normal. However, it might be an issue if the fan blows too often, making weird noises.

Any noises like gurgling, grinding, or a loose bearing from the fan is never normal, and you need to fix this problem. You can simply fix the problem by following the steps mentioned ahead in the article. 

Are you having trouble while connecting your Nintendo Switch to Public Wi-Fi? If yes, follow a few simple steps, and you are good to resume gaming. 

Why does the Nintendo Switch keep making noise?

child playing the nintendo switch

Most probably Nintendo Switch makes noise if used for more extended periods continuously. When Nintendo Switch is used for extended periods, it becomes loaded and gets loud. Additionally, if the fan is noisy on the startup, it will cause the Nintendo Switch to heat up. It can damage your Nintendo Switch ultimately.

Furthermore, the dirty vents in your Nintendo Switch can also lead to disturbing noises. It makes it difficult for the fan to keep the Nintendo Switch cool and leads to loud noises.

The way you hold your Nintendo Switch also plays a role in making noise. Holding the Nintendo Switch too tightly causes your Nintendo Switch to heat up. It leads the Switch to produce more noise than usual. 

How do I fix a noisy fan?

Internal view of the Nintendo Switch

Following is a brief guide to fix Nintendo Switch that keeps making noise;

Clean the Nintendo Switch

The dirty vents and other openings of your Nintendo Switch make it difficult for the fan to keep the console cool. So, it leads to the heating up of your Nintendo Switch. Thus, it causes loud noises in your Nintendo Switch. The cleaning of your Nintendo Switch improves its performance and helps to reduce weird noises. 

Blowing out the inside of the unit with compressed air can be helpful to reduce noises. Compressed air is a powerful way to remove dust or debris from the vents and openings of your Nintendo Switch.  

Be careful while blowing as some compressed air cans have much pressure. Avoid blowing the compressed air directly into the fan vent as it can be damaging.

Replace internal fan

Most probably, Nintendo Switch keeps making noise because of a faulty fan. So, replacing the internal fan of your Nintendo Switch is the perfect way to get rid of the issue. 

Do not forget to read all the points in the instruction manual of the Nintendo switch to have an idea about its functioning.

Following is a step-by-step guide to replacing the internal fan with a new one;

  • Collect all the essential tools, including thermal paste, a brand-new fan, and screwdrivers.
  • Switch off the Nintendo Switch to avoid electrical damages during the fan replacement process.
  • Then, remove the rear panel from the Nintendo Switch by using Screwdrivers. Further, remove all other screws connecting the upper surface to the rest of the Nintendo Switch. It will help you access the Nintendo Switch’s inner parts for replacement.
  • Then, you will see an SD card in one of the corners. Gently remove it to avoid damaging any connectors.
  • Then, disconnect the battery from the motherboard.
  • Then, remove the heat sink underneath the battery by using screwdrivers. You see a thermal paste on the power supply surface when removing the heat sink. Use alcohol to remove this thermal paste and replace it with a new thermal paste. Gently rub thermal paste to assemble with parts of Nintendo Switch.
  • Then, disconnect the fan cables that connect the fan with the Nintendo Switch. Disconnect all the screws so that it becomes easy to remove the fan. 
  • Then, remove the Nintendo Switch fan gently without disturbing other parts. Place a new fan in place of it. Screw it back tightly. Connect all the cables that connect the fan with the Nintendo Switch. 
  • Place the heat sink and connect the battery back. Put the SD card and the rear panel back in place. Then, fix all the screws tightly. 
  • Turn on the Nintendo Switch and check whether the Nintendo Switch keeps making noise or not. 

Why does my Nintendo Switch make a buzzing sound?

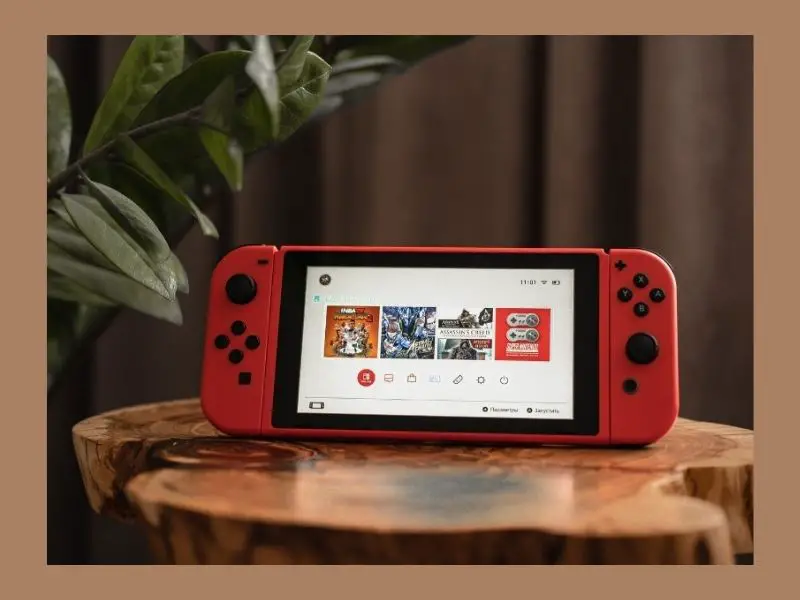
Photo of a nintendo switch

 A Nintendo Switch might keep making buzzing noise because of the following reasons;

  • The Nintendo Switch might be dirty.
  • Using the Nintendo Switch for more extended periods
  • Using the console in hot areas
  • Faulty Nintendo Switch fan 
  • Holding your Nintendo Switch tightly (it causes the Nintendo Switch to heat up, making weird noises)

Conclusion

The above article discusses the causes why Nintendo Switch keeps making noise and how you can fix it. Do not forget to read the instructions in the manual carefully. Follow all the steps mentioned above to ideally replace a faulty fan with a brand-new one. If you still find any glitches, connect with a technician to fix the issue.   

BBC iPlayer Keeps Buffering: Fix The Loading Issue Here

0

BBC iPlayer keeps buffering is one of the most common problems users face when streaming online content. If you are an iPlayer user and are getting frustrated with the constant buffering and freezing, this guide is for you. 

The BBC iPlayer is the most popular streaming platform in the UK. It is free and available to anyone in the UK who has a Smart TV, mobile, tablet, or computer. The BBC iPlayer is a long-standing brand that has grown a substantial user base in the UK. 

Despite this growth, there are times when the service may experience buffering issues due to various reasons. This guide will explain the reasons for buffering and the possible solutions to deal with the problem. 

What Broadband Speed Do I Need for BBC iPlayer

wifi icon on laptop

BBC iPlayer is a high-definition video streaming service that requires a faster internet connection. As a minimum, you need a broadband speed of 1.5 Mbps for standard streaming and 5 Mbps for high-quality streaming.

BBC iPlayer only offers a handful of programs in UHD (4K) but is constantly testing 4K programming. You will always see different shows in 4K on the iPlayer. For experiencing your favorite shows in 4K, the BBC recommends an internet speed of 24 Mbps.  

Bear in mind that BBC iPlayer uses an Adaptive Bitrate (ABR) technology on some devices. It can automatically adjust the quality of the video to match the bandwidth available and avoid buffering.

Why Does My BBC iPlayer Buffer

buffering on an iPad

There are a couple of reasons why your BBC iPlayer keeps buffering. The most common reasons are as follows:

  • Poor internet speed or unstable internet connection
  • Multiple devices connected to the internet or streaming simultaneously
  • An outdated BBC iPlayer app or an outdated web browser
  • Video quality (HD or UHD)
  • Peering issues between the CDN (Content Delivery Network) and the ISP (Internet Service Provider)
  • Geo-restricted locations 
  • Cache memory
  • A problematic streaming device

How Do I Stop BBC iPlayer from Buffering

couple watching tv and using laptop

To stop the BBC iPlayer from buffering, here are some possible solutions:

Check your internet speed

The buffering of a video may slow down the playback speed or stop it completely due to insufficient bandwidth. Firstly, check your internet connection to find out if there are any issues, such as a slow speed or disconnections.

Test your internet speed online. This will assure you whether your poor internet speed is causing buffering issues. If your internet speed is poor, the following solutions should help lessen the occurrence of buffering problems:

Disconnect your streaming device from the internet and then reconnect.

  • Restart your router and modem
  • Restart your device
  • Change the position of the router. 
  • Change the WiFi channel.
  • Disconnect all other devices connected to the same internet. 
  • Avoid watching BBC iPlayer during peak hours.
  • Upgrade your internet plan
  • Invest in the WiFi range extender

Use a different browser

Sometimes BBC iPlayer fails to work because of a faulty web browser. If you are having trouble loading BBC iPlayer with a browser on your computer, mobile, or tablet, try using a different web browser. This may help you fix buffering issues. Also, make sure your laptop or computer has a compatible internet browser.

Updating your current browser might also help resolve the issue. To update your Chrome browser, follow these steps:

  • Open Google Chrome and click on three dots on the top right corner
  • Navigate to Help and click About Google Chrome
  • If the update is available, Chrome will start updating automatically
  • Once completed, click on the Relaunch button to finish updating      

Reduce video quality

BBC iPlayer keeps buffering issue can also be caused due to High Definition programs running on the internet that is not strong enough to support HD quality videos. These HD programs need more bandwidth. Therefore, it is necessary to reduce the video quality and switch to Standard Definition (SD) to watch your favorite content without any delays or buffering.     

To switch to SD quality on your Smart TV:

  • Open the BBC iPlayer and go to Settings
  • Go to Video Quality
  • Select Standard Definition

To change the video quality on your laptop or computer:

  • Click on the Settings icon in the playback bar
  • Click on Video Quality
  • Choose Low or Medium 

Update the iPlayer app

The BBC iPlayer app is regularly updated with new features, fixes, and performance enhancements. If the app is not updated on your mobile or Smart TV, you may experience buffering issues.

To update the iPlayer app on your Smart TV:

  • From your remote, press the Home button to go to Home Screen on your TV
  • Go to Settings
  • Navigate to Apps and click on My Apps
  • Select the BBC iPlayer app and open the sub-menu by pressing and holding the Enter button on your remote
  • Select Update App to start updating the application

To update the app on your mobile:

  • Go to the Play Store
  • Tap on your profile and select Manage Apps & Devices
  • Under the Overview section, you will find Updates Available
  • Click on it to see if the BBC iPlayer is on the list of the apps
  • If yes, tap on it to update

Clear Cache

You can also resolve the BBC iPlayer keeps buffering issue by clearing the cache data.

To clear the cache of the app on your Android mobile:

  • Go to Settings and select Apps & Notifications
  • Click on See All Apps and look out for the BBC iPlayer
  • Click on the app and select Storage & Cache
  • Select Clear Cache to remove all the cache data of the app. 

If nothing works, download programs from the BBC iPlayer if you live in the UK and want to watch your favorite content offline.

Conclusion

BBC iPlayer is one of the most popular video-on-demand services that allows you to watch your favorite content anytime. However, it can be frustrating when the service buffers. Hopefully, this guide has been helpful, and you are now able to stream content without any buffering issues.   

LG TV Keeps Making A Humming Noise: Fix It Here

0

Does your LG TV keeps making a humming noise?  The overlapping of dialogues can be annoying when you are watching your favorite TV shows. It doesn’t have to be a constant problem.

LG TV hosts a range of channels and apps that you can enjoy every weekend. LG devices are primarily free of faults, but if you hear a humming sound, you can fix it on your own. Despite these minor issues, TVs from LG offer a great viewing experience for children and adults alike. 

If LG TV keeps making a humming noise, it is not a huge problem. You can fix the humming noise by adjusting the settings of your LG TV. We have got the information you need to resolve the issue of the humming noise on your LG TV.

Why Does LG TV Keeps Making A Humming Noise?

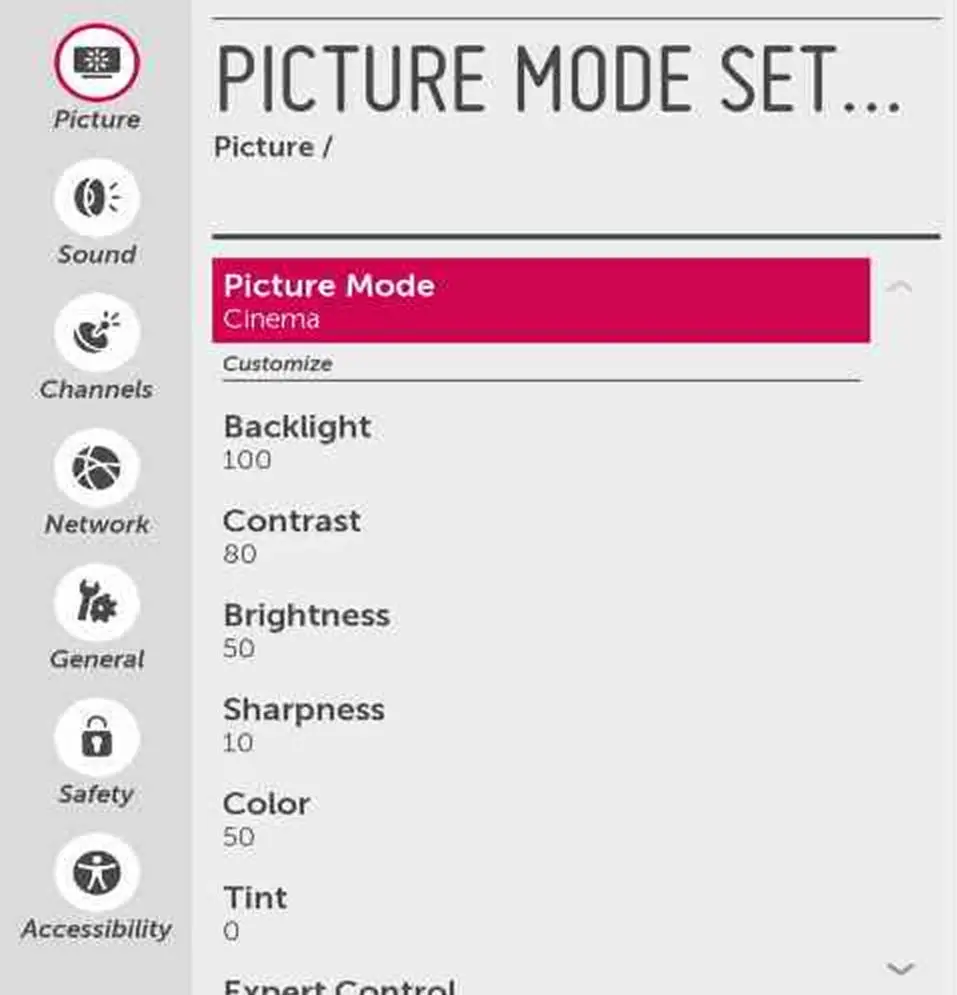
picture mode set

There are many reasons LG TV keeps making a humming noise; sometimes, LG TVs start rebooting out of nowhere. To check the overall performance of your TV, you need to check all aspects. It may sound tedious, but the flaws in the design and functioning of LG TV are minor and can be fixed easily. Here is a list of all the potential problems you might be facing.

Brightness Levels Could Be High

When the brightness levels are too high, LG TV starts making a humming noise. You can change the brightness levels on your LG TV by following the given steps:

  1. Press the “Smart” button on your remote.
  2. Go to “Settings”
  3. Click on the “Picture” tab.
  4. Go to “Picture Mode”
  5. Scroll down to the “Brightness” settings.
  6. Change the brightness settings until the humming noise stops.

Make sure you check all the levels of brightness. Keep your television on “mute” as you change the settings. Once you reach the optimum brightness level and the humming noise stops, you have fixed your LG TV.

If it doesn’t work, your speakers might have a problem.

Loud Volume Settings Can Damage Speakers 

If you are used to listening to your TV at a high volume, it might cause a humming sound in the speakers. Turn down the volume and listen for the humming noise. If the humming noise disappears, it means that you need to use a lower volume setting on your LG TV.

Faulty Speakers From Excessive Usage 

If LG TV keeps making a humming noise, the noise stops as soon as you put it on mute. It means that there is a problem with the speakers. Call LG customer service and see if you can fix the problem on your own. If not, take your LG TV  to the nearest service centre and fix it.

Repeated Overheating Damages Fans

The cooling fans in LG TV get damaged after some time. If you have overused your LG TV or placed it in a cramped corner, the fan would have to run overtime. If you can replace the fan on your own, then get a new one from an LG TV store. Therefore, you should take your TV to the nearest customer service centre and get the fan fixed. 

Your TV Could Be Malfunctioning

If you have joust bought a brand new LG TV and it makes a humming noise, you might have a malfunctioning model. The LG TV LM620T range was diagnosed with a humming problem in 2012. If you were not aware of the situation, you need to replace your TV with another one.

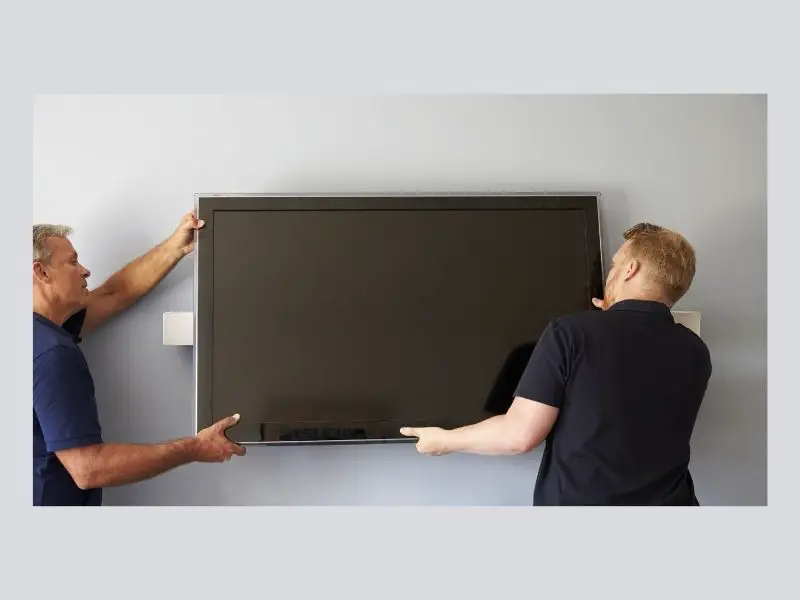
Maybe your TV mounted  close to the wall

men fitting tv to wall

When an LG TV is placed too close to the wall, it makes a humming noise. When LG TV becomes overheated because of poor ventilation, it produces humming noise. Make sure you have at least 10 centimetres between the wall and the back of the TV to allow proper air circulation. There are a few ways in which you can fix this problem.

  • If your LG TV is mounted, you might need to fix the screws at the back. Loosen the screws a little to allow space between the wall and the LG TV.
  • To create space, you can place the LG TV on a small table or shelf and move it a few inches away from the wall. 
  • Place the LG TV in a cool spot to ensure it doesn’t overheat. 
  • Amp up the air conditioning to keep the area cool.  

Once you have maintained a proper distance between the wall and LG TV, turn it on to check whether the humming sound has stopped or not. If the problem isn’t resolved, try the next solution.   

Damage to Audio ICs Lead to Distortion

The humming noise on LG TV can be caused by distorted audio. Sometimes the sound settings can be mismatched, or a high sound setting can damage the audio system. If you have lowered your LG TV volume and still have the humming sound, try to fix it by troubleshooting your LG TV.  Troubleshoot the audio to resolve the issue of the audio distortion. Follow the given steps to fix the problem:

  1. The first step is to carry out a good test.
  2. Click on “settings” on your remote control. 
  3. Go to “All Settings”.
  4. Select ” Sound” in All settings.
  5. Click on “Sound Test”
  6. When the sound test starts, listen carefully. 
  7. Click on “yes” to finish the sound test if you can hear the sound.

Check to see if you still hear the humming sound. If you don’t hear humming anymore, your problem is solved. 

If you have any audio problems, you can “Schedule A Repair” by visiting the support page on LG TV. 

On the other hand, if you can hear the sound clearly and the humming noise is still audible, the problem might not be in the audio settings. 

Conclusion

LG TV making a humming sound is a common problem. It doesn’t mean that you should panic. Just try the steps we have outlined for you, and you will have fixed the humming sound issue in no time. Remember that LG TV is a sophisticated machine and must be handled properly. Contact LG TV support to get a permanent fix if you still face the same problem after trying all the solutions we have provided.

Why My PS5 Keeps Making Clicking Noise: Solutions

Sony designed PS5 to offer non-stop entertainment for gamers. If your PS5 keeps making clicking noise, you might have a habit of playing long hours. There can be many reasons that could lead a PS5 to make these annoying clicking noises. 

The pandemic has forced many people to stay indoors for a long time, and PS5 offers an escape. PS5 offers exclusive games with high-quality audio and decreased loading time. The fact that these consoles can run into errors makes them less attractive.  

If your PS5 has a habit of making weird clicking noises, it means that there is something wrong with the fan or the console has overheated. To resolve this issue, we have a step-by-step guide that is easy to understand and implement. 

Why Does PS5 Keeps Making Clicking Noise?

Photo of a GPU

To find out the problem behind the annoying noise, you need to check every console part to make sure everything is in its place. If you have a brand new PS5, it should not be making any noise. 

You will have to send your PS5 for repairs if your PS5 surpasses its warranty period. Here are the reasons that lead to clicking noises in your PS5. 

Cramped Console

If you have placed the console at a place where its outlets are not properly ventilated, it might start making noises. You will significantly limit your PS5’s ability to air circulate air by placing it in a corner of your room. Due to the lack of air, the fan starts working at a higher speed than it usually does. As a result, the fan starts making clicking noises. 

Make sure the PS5 console is placed in a properly ventilated place. Keep a 10-centimetre distance vacant area on all four sides of the console. If it is possible to set the PS5 console in another location, move it to a spacious area of the room. Start your PS5 and check if it’s making a clicking noise. If the noise stops, the problem is a lack of space. 

Incorrect Installation

When one or more components of the PS5 console are not correctly connected, it may cause friction between the parts of the machine. This friction can cause clicking noises in PS5. The incorrect cord installations can cause sparks and damage your PS5. In such as case, the system overheats, and you hear a clicking noise because of the fan’s speed. 

Check all the entry points of the PS% console. The cable connection should be appropriate and each plug should go into the right socket. . If a socket is loose, it is better to replace it than get a whole new PS5. 

A Voltage Problem Could Cause Your PS5 to Make Clicking Noise

part of a playstation

If you face voltage problems in your home, they will affect the working of your PS5 console. A sudden high voltage can cause damage to the fan and other parts of the PS5, which might be the reason behind PS5 making clicking noises. The fluctuating current interferes with the functioning of the fan, and it starts speeding or slowing down. 

Consult an expert to check the incoming voltage in your PS5. If there are problems with wiring or switchboards, replace them with new ones or ask for repairs. 

Loose Wires Can Cause Internal Short Circuits

Loose wires are a security hazard. If you have any wires coming out of your PS5 console, it’s a sign of damage. The fans inside the PS5 are the first thing that gets damaged due to loosely connected wires. The wires inside the console can also become overheated and melt, causing functional problems. 

Fix all the loose wires and check to see if they can be removed or replaced. It is essential to check the cables connecting to the fan as they might cause the fan to start hitting the cover of the console.

Surface Heat Does Not Let the PS5 Cool Itself Down

PS5 starts making clicking noises if not placed on a proper surface. The PS5 console will have a hard time dissipating heat if you place it on a rug or a cloth.  

Place the PS5 console on a surface that doesn’t attract much heat. You should place your PS5 console on top of your gaming table to allow its fans to suck in more air to cool down.  

A Dusty Fan Leads to Clicking Sounds

When dust accumulates in the air vents of the PS5 console, the fan starts working overtime, and PS5 keeps making clicking noises. The fan installed in your PS5 will overclock to suck in more air to cool down the components and as a result, will produce clicking noise. Therefore, the narrow crevices should be free of dust particles. 

Open the PS5 console by using specialised screwdrivers. Take off the lid and remove the air vents fixed on top of the fan. Make sure you keep all the screws in a safe place. Clean the air vents and the fan using a low-powered vacuum cleaner. 

Your PS5 Fan Could Have Attained Permanent Damage

After checking all the parts of the PS5 console, the fault might be in the fan. If the fan is damaged or tilted from its place, then PS5 starts making clicking noises. The blades of the fan might be hitting the console’s lid, resulting in clicking noises. Something the edges can unhinge from the primary motor causing further damage.

If you are confident that you can fix the fan on your own, then open the PS5 console and remove the fan. Clean all the parts and carefully set the fan in its proper place. If the clicking noise continues, it is time to call a professional to fix the fan or replace it for good.

Conclusion

PS5 is a robust gaming tool, and just like other machines, it can also glitch most of the time. If your PS5 keeps making clicking noises, try the solutions we have outlined for you. We hope you will resolve the problem by following the given guidelines. Once the issue is resolved, you can enjoy PS5 anywhere you want.  

Why My Lenovo Laptop Is Making Noise: 7 Reasons

0

In the 21st century, laptops have become an inevitable part of our daily life. Thousands of people use Lenovo laptops on a daily basis, as they are known for high utility. One small noise from your laptop could force you to ask yourself: Why my Lenovo laptop is making a noise? 

Lenovo is a Chinese-American multinational technology company that designs, produces, and markets consumer electronics, personal computers, software, business solutions, and related services. This manufacturer’s laptop is generally reliable, but it may produce some noise.

You are more likely to become annoyed by noisy laptops. This article explains why my Lenovo laptop is making noise and how to fix it. A multitude of factors could be considered to come up with a solution.

Why Does My Lenovo Laptop Make Noise?

man with ear next to laptop

Lenovo is a well-known brand, and their laptops are excellent, yet you may come across consumers who complain, “My Lenovo laptop is making noise.” If this is the case, you should be informed of the causes of the problem and how to resolve it. This problem can be induced by a variety of minor factors, but prolonged exposure to those factors may result in major consequences. The following are some plausible explanations.

Maybe it’s Overheating 

We often use laptops for an extended period, which causes overheating issues because you are running too many programs simultaneously. Due to this, your fan will move at a higher speed to cool down the CPU. This process will result in your Lenovo laptop making noise. Place your laptop on a stable, flat surface, such as a table or desk, to avoid this problem.

Dust or Air Particles Might Cause This

The most common reason behind the noise is dust. Typically, dust came in the air vents of fans, thus blocking them and making them noisy. Moreover, it makes your laptop’s overall performance slow. 

Unnecessary programs Could Throttle Your CPU

If you open many programs simultaneously, that can also be a reason for the noise. Running too many programs simultaneously can lead your laptop to overheat, which leads to noise production.

A Clogged or Broken Cooling Fan Could Be the Culprit

When a cooling fan gets old, it does not run smoothly and produces a buzzing sound. That could be because of dust or fan bearings worn out, resulting in the replacement of the fan. Air cannot reach the laptop due to blockages in the air vents. As a result, running some background software may cause your laptop to overheat and make unusual noises.

Failing or Bad Hard Drive Can Be Another fault

Problems in the hard drive may also lead the system to make a quiet whistling sound. When hard drives installed in your computer have gone wrong or are about to fail, your Lenovo laptop may make a buzzing sound because the memory sticks cannot construct solid and proper connections with the other laptop components.

Check Your Power Supply or Modem 

If your device has some power supply issue, it can also lead to a “my Lenovo laptop is making noise” issue. Connecting your laptop with a modem or other devices may also cause various dangerous threats, including this particular one. 

Malware Can Cause All Sorts of Damage

It is an intrusive program that damages and destroys computers and computer systems. As a result, essential system files are corrupted, the PC cannot function normally, and many installed apps and drivers are not functioning. Viruses or malware present on a compromised PC can also cause such issues.

How To Fix my Lenovo Laptop making noise?

man showing colleague work on laptop

As mentioned earlier, it is not a cause of concern if it remains checked timely. You should avoid the things which cause it. But, if you find this concern, it is easy to fix this by following the steps.

  • When your laptop is overheated, just restart the computer after some time, and it will stop or use a cooling pad.
  • You should take the laptop to the service to get the dust removed. Make sure to get rid of it by blowing air vents off the fan.
  • Close all the programs or windows that are irrelevant or unnecessary, and reduce the brightness to quiet the fan.
  • BIOS update and power manager (if BIOS/EC thermal control logic has issues)

You should follow the instructions given below if it becomes severe.

Start With Malware Removal

It is recommended to use reimage to remove malware from your laptop. Scan the entire machine to remove all hazardous infections and viruses. Both manually and automatically can be done. The “Manual” process requires great attention, and you must be highly skilled with computers and technology. For this reason, we strongly advise you to use the “Automatic” procedure. For this function, Reimage antimalware software can be used.

Update the Laptop’s Windows Version

The new and up-to-date window can also help you to solve this problem. Updated and bug’s fixed version allows you to use your Lenovo laptop with minimum noise. Moreover, you can also use third-party software to improve the fan speed and laptop function. 

Clean or Replace the Defective Fan

You can clean your laptop with compressed air without disassembling it. This is a cheap, readily available method of cleaning a laptop of dust and debris without disassembling it. Also, there is an option of replacing your existing laptop fan with a new one with the help of an expert.

Keep an Eye on Fan speed

You can also control your laptop’s fan speed by using drivers and windows. That should be done when you think fan speed is higher than average.

  • Go to my computer
  • Go to system properties
  • Check system types, e.g., 64bit or 32bit
  • Install hardware info of your system type
  • Run it and open the yellow color centers tab.
  • Scroll down to the CPU fan speed and adjust it to normal.

Power Saving Mode Should Be On

Turn on power-saving mode. That will limit your CPU usage and will allow your laptop to run smoothly cooler without using much cooling fan

To do that:

  •   Type power setting in the search bar.
  •   Click on additional power at the bottom.
  •   Click existing power plan (power saver).

Improve the Position of Laptop While Using it

Another simple method to remove your laptop’s noise is using it on a flat surface with proper ventilation. That can help in proper air flowing through the laptop, which prevents overheating, eventually resulting in low or no voices. 

Conclusion

We have listed all the possible causes and methods to fix the problem, “my Lenovo laptop is making noise.” We hope that your situation has been solved in the ways mentioned above. If still, your Lenovo laptop is making noise, then you should probably seek the assistance of an expert for repair or servicing. 

When Your Lenovo Laptop Keeps Disconnecting From WiFi

0

In today’s modern era, where 16% of the world’s companies are fully remote, no one can negate the importance of a stable WiFi connection. Sometimes, you might have some issues when you have a Lenovo laptop with unique features and qualities. You are facing a problem where your Lenovo laptop keeps disconnecting from WiFi, especially when using Windows 10.

A reliable internet connection makes our lives easier and allows us to work, educate, and save money. If your Lenovo laptop keeps disconnecting from WiFi, your response time decreases, making you more frustrated. In addition, an unreachable cloud is created.

Having a stable and strong WiFi connection is essential for laptops. Therefore, you may need to troubleshoot if you continuously disconnect from your WiFi connection. Here are some steps you can try. Before that, let’s view the causes of this concern.

Why My Lenovo Laptop Keeps Disconnecting From WiFi?

laptop turned on

Laptops from Lenovo are among the best laptops preferred by millions of users. Some issues may arise for most users, which causes Lenovo laptops to keep disconnecting from WiFi. The leading causes of the concern are listed below:

  • If the BIOS on your Lenovo PC isn’t up-to-date, it can cause this issue
  • Something is wrong with the hardware or software of your Lenovo laptop
  • The network adapter is not working properly
  • The driver is corrupted
  • The TCP/IP settings are incorrect
  • When your Windows machine sleeps after some time when you keep it idle.
  • WiFi issues.

After entering BIOS and enabling Wireless LAN, you can diagnose your Wireless network’s status from Lenovo’s website and download and install the appropriate wireless LAN driver for your PC model.

How to Fix Lenovo Laptop That Keeps Disconnecting From WiFi?

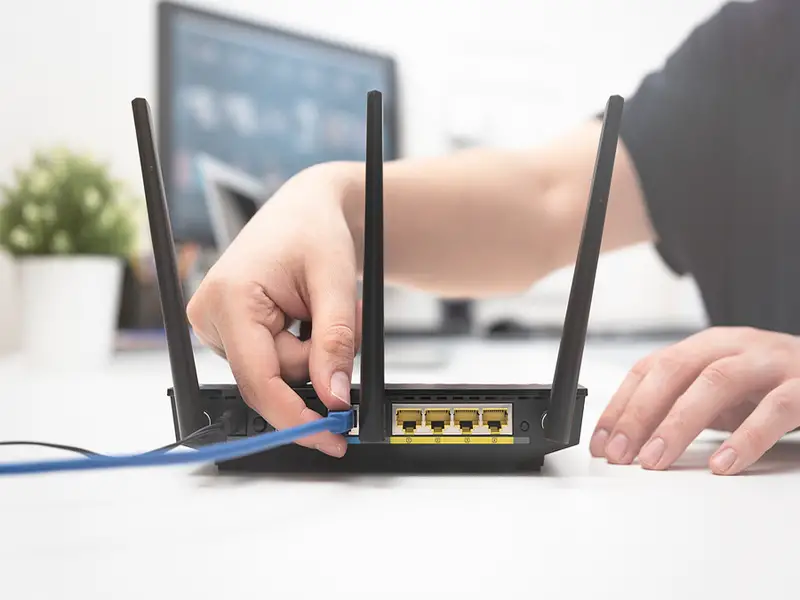
woman plugging wire into router

There are several ways to fix WiFi disconnection issues. You can use these to troubleshoot the problem. Make sure the wireless switch is on. Enable WLAN Autoconfiguration. Set up power management for your wireless card. Connect manually to the network.

Reboot Your Network Adapter

Your network adapter should be restarted. Follow these steps after rebooting your network adapter:

  • First, press the ‘Window+R’ keys simultaneously, then the ‘Run’ dialogue box will appear.
  • In the dialogue box, type ncpa.pl and press Enter to run it.
  • Select the ‘Network Adapter,’ right-click on it, and choose the ‘Disable’ option.
  • Go back to the network adapter option and right-click it. Now, from the menu option, choose ‘Enable.’

Check Drivers

Firstly, you should check the driver status of your device. Lenovo usually releases updates for their devices regularly. You are probably facing this problem because you have forgotten to update your driver for some time.

  • Open the Lenovo support website.
  • Pick the specific model of your device from the list.
  • Go to the tab labelled ‘Drivers and Software. The device will either search for updates manually or automatically.
  • Select automatic and wait for a few minutes.

During the procedure, you will need to reboot your device several times. It is essential to make sure that all the new updates are installed.

Remove Faulty Driver and Reinstall

The most common solution to many problems is removing and reinstalling everything on your system. So, troubleshooting the disconnecting error on your Lenovo laptop can be accomplished by reinstalling the Network Adapters from the web.

  • Click on the Windows Start button.
  • Select Device Manager.
  • Click the Network Adapter option.
  • Search for a suitable WiFi adapter for your Lenovo laptop, right-click on it, and then select the ‘Uninstall’ option from there.
  • When you have deleted or uninstalled the existing driver, click on ‘Network Adapters’ again and select ‘Scan for hardware changes.’
  • Once Windows has identified new WiFi drivers suitable for your system, it will automatically install them. This should fix your problem.

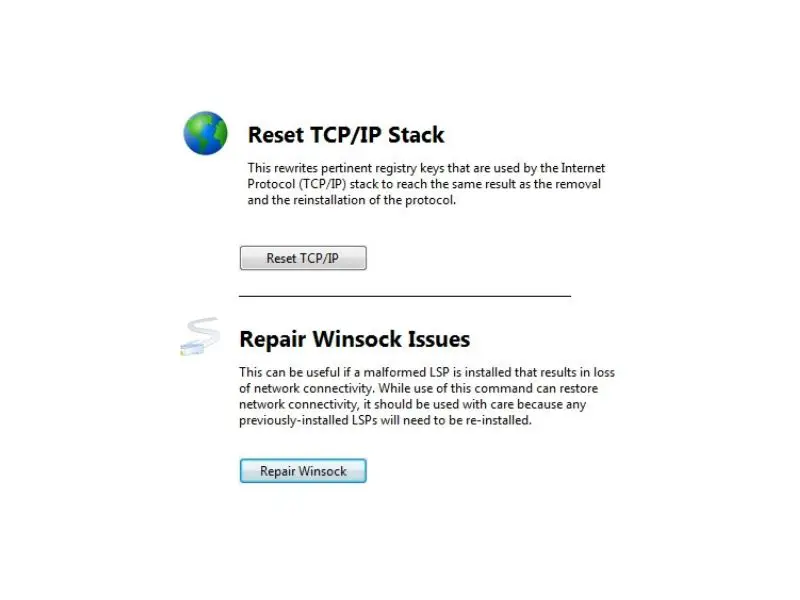
Reset TCP/IP Stack And Auto Tuning

repair windsock issues message

You can use this method by going to the Windows Start menu and searching for the command prompt that must be run as an administrator. Follow the instructions as given.

  • Write: ‘netsh int ip reset c: restlog. Txt’ in the given command box and then hit the enter button from the keyboard. Then write: ‘netsh int tcp set heuristics disabled’ and press enter key.
  • Similarly, input ‘netsh int tcp set global autotuninglevel=disabled’and also information ‘netsh int tcp set global rss=enabled’Â in the following lines given and then press the enter key from your keyboard by entering each command.
  • Try restarting your Lenovo laptop and then relaunching the WiFi to check if you can get a stable and reliable internet connection.

Execution Of The Network Troubleshoot

You can also use the in-built application ‘Network Troubleshoot’ to fix the Lenovo laptop that keeps disconnecting from WiFi. Follow the instructions provided for executing it.

  • After pressing the ‘ Windows ‘ key, type network troubleshoot in the search area. Select the option ‘Identify and repair network problems from the search results.
  • When you are in the troubleshooter window, follow only the instructions displayed on the screen and let the troubleshooter do the work.

Disable RDC (Remote Differential Compression)

If you do not own a server-based PC, you might not need this feature. Disable the quality to make full use of the connection’s bandwidth. Use the following method.

  • Start by clicking Start. Select the Programs category in the Control Panel
  • Click the Turn Windows features on or off link in the Programs and Features subcategory.
  • Find and uncheck Remote Differential Compression API Support from the list of features.
  • Click Ok.

These all above methods act as Wifi boosters.

Conclusion

WiFi instability is not a pleasant experience. There are many reasons why your Lenovo laptop keeps disconnecting from WiFi. You don’t have to worry about this. You can use several methods to fix it. Since you won’t be opening either up or tweaking the settings, none of these will cause a problem with the laptop or router.

Why Is My HDMI Not Working On My PS5: Fix The Console Here

Do you see a black screen or a “No Signal” error when you connect your PlayStation 5 with the TV screen and think to yourself: Why is my HDMI not working on my PS5? If yes, then you need not worry. There are many rowing the same boat.

For someone who’s a gaming addict, sitting down and discovering that the HDMI port on their PS5 is not working can be nerve-racking. It’s next to impossible that the TV is broken. Generally, this error has got something to do with your video connection.

If you find yourself having these issues, this guide will help you solve them. We will answer questions on fixing the HDMI port and connection problems on your PS5. Which port you should use and if there’s an alternative way to get past this.

No display? Troubleshoot your PS5

HDMI to PS5 on tv

The basic rule for debugging any electronic device is to check the common fixes and work your way up from there. For instance, you may encounter a black screen issue that may only be due to a faulty HDMI cable.

If you can’t answer the question, why is my HDMI not working on my PS5, check if the power cable is connected or not? Here are some steps that you should follow for troubleshooting:

  • Ensure that the PS5 is connected to the correct HDMI port.

Mask sure you selected the correct HDMI channel from your TV’s remote. You must cycle through all the HDMI inputs to ensure that you haven’t chosen the wrong one. Unplug and replug the HDMI cable so that the connection isn’t loose. If the port is correct, try switching to another one and make sure to switch to other channels too.

  • Circumvent any device attached between your PS5 and TV screen.

If an audio/video receiver is between your PS and TV, try bypassing it by connecting the PS5 directly to the TV. There may be issues at the receiver end, and the devices may not be communicating accurately.

  • Check both the ports physically: HDMI cable and TV’s port.

Use a flashlight to check for any bent pins in the HDMI cable and the PS5 port. Maybe, the reason behind the black screen that you see on your TV is these bent pins. Use a screwdriver to push them back into place gently.

  • Try switching to another HDMI cable

Your cable could be faulty. Try purchasing another cable as this may help you get rid of the black screen. If, however, you still see the No Signal error, you can try changing the resolution in safe mode. Sometimes changing the screen’s resolution can also solve HDMI-related issues.

Fixing the HDMI port on a PS5

PS5 and HDMI port

If you’re facing issues with the display on your PS5, then it might be due to the HDMI port. Luckily, fixing this port is very simple. Follow these suggestions. If one doesn’t fit, please move on to the next one.

  • Examining the ports

The HDMI port on a PS5 is a half octagon between the AC power and ethernet ports. Examine it for any damage or dust accumulation. Also, check if the cables are correctly inserted at both ends.

  • Check your HDTV

The problem may not be with your PS5 but your LED TV. Try using a different screen. If you’re using a smart TV, ensure that the firmware is updated to the latest version.

  • Try disabling HDR

If the screen is flickering or blinking, you may want to turn off the HDR setting on your PS5. To do this, go to the PS5 Settings > Screen and Video > Video Output > HDR and turn it off.

  • Troubleshoot HDMI port by booting into safe mode

To help you pinpoint the HDMI port issue, you can boot your PS5 in safe mode. To do this, press and hold the power button until the PlayStation beeps twice. Then press the power button again and hold it for about 7 seconds. Release the button after you hear two beeps. This will boot the PS5 into Safe Mode. Connect the DualSense wireless controller via a USB cable (If you’re using a wireless controller, you’ll see a message on the screen telling you to use a USB cable). Press the PS button on the controller to see the safe mode menu. Here, select Change Video Output. Set the HDCP mode to HDCP 1.4 and restart your PS5.

The HDMI cable you should use for a PS5

HDMi 2.1 for ps5

PlayStation 5 comes with an updated next-generation console to support higher frame rates up to 120 frames per second (fps). Hence, the PS5 uses an HDMI 2.1 cable. This cable provides better frame rates which means you can transfer 4K or 8K images from your gaming console to your TV.

PS5 games come with modes that target higher graphical fidelity or enhanced frame rates. The player needs to play in 4K resolution at 60fps or HD at 120fps. The exact parameters will, however, vary between each of these games.

Features of HDMI 2.1

close up of HDMI Cable

With the introduction of mainstream consoles by Microsoft and Sony, HDMI 2.0 can no longer support the new features required to run these platforms seamlessly. Hence, the battle between choosing between the two seems all but finished.

HDMI 2.1 supports an HDR display which allows altering the HDR metadata from one scene to another and from one frame to another. It supports an enhanced audio return channel (eARC), eliminating frame tearing in games. This audio feature also allows quick media switching and reduces the delay between video sources due to the 2.1 connector’s expanded bandwidth.

The cable also has an automatic low latency mode (ALLM) which helps cut down signal latency, crucial in gaming.

Preventing damage to the HDMI port in PS5

Every day plugging and unplugging can cause wear and tear to the HDMI port on your PS5. There’s no denying that the fault lies in its fragile manufacturing. Shoving the cable too far in or with too much pressure could amplify the damage.

Here are some of the guides you can follow to prevent any future harm to your port:

  • Use the HDMI cable’s perfect length from your console to your HDTV. Cables that are too long or too short add unnecessary pressure on the HDMI port.
  • Try not to move the PlayStation around while the cable is still inside the console. If you need to move your gaming console, first unplug it from the port.
  • Don’t place your console in a very heightened place or where it’s easy to bump off. Falls that are uncalled for cause the most impairment.

Conclusion

There’s still a lot that needs untangling regarding HDMI connections to the PS5. Hence, this guide can help you solve these issues. If one trick doesn’t get your ball rolling, you may need to switch and try something else. Our Guides will help you understand why is my HDMI not working on my PS5 and get the best out of your PS5 console. You may also visit the PS5 official help guide for more information.

Xbox Series X Keeps Stopping Installation Error: Fix It

Xbox Series X offers a wide range of games and services that you can update over time. However, if Xbox Series X keeps stopping installation, there might be errors in the Xbox that you have not detected.

Xbox hosts multiple games simultaneously and has excellent sound and visual quality. Players can enjoy the gaming experience with widescreen monitors and indulge in high-tech action sequences. Adding a new game to a console makes the experience even more exciting.

Microsoft offers backward compatible games on the Xbox console, and it has a total of 343 games on the console. If you have trouble downloading and your Xbox Series X keeps stopping installation, we have outlined all the major problems you might face. 

Why Does Xbox Series X Keeps Stopping Installation? 

xbox series installer

Xbox Series X keeps stopping installation because there might be underlying issues in your console. If you download games from the internet and not the disc, your games might get corrupted. Another reason for blocked installations is that the Xbox updates its games regularly and can interfere with downloading. Here are a few solutions that can help you install new games without stopping in the middle.

Clear Locally Saved Games

xbox series storage

When you have a backup of locally saved games, it fills up the space on your hard drive. The locally saved games update regularly. The installation will stop if your Xbox is being updated while you try to download a new game. Follow the instructions below to fix the issue:

  1. Remove the disc from the console. 
  2. Hold the “Xbox” button on the controller to open the “Guide” menu.
  3. Go to “Profile & Systems”.
  4. Click on “Settings”
  5. Navigate to “Systems”
  6. Click on “Storage Devices”

Once you reach the “Storage Devices” option, follow these steps:

  • Click on “Clear Local Saved Games”
  • This option will delete only the locally saved data, and your games will remain saved in the console.
  • Confirm it by clicking on “yes”.
  • Go back to the home screen and try to install the game again. 

Cancel The Download By Going Offline

xbox general settings

When the download process pauses in the middle, it is challenging to continue playing on your Xbox. Make sure you turn off your Xbox before you start installing another game. If your Xbox Series X keeps stopping Installation, you can’t continue the same download process. To clear your download history, you have to go offline. Here are a few steps you can follow to cancel the download and start afresh:

  1. Go to the home page.
  2. Push the Xbox button to open the “Guide” menu.
  3. Go to the “Systems” option in the Guide.
  4. Select “All Settings” in the Systems.
  5. Go to “Network Settings” and scroll down.
  6. Click on “offline” 

Once the console is off, you need to remove the game from the list of downloads.

  1. Go to the home screen.
  2. Click on “My Games And Apps”
  3. Choose “Queue” from the options.
  4. Select the game you want to remove from the console.
  5. Push the “Menu” button on the controller.
  6. You will see a “Cancel” tab.
  7. You will remove click Cancel and the game.
  8. Remove the Game disc from the console. 

After removing the game disc from your console, you must restart the console.

  1. Go to the “Guide” menu.
  2. Click on Settings.
  3. Choose the “Restart Console” option.
  4. Confirm “Yes” to restart your console and try to download the game again. 

When the console restarts, try to download the game again. If you can download it quickly, then your problem is resolved. If not, try the next solution. 

Power Cycle Your Console 

xbox full shutdown menu

If your game has stopped downloading, you can power cycle your console if it’s frozen. Follow the given guidelines to restart your console:

  1. Hold the Xbox button on your console for ten seconds. 
  2. The Xbox will turn off.
  3. Press the Xbox button again using your console or the Xbox controller.
  4. The Xbox will turn on.
  5. Try to install the game and see if it works.

Reconnect The Console

If the power cycle option doesn’t work, try reconnecting the Xbox to get the desired result. Here is the process:

  1. Click and hold the Xbox button to disconnect the console for ten seconds. 
  2. Unplug the power cable from the power supply.
  3. Keep the console disconnected for ten seconds. 
  4. Plugin the power cable.
  5. Press and hold the “Xbox” button to reconnect it.
  6. Check to see if you can install the game.

If the installation stops, try the next solution. 

Reset The Console

When corrupt files are in your console, it can hinder the installation process. If you want to clear out your hard drive of malware, you can do a factory reset. Follow these steps:

  1. Hold the Xbox button.
  2. Go to the “Guide” menu.
  3. Click on “Profile & System”
  4. In the next step, select “Settings”
  5. Choose “System” in the settings menu.
  6. Scroll to “Console Info” in the system.
  7. You will find “Reset Console”

When you reach the “Reset Console” tab, the Xbox will give you two options:

  1. Reset And Remove Everything
    This option will remove everything from your console. You will have a completely clean console as all of your accounts, games, apps, Xbox associations, and Xbox will remove saved settings. If you want to keep your games intact, avoid this option at all costs. 
  2. Reset And Keep My Games & Apps
    This option will remove the malware and Operating System from your console. All the games and data will remain intact. Always choose this option when resetting your console. 

Conclusion

Xbox Series X hosts a treasure of games. However, if you get bored of playing the same game over and over again, you can install the latest games on your Xbox. Before you get too excited and try to download all the new games, check the current storage on your Xbox series X and then proceed.  If you have the proper storage capacity, try the solutions we have outlined. If the installation stopping error persists, contact Xbox Support for further assistance.