Home Blog Page 6

When Funimation Wont Play On HDMI: Fix It Here

0

Are you having difficulty watching Funimation anime on your TV, and wonder why you can’t enjoy your free time? There are a few reasons why Funimation wont play on HDMI, but you can fix it quickly.   

Funimation is one of the most popular anime streaming platforms. Almost every device or platform supports Funimation, including mobiles, tablets, gaming consoles, and Smart TVs.   

However, when you connect your laptop or mobile to your TV using HDMI, you face connectivity issues. This guide will discuss the reasons and solutions to fix the HDMI connection problem.  

How Can I Play Funimation on My TV?

teenage boy watching tv with snacks

The best way to play Funimation on your TV is by connecting your laptop or phone with a TV using an HDMI cable. If you don’t own a Smart TV, this is the option. It is one of the most reliable and most accessible methods that help you mirror your laptop’s screen to your TV.

  • First, insert one end of the HDMI cable into your laptop’s HDMI port.
  • Insert the other end of the cable into your TV’s HDMI port.
  • Next, on your TV remote, press the Input or Source button.
  • Select HDMI 1 or HDMI 2 on your TV screen accordingly. This way, you can easily stream Funimation on a big screen.

Reasons Why Funimation Wont Play on HDMI

funimation on HDMI

From faulty HDMI cable or port to outdated device or web browser, there could be many reasons why Funimation wont play on HDMI.

Dusty or faulty HDMI port

If the HDMI port on your device or TV has build-up dust or dirt, you may experience connectivity issues. These ports can catch dust quickly that needs to be removed for proper connection between devices through an HDMI cable.

Also, a faulty or damaged HDMI cable or port can cause trouble in playing Funimation on a big screen.

Loose Connection

Another possibility is that there may be a loose connection between your laptop or gaming console and TV. A flexible HDMI cable on either end could cause an HDMI error.  

Wrong input source

When you use an HDMI cable to pair devices, the cable will instantly transmit the feed from the device to your TV. However, when you select the wrong input source on your TV, you will see a blank screen.

Many users fail to stream Funimation via HDMI only because of the selection of the incorrect source on their TV that doesn’t match the port they have plugged the HDMI cable into.

Incompatible HDMI cable

Funimation HDMI error could also be the reason for an incompatible HDMI cable. Your adapter won’t work with your TV if you get a message on your screen stating, ‘HDCP-compatible device is required.’ If one of your devices is not HDCP compliant, you will get an error. Make sure you have a compatible HDMI cable for your streaming device. 

Outdated device

All electronic devices have an effective lifespan where they receive frequent updates to function correctly. If your TV is not updated, it may not recognise external devices. Also, if your connected device is faulty or outdated, you will be unable to connect and play Funimation on TV via the HDMI port.

How Do I Fix Funimation HDMI Issue?

hdmi

HDMI cables and TVs are designed consistently to work together, but occasional incompatibilities can cause the Funimation app not to work. If you are experiencing HDMI issues, try the following solutions. 

Clean or Change the port

To play Funimation on HDMI without any issues, remove the build-up dust in the HDMI port. This dust sometimes prevents the device from functioning correctly. You can either use a blower or canned air to remove dust. After cleaning the port properly, reconnect your HDMI cable to check if the issue is still there.   

You can also use a different port on your TV. A faulty port can cause connectivity issues. Therefore, switching to another HDMI port is necessary if the previous one is faulty.

Change the HDMI cable

Sometimes, a faulty HDMI cable won’t allow you to connect your device to the TV. If you have another HDMI cable at home, change it with the current one. This will help you know whether the faulty cable was causing the issue.

Choose the correct input source

Always select the correct input source to display your laptop screen on a TV. Select the same source number if you have connected the HDMI cable to HDMI port 1 on your TV. If it is HDMI 1, select 1, and if it is HDMI 2, choose 2.    

Use a browser instead of the app

If you are playing Funimation via a web browser, try to use the Funimation app to stream through HDMI. Also, if you are using the app, try to switch to a web browser to check if it resolves the issue.   

Power cycle your devices

There might be a problem with your device. So, rebooting is a good option. Here is how to reboot your devices:

  • Turn off your TV and unplug it from the power source.
  • Remove the HDMI cable from the HDMI port on the TV.
  • Next, remove the other end of the HDMI cable from your laptop.
  • Shut down your laptop and wait for a few minutes.
  • Turn on both devices.
  • Connect them with an HDMI cable and see if you can play Funimation.        

Check for updates   

Every device needs updates to function correctly. Therefore, it is necessary to check whether your smartphone, laptop, or gaming console is updated.

To get the latest windows update:

  • Click on the Start menu and navigate to Settings.
  • Look out for Update & Security.
  • Select Windows Update and then click on Check for Updates.

You can also update your Apple TV to enjoy your favourite anime.  

Conclusion

Funimation has been one of the best anime streaming services. You can watch your favourite anime movies and shows on various platforms. But HDMI cable sometimes causes problems when playing the service on TV. This guide has covered all the possible reasons why Funimation wont play on HDMI and fix the issue.

Xbox Series X Controller Light Too Bright: Here’s How To Dim it

Playing games on Xbox is fun, especially when you play at night, but the Xbox series X controller light too bright can become annoying. The Xbox might run into errors, but you can quickly fix the dimming of a controller’s light.

Xbox is a popular gaming series developed with the latest technologies and provides a realistic feel. The new Xbox X series is equipped with Variable Rate Shading (VRS) and Direct X-Ray Tracking, making the experience enjoyable for seasoned gamers.  

Many users have faced problems with their Xbox series X controller light being too bright, but they couldn’t find a viable solution.  Microsoft has updated the Xbox series X by offering an updated firmware for the console. 

How To Dim Xbox Series Controller Light?

accessibility night mode

There are two phases of solving the “Xbox series X controller light too bright” issue. The first phase includes updating the software, and the second phase is to apply the settings in your Xbox Series X controller to dim the light. 

Microsoft has updated a “Night Mode” option in the latest Xbox X and S series. You need to update your console to the latest firmware to use the Night Mode first. You can enjoy Xbox anywhere, whether it’s your place or even at a hotel, by dimming the lights of the controller. 

The following guidelines will help you navigate the settings of your Xbox X controller.

Manual Update Firmware Of Xbox Series X

xbox settings

Older versions of Xbox Series X don’t have a pre-installed Night mode. If you want to add “Night Mode” to your Xbox Series X, you can update the firmware manually. The process of manually updating an Xbox X series console is simple. Follow the step-by-step guideline to fix the Xbox Series X controller light too bright problem.

  1. Guide Menu
    Take your Xbox controller and push the Xbox button to reach the “Guide” menu.
  2. Profile & System
    After opening the “Guide” menu, push the RB button. Press down the RB button to scroll down to the “Profile & System” menu.
  3. Settings
    Select the “Settings” option in the Profile & System tabs by using the “A” button on your Xbox controller. 
  4. System
    As you reach the Settings, find the “System” option located on the left column on the screen.
  5. Updates
    When you select systems, you can then navigate to “updates” on the right side of the screen.
  6. Select The Latest Firmware
    A list of updated firmware will appear in the “Updates” section. Choose the latest version by clicking on the top slot in the Systems-Update tab.

Dimming The Light Of Xbox Series X Controller

xbox controller

Dimming the light for the Xbox controller is easy after you have completed the firmware update. Once the firmware is updated, you can fix the Xbox series X controller light too bright issue in a matter of minutes. Here is how you can dim the light of Xbox series X of your controller in an instant:

  1. Open Settings
    Click on the “Setting” menu to open the tab.
  2. Select Accessibility
    Find the “Accessibility” option on the left tab as you open the settings.
  3. Navigate to Night Mode
    You will find  “Night Mode” on the right side of the screen when clicking on Accessibility.
  4. Open Controller Brightness Option
    Once you are inside the Accessibility tab, select “Controller Brightness”.
  5. Customise Brightness
    Select the “customise brightness” tab in the controller brightness. It will help you choose the right option for your brightness preferences.
  6. Manually Select Brightness From Default Menu
    When you turn the customise brightness feature, you can change the brightness settings based on your preferences. Use the “Analog Stick” or “Directional Pad” to choose one of the following settings of brightness:
  • Off (0%Brightness Level)
  • 20%Brightness Level
  • 33%Brightness Level
  • 50%Brightness Level
  • 75%Brightness Level
  • 90%Brightness Level
  • Default (100% Brightness Level)

After choosing the brightness level you require, just go back to your gaming menu, and you will see that the controller light has dimmed on its own. 

Turning On Night Mode 

preferences night mode

Night Mode is a recent feature updated by Microsoft. It allows you to change the brightness level of the controller by going to the settings menu. If you have the latest version of Xbox Series X, you can use it to turn on MightMode directly from the settings. Follow the given instructions to dim or turn off the light on your Xbox Series X controller:

  • Open the settings menu on your Xbox screen.
  • Go to “Accessibility” in the settings menu.
  • You will find “Night Mode” on the right side of the Accessibility menu.
  • Turn the “Night Mode” on.
  • Once the Night mode has been enabled, you can manage the display settings.
  • Set the Night Mode time by clicking on the “Scheduling option.”
  • Open the “Night Mode Starts” tab and set the time on which you want to set the starting time of the Night Mode.
  • Go to the “Night Mode Ends” and select when you want to turn off the Night Mode.
  • Return to your game and see if the settings are in place.

Placing The Xbox Controller “Night Mode” On Schedule

Once the night mode settings are in place, the Xbox controller can be placed on a schedule. It will permanently fix the Xbox Series X controller light too bright issue. It means that the console will dim the controller’s light in the evening. Here is how you can place the Xbox night mode on a schedule.

  1. Go to settings. 
  2. Click on the “Accessibility” option in the drop-down menu.
  3. Select “Night Mode” from the options in Accessibility.
  4. Turn the Night Mode “On”.
  5. Select “Scheduled” in the Night Mode options.
  6. Now, you can change settings according to a particular time zone.

Once the Night Mode is on a schedule, you won’t have to turn it on or off as it automatically functions. Make sure you set the timings according to your time zone. If you have any other time zone set on your Xbox, change it to your particular preference. 

Covering The Controller Light

Most gamers who don’t want to upload the NIght mode, use black tape to cover the light on the controller. If you do not have the time to update your firmware, you can get stickers to cover the bright light on the colour. It will add a colourful tinge to the atmosphere in your room. Use a proper adhesive to cover the bright light of the controller. If the tape does not stick properly to the controller, you might end up with an annoying piece of tape hanging from the controller. Getting a Night Mode is the better option to save yourself from the hassle of switching tapes and stickers.

Conclusion 

We hope you have understood the process of dimming the light on your Xbox series X controller. Make sure you follow all the steps correctly to update the right software. Once you have updated the firmware of your Xbox console, the rest of the process is easy. Just put on the night mode version, and you can enjoy your gaming experience any time of the day. The latest versions of Xbox Series X have a built-in “Night Mode” option in which you can make the changes you require to enjoy your nighttime gaming experience.

Why is Disney Plus Not Working on Samsung TV: 5 Easy Fixes

0

Disney Plus not working on Samsung TV can ruin your viewing experience. If you want to watch trending shows and movies on your Samsung TV, you should know how to fix this problem. The good news is that it doesn’t take much time to stream Disney Plus on your website. 

Both Disney Plus and Samsung have become household names at this point. During the COVID-19 pandemic, Disney Plus saw a massive boost in its viewership. Some analysts have even predicted that it will surpass Netflix as the world’s most popular SVOD by the year 2026. 

While there is no doubt that these are popular platforms, they can still run into errors from time to time. If you find that your Disney Plus not working on Samsung TV, keep reading to find out why this happens and how to fix this issue.  

Why is Disney Plus Not Working on My Samsung TV?

man watching tv

Although it can be quite frustrating when you realize Disney Plus isn’t connecting to your Samsung TV, the good news is that it’s usually due to issues that are quite simple to resolve. Check some of them out below:

Poor Internet Connection: If you have a poor internet connection then your Disney plus app would stop working. To fix this, you’ll have to check your connection and then take the necessary steps to fix the problem.  

Using an Older Version of Samsung TV. If you are using an older version of Samsung TV it will not support the Disney Plus app. It is therefore necessary to get a connecting device.

Outdated Disney App

Other glitches in the Disney app can be fixed by updating it. If your Disney plus app has not been updated or you have not been refreshing the page, it will stop working. 

Server Issues

Most of the times Disney Plus not working on Samsung TV because of server problems. Keep a check on their social media handles to see if there are any problems with the server. Twitter will keep updating you on the progress of the progress as they come up with a solution. You can call customer support to get a better idea of the situation.

How Do I Reset Disney Plus on My Samsung TV?

male hand holding tv remote

Now that we know what the most common culprits are for this, let’s talk about how you can solve the issue of Disney Plus not working on Samsung TV. 

A straightforward solution is to reset the app on your Samsung TV. Samsung Models built after 2016 support Disney Plus and you can follow a few simple steps to download it on your TV. 

  • Connect To The Internet

Make sure your Samsung TV is properly connected to the internet before you install the Disney Plus app. Once the internet connection is up and running, you can proceed to the next step.

  • Open Smart Hub / Home Page

Click on the Smart Hub option on your remote and go to the home page of your Samsung TV. Look for the search bar on the top of the screen. 

  • Search For Disney Plus App

Write Disney Plus in the search bar and the application will appear on your screen. 

  • Install Disney Plus

Click on the Disney Plus app and select the install option. It will take a few minutes to install the Disney PLus app on your Samsung TV.

  • Sign Up

Once the app is installed, sign up with a new account and follow the given instructions. Choose your favorite programs and enjoy watching Disney Plus on your Samsung TV.

Reset Your Samsung TV

When Disney Plus not working on Samsung TV after updating the app, you need to factory reset your television. Follow the given steps to factory reset your Samsung TV. There are two ways of factory resetting your Samsung TV. 

For New versions:

  • Go to settings.
  • Choose general.
  • Click on reset
  • Reset and restart the TV
  • Turn on the TV.
  • Type in your pin.
  • Reinstall the Disney app.

For Older Samsung TVs:

  • Click on Settings
  • Go to Support
  • Go to Self-Diagnosis 
  • In the Self-Diagnosis find Reset
  • Click on Reset

Wait for the TV to reset and reinstall the Disney app. Check to see if this resolved the issue. If the problem persists, check out some other solutions you can apply.

How to Fix This Issue

tv and tv remote

If you have already installed Disney Plus on your Samsung TV and it’s not working for some reason, you might be dealing with the following problems:

Slow Internet Connection

If you have a slow internet connection Disney Plus would not be able to stream or browse your favorite shows. Make sure you are not using the internet on other devices. Once you have finished reconnecting the internet at a proper speed, start Disney Plus and enjoy your favorite shows.

Faulty Connecting Device

If your connecting device is not working properly then Disney Plus might stop running. You need to disconnect all the devices from your Samsung TV and wait for a few minutes. Attach everything properly and try updating the connecting device. If it starts updating and is properly connected to the internet, Disney Plus will start working on your Samsung TV in an instant. 

Unplug The TV

Unplug your Samsung TV and wait for at least one minute. It might seem simple but it is one of the reasons Disney Plus not working on your Samsung TV. After waiting for sixty seconds, plug in the device and check to see if Disney Plus is working.

Reinstall Disney Plus

If the Disney Plus not working on Samsung TV even after you checked the internet connection and unplugged the TV, you need to reinstall the app. 

  • Go to the home screen and look for the apps. 
  • Click on the Settings option and select Disney Plus. 
  • Choose the Disney Plus app in the settings option and click on delete. 
  • Click twice on the delete button to make sure it’s removed from the apps on your home screen. 
  • Turn off your TV and after putting it back on search for Disney plus app. 
  • Click on install and wait a few minutes to enjoy the latest shows.

Revamp The Smart Hub

Reset the smart hub if Disney plus not working on Samsung TV. To reset your smart hub,

  • Go to the settings option
  • Fine Support icon in the Settings
  • Click On support
  • Find and click on the reset smart hub option on your Samsung TV
  • Reset the smart 
  • Reinstall the Disney plus app

Conclusion

We hope that you have acquired all the information you need to make sure Disney Plus starts running on your Samsung TV. Before rebooting your Samsung TV, look at all the options to fix the Disney plus app. Make sure you have checked your internet connection, connecting device, and also the speed of the internet connection before you try to reset your TV. If Disney Plus is not working after following all the guidelines, contact Disney Plus customer service for more information. 

What Is The Sony Xperia Random Notification Sound: Guide

0

Have you noticed that your Sony Xperia is making random notification sounds but you don’t have any notifications showing up on your phone? You’re not alone, many Android users have noticed this issue.

There are many reasons as to why your Sony Xperia is making a notification sound, therefore we have compiled a troubleshooting guide to fix this annoying issue.

Whether the issue has just started to occur or it has been going on for a while, this is the post you need to help resolve this.

Why does my Sony Xperia make random notification sounds?

mobile phone on table

It is likely that your Sony Xperia may be making random notifications due to the NFC feature within your phone. If your phone case has a built-in wallet, you may notice the NFC feature on your Sony Xperia causes the phone to make a noise. This feature will make your bank cards believe they’re being scanned. Although this is annoying, it is advised to turn off the Sony Xperia NFC feature if you are regularly hearing these notifications.

If you don’t have this issue with your phone, here are some other common reasons why your Sony Xperia has a Random Notification Sound.

  • Your emergency notifications keep going off
  • Your phone is on loud
  • There is an unlistened voicemail
  • Bluetooth is connecting to other devices
  • Your device needs updating

Are you having issues with your Samsung randomly beeping? Here’s how to fix the beeping error.

How do I fix my Sony Xperia notification error?

mobile phone in someone's hand

There are numerous reasons as to why you are getting the Sony Xperia random notification error, however, we have plenty of fixes to try for you to get your device back in order.

If you have debit or credit cards within your phone case or nearby, the sound may be related to a failed connection. The connection between a card and a reader is done via Near Field Communication (NFC) therefore your phone may believe it is trying to pay for something.

To stop this unknown notification sound you need to turn off the NFC feature on your phone. If you’re unsure of how to do this, here are some easy steps to follow in order to disable the NFC feature on your account:

  1. On your Sony device, open settings
  2. Choose connected devices followed by connection preferences
  3. On this screen, you should see the NFC option, select this
  4. Then use the toggle to turn this off.

Fix 2. Change your emergency notifications preferences

Most new phones come equipped with emergency notifications for issues such as extreme weather conditions, this is a part of safety features on your phone. When connected to the internet your phone will be made aware of emergencies, therefore, releasing a sound. Although this does not sound similar to a standard notification, it can be confusing.

If you no longer want these alerts on, you can turn these off here:

  1. Open the Settings in your phone
  2. Tap Notifications > Emergency Alerts
  3. Toggle off if you no longer want these alerts on

Fix 3. Mute your phone apps

Each individual app on your phone has its own settings. Some apps come with a sound notification setting already turned on, therefore you may notice a noise from your apps. In order to figure out which apps are creating alert noises, follow the below steps for further information. Try disabling notifications on certain apps to see if the problem persists.

  1. Tap the account icon on your phone
  2. Choose settings followed by notifications
  3. Disable sound and vibrations
  4. Select a time and date or choose for this to happen permanently.

Fix 4. Check your voicemail

Users of Sony Xperia have reported that their phone makes a beeping sound on a regular basis. With the cause of this beeping being linked to your voicemail. If you keep a voicemail message unlistened to, you may notice that you hear a sound that goes off regularly.

A solution to this issue is easily fixed by deleting any voicemails you have left on your phone. Once your voicemails are cleared, some users have found their phone no longer makes a random notification sound.

Fix 5. Turn off Bluetooth

If you have your Bluetooth turned on, your device can automatically connect to devices it has been connected to prior. This includes speakers and smartwatches. If this connects to another device, you will likely hear a sound alert. Which in turn will provide your device with any notifications on the other device.

Switching off your Bluetooth when you’re not connected will stop your device from choosing another connection.

Fix 6. Soft reset of your device

A soft reset involves turning the device off and resetting it and this does not remove any of your data such as apps.

The purpose of resetting your device in this way is it resets the processes within the device. This is a similar process to turning your phone off, but with a few additional steps. To soft reset your Sony Xperia, here’s what you need to do-

  1. Press and hold the power button and the volume up keys at the same time.
  2. Wait for the device to vibrate before removing your hand from the buttons, this usually takes around 15 seconds.
  3. Release the keys, then click the power key to turn it back on.

Fix 6. Factory reset your device

The final troubleshooting method we have for the Sony Xperia Random Notification Sound alert is to reset the device back to factory settings. Sadly this will remove any existing data from the device. Including apps, messages and pictures. Make sure to back up your phone before doing this, as some of your files may be lost permanently.

However, this method is proven to work when it comes to fixing the notification issue. When your phone is next turned on, it will be a fresh install.

In order to reset your device you need to do the following:

  1. Ensure your device is powered off
  2. Press and hold the power button on your device
  3. Whilst still holding the power button also press the volume down button
  4. When the recovery mode select Factory Reset, then use the volume buttons to scroll the menu
  5. Then select yes when you get to the power button

How do I mute my Sony Xperia?

If you have a new Sony Xperia and are wondering how to mute your device, you can do this via holding the down part of the volume button until this switches to a vibrating sound. If you keep holding this, it will then switch to silent mode. In order to turn the sound back on, hold the volume up button.

Conclusion

We hope this post has helped you to find a resolution for this annoying Sony Xperia Random Notification sound error. However, if you are still experiencing this sound, we’d recommend getting in touch with Sony directly as the device may have an error.

You can reach Sony via their contact form here.

How to Fix Xfinity Router Blinking Green: In 5 Easy Steps

0

If you are an Xfinity customer you may have noticed your router blinking green when you are having issues. This indicates there is an issue with your internet, with either no connection or a slow connection the green light is not ideal for users.

Here at Digi Help Desk, we understand how important a good connection is, whether you’re working from home, enjoying a film or swiping on a dating site. Therefore we have compiled a list of easy fixes to help you get your router working as it should be.

Whether you are a tech novice or a newbie, these tips are easy enough for anyone to follow.

Why is my Xfinity Router Blinking Green?

nether router box

There are numerous reasons as to why your Xfinity router is blinking green, with so many possibilities we have created a guide to make it easier for you to troubleshoot your Xfinity router.

One of the most common reasons as to why your router is flashing is due to where you have placed it. It is recommended that routers are not placed on the floor and are in well-ventilated areas. If it is on a table you are more likely to get a stronger connection and less chance of it overheating.

However, overheating is not the only cause of the Xfinity Router Blinking Green, some other causes are:

  • Planned service outages or extreme weather conditions
  • Cables in poor condition
  • No WiFi signal is being detected
  • Too many devices are connected to your router
  • Your device needs resetting

How to fix Xfinity Router Blinking Green?

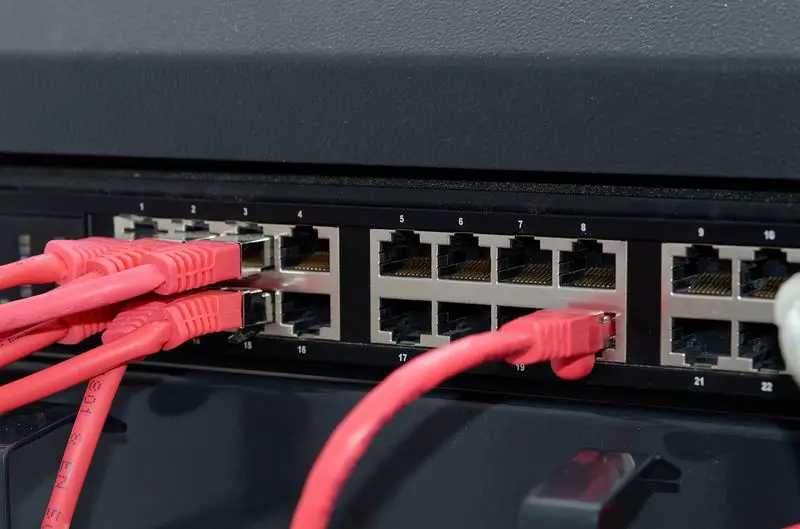
router with red wires

Step 1. Restart your WiFi router

There are numerous ways to solve the flashing green light issue with Xinifity, but one of the most successful fixes is to restart your router. This simple troubleshooting technique can fix your internet issues.

In order to restart your router, here’s what you need to do:

  1. Unplug the router from the mains
  2. Wait 60 seconds and then plug back in
  3. Allow up to 5 minutes for your router to reboot.

After this time if your router is still flashing green, we’d recommend moving on to the next troubleshooting fix.

Step 2. Check for service outages

If you are struggling to get a WiFi connection at all, checking for service outages can be beneficial. Especially as the issue may not even be with your router. usually, most signal outages are fixed within a short period of time.

To find out if Xfinity is experiencing issues, you can find out on the Down Detector or try directly by downloading the Xfinity app.

After checking for service outages, if there isn’t an issue with your service, keep reading for further support.

Step 3. Remove devices

Routers can struggle when there are a large number of devices connected to them. If your router is overloaded this can create an error that causes your router to flash green. We understand that you may not know all of the devices which are currently connected to your box, luckily there is an easier way to remove unwanted devices.

  1. Head on to the Xfinity website
  2. Select Services followed by Internet and then choose Manage Internet.
  3. Next, then scroll down to Xfinity WiFi Hotspot Connected Devices followed by Manage Devices
  4. Then select the devices which you no longer use or don’t want to be connected to at that time by selecting and then pressing remove.
  5. Removing a few devices from your router can make all of the difference.

However, if your router is still blinking after you’ve removed some devices, we’d recommend checking out our next troubleshooting technique.

Step 4. Assess your cables

Although this may seem obvious, your cables may be in a poor state which can cause errors on your router. Things such as frayed wires, pets chewing cables and loose connections can all cause issues. Check through your cables to see if you can notice any damage.

Check all of your wires are plugged in tightly and there are no knots and frays on the wires. Straighten out the wires, and undo any tangled cables. If you notice any damage to your wires, it may be worth replacing these. You can replace them easily on Amazon or get in touch with Xfinity to request a replacement.

Step 5. Hard reset your Xfinity router

The final troubleshooting technique we recommend is to hard reset your router. Although this should be done as a last resort. As it means resetting your router back to its factory settings. Unfortunately, this does mean any custom names and passwords will be removed. You will also have to sign into the WiFi again on all of your devices.

To hard reset your router you need to do the following:

  1. Head to your router and make sure you can see all around it
  2. Hold the reset button on the back of your router, for 60 seconds then release
  3. Once you release the button the router should begin to restart back up
  4. After this has turned on try to connect again, however, remember you will need to sign in from the credentials on the bottom of your router.

Note: If you have an older router you will need to use a pin to reset your device, as there isn’t a reset button that can be pressed. If you have a pinhole button, the reset steps are the same, the only difference is using a pin rather than pressing a button.

What does the white light on my Xfinity router mean?

Now you’ve been able to successfully troubleshoot your router blinking green, you may have noticed other lights on the router. Including a white light on your box. Here’s what the white lights mean on your Xfinity router:

Steady white light

If you have a steady white light on your Xfinity router this means everything with your router is running as it should be. There is no need to take any further action with your router.

Blinking white light

Blinking white light means your signal is spotty, which could indicate dropouts may occur. This could be due to where your router is placed in your house, work out or weather conditions.

Although this should fix itself if you notice the light change to blinking green or not flashing for a long period of time, we’d recommend getting in touch with Xfinity. This may mean that there is an issue with your router.

Conclusion

We hope this guide has been helpful in fixing your Xfinity Router Blinking Green issue, however, if you are still experiencing issues, we’d recommend getting in touch with Xfinity. If you reach out via their website, then they can run further tests and advise whether an engineer is required.

Here’s What Is Causing The Spectrum Router Red Light

0

If you are attempting to use your WiFi but notice that your Spectrum router has a Red light on it, this may be concerning. Usually, when you see this, your router is either unable to connect to the internet or there is a weak connection. Therefore you are likely to be unable to use it whilst there is a red light on.

Although these situations should not happen regularly when they do it’s best to be prepared. Therefore we have compiled a guide to share with you how to troubleshoot your Spectrum router and get it working as it should be once again.

What causes the Spectrum router Red light?

back view of a white router

The red light on the Spectrum router could be caused by a number of issues, including service outages and your router needing an update. These issues can be critical to your WiFi and stop it from working completely unless resolved.

One of the most common reasons for a red light on your Spectrum router is your router is attempting to establish a connection but is unable to do so.

When this happens your router will flash red, but it will not do any tasks as required. Therefore it is important to get this fixed, especially if you require WiFi on your device for an important work meeting.

Although this is likely to be the issue with your router, here are some more common Spectrum router red light issues:

  • Your router needs updating
  • The network frequency needs changing
  • You are using it at a time when it is busy
  • Service outages
  • Your cables are faulty

Steps to fix Spectrum router Red light

close up of front on online router

Your Spectrum router may have a solid red light on it or a flashing red light both of which can be fixed with ease. If you are unsure where to start we have compiled a list of easy to follow fixes to allow you to get back online as soon as possible.

Fix 1. Power-cycle your Spectrum router

Power cycling your router can be an effective way to fix any issues within your router without any complex steps. Here’s how to do power-cycle your Spectrum router with ease:

  1. Switch off the router at the wall, then unplug the router completely
  2. Allow 3 minutes before plugging it back in
  3. Plug back in and allow for your router to start up again
  4. Wait for the lights to turn solid blue, once this happens your router should then work again.

If you’ve done the above steps but notice the blue lights don’t come on, or you are still getting a red light, we’d recommend checking out our next troubleshooting method.

Fix 2. Check for a service outage

If you notice your device is flashing red, this could indicate that your router is having an issue.  A service outage is usually caused by issues such as weather. If you’re unsure whether your device is down due to a service outage, Spectrum has its own service outage checker to provide this information.

Fix 3. Change your network frequency

If you are still able to connect to your WiFi we’d recommend changing the network frequency. If there are a high number of households on Spectrum in your area it can make the frequencies become busy and slow down the connection. Therefore changing the frequency can prevent future issues.

In order to change your WiFi channel you need to do the following:

  1. Head on to a web browser and search 192.168.1.1
  2. Once you have done this a login screen will appear for Spectrum, you will get a message advising these are advanced settings. Check the box and continue to the next page.
  3. Locate your administrator password from the bottom of your router and log in.
  4. Click the configuration icon and choose 5GHz, then press save.
  5. Once you have set this up, you will be prompted to enter details such as a password to access this network.

If you have multiple users in your household keeping both networks on can help to speed up your WiFi, as they are running on different channels.

Fix 4. Check the cables to your router

Although this may seem obvious, checking the cables to your router on a regular basis is important. As these can easily become damaged or loose. If you have any pets it is worth checking the condition of your cables.

If you notice any splits, knots or fraying, this may be the issue as to why your router is not working correctly. In most cases you can find replacement cables on Amazon or alternatively speak to the manufacturer, to see if they can offer a replacement.

Fix 5. Reset your router

The final easy fix in our guide is to reset your router; this is different to rebooting it. It will remove all of your router settings such as custom names and passwords. However, it is usually a pretty sure fix. In order to reset your router you need to do the following:

  1. To start, press the button on the back of your router which says reset.
  2. Hold this for 10 seconds and then wait for your router to come back on
  3. Once back on, attempt to connect to the router again. You will need to sign into the WiFi from any device you are using, with the credentials on the bottom of the box.

Is it safe to reboot my Spectrum router?

It is completely safe to reboot your router as many times as required. If you find your internet is running slow or keeps dropping out, rebooting it can be an easy fix for this.

How do I access my Spectrum router settings?

Accessing your Spectrum router settings can be done via their app, in order to access this, you need to download the My Spectrum App from the App Store or Play Store or alternatively you can sign in by visiting Spectrum.net.

Once you are signed in you can access the settings of your router, test your equipment and even reboot your router with a click of a button.

Conclusion

We hope this guide has been able to help you to resolve your issue with your Spectrum router flashing red.

However, if you are still experiencing issues with this, you can contact Spectrum via their contact us page, or alternatively, call them on 1-815-940-5701 for additional troubleshooting help.

Chrome Can’t Install New Update: Here’s How To Fix Error

0

Chrome is a popular web browser used across the world. The browser is fast and reliable and allows for quick browsing. However, in more recent months the users of the Google platform have been reporting issues with updating their browser.

Whether you are getting an error code or simply are advised that the update cannot be installed, we have compiled a list of reasons why you aren’t able to install the new update. As well as some easy fixes to get this issue resolved with ease.

Why can’t Chrome install the new update?

google app icon on mobile

Whether you’re a Google Chrome user who is unable to download the new update or you are getting error messages during your download we understand how frustrating this can be. Therefore we have compiled a guide on how to fix your Google Chrome issue.

A key reason why you may not be able to download Google Chrome may be down to your computer needing a clean install of Chrome. This means you will need to remove the old Chrome software first before installing the new download.

However, there are various other reasons you may find you cannot install Chrome, this includes:

  • Lacking disk drive space
  • Running an old version of Windows
  • Not being an administrator on your device
  • It is being blocked by your Firewall or Antivirus
  • You have a poor internet connection

How to manually update Chrome?

google page can't be reached on iPad

Although Chrome should prompt you to do an update in the top righthand corner of the screen. If you don’t get the message regarding this or it’s been a while since your last update it’s worth manually searching for the update.

If you’re unsure how to find where to update Chrome, not to worry we have a step by step guide ready to help

  1. Head to the three dots at the top of your Chrome page
  2. Press these and you will see a drop-down menu > select Help
  3. Then choose About Google Chrome
  4. You should be prompted to update to the latest version if you aren’t already running it at this point
  5. Click download and wait for a new Chrome file to download. Once this has been downloaded open the file and go through the installation method

How to resolve the Chrome install error

The Google Chrome unable to install error is proving an annoyance for users who are struggling to update it. However, we have the fix, to allow you to resolve the Chrome install error with ease.

One of the most effective fixes of this Chrome install error is to remove your current version of Chrome before attempting to reinstall Chrome. If you try to download it whilst you have an existing version in place, this may error.

We’d recommend following the steps above in order to download a new version of Chrome. But before clicking on this to run, we’d recommend completely removing the old one from your PC. If you are unsure of how to do this, here’s how to remove Chrome from your Windows PC:

  1. Close Chrome completely
  2. Head to the Start menu, followed by Settings and then Apps.
  3. Under Apps & Features find Google Chrome and select it
  4. Then click uninstall

Once you have removed this file, use your new downloaded version from your downloads folder and you will be able to run the latest version of Chrome.

Fix 2. Clear your cache

After you’ve downloaded the latest version of Chrome, if you are still getting errors you may have old files in your cache that need to be removed in order for Chrome to work effectively. If you’re not sure how to do this, here’s how to clear your cache 4 easy steps:

  1. Click the three dots in the right-hand corner of the screen, from the drop-down select More Tools.
  2. Once you have clicked More Tools you should see an option that states ‘Clear Browsing Data’, choose this option.
  3. On the screen, you will be greeted with a number of tick boxes, select Browsing History, Cookies & other site data and Cached images.
  4. Change time range to all time and then select clear data, depending on how many cache files there is, this may take a few minutes.

We’d recommend regularly emptying your cache in order to prevent issues like this.

Fix 3. Make sure you have a strong internet connection

In order to correctly download Google Chrome and then install it again, you will need to have a strong internet connection. If you notice your internet keeps dropping out, make sure your connection is stable before trying to install the programme.

Fix 4. Run as an administrator

If you are not an administrator on your PC you will be unable to uninstall Chrome or reinstall it. If you do not have the privileges you will automatically be unable to follow the next steps with this.

However, if you are unsure as to whether you are an admin you can do the following steps to find out:

  1. Press the Start button/ menu on your PC
  2. Click Run followed by entering ‘control’ or ‘userpassowrds2’ then check ok
  3. Then search your username to see if it has access to the administrators’ group.
  4. If you are not an admin you will need to seek this from a computer admin in order to download this file.

Fix 5. Review antivirus and firewall

An issue users come across when trying to download Chrome is regarding their antivirus and firewall. Although both devices are used for safety measures. Therefore instead of deleting it follow these steps to get your software added to a security software exception list.

  1. Head on to your Windows Computer and select the Windows settings app
  2. Next search for a Firewall within the search box
  3. Then click allow an app through windows firewall
  4. Follow this with change settings > allow another app > browser
  5. When searching for the setting in the browser tap search for ‘%ProgramFiles(x86)%\Google\Update’
  6. Select the browser folder with the highest number first
  7. Finally, click the GoogleUpdate.exe to modify this

If you are looking to add an alternative programme to your exemptions list, most pages will have advice on their websites.

Fix 6. Check your system can run the new version

If you are unable to install the downloaded version of Chrome, it may be due to your system being unable to run the specs required for the latest version of Google Chrome.

To use Google Chrome on Windows you’ll require a device that can run Windows 7, 8, 8.1, 10 or later.

Running any earlier versions of Windows means you will be unable to install an updated version of Chrome.

Conclusion

Although we hope these tips have been able to resolve your Google Chrome issue and that you have been able to quickly get back to browsing. However, if you are still having issues with Chrome can’t install the new update, then we’d recommend getting in touch via Google via their support forum.

Hisense Smart TV Keeps Rebooting: Stop It Restarting Here

0

When sitting down to watch your favourite show the last thing you want is to deal with your smart tv rebooting on its own. Whether the issue occurs just after you’ve turned it on, during your programme or when you’ve stepped away for a few minutes, this can be concerning.  Especially when this keeps happening.

Your Hisense TV will experience issues when it needs updating but is unable to complete the update. Until this is resolved, your TV may keep rebooting itself.

As well as this there are several issues which your TV could be experiencing. Although this seems worrying, our helpful guide will resolve your Hisense Smart TV issue with ease.

Why does my Hisense Smart TV Keep Rebooting?

tv remote in front of tv with Netflix

Your Hisense TV will be unable to work as expected when it has an issue with the software. This is likely to be caused by your TV trying to run outdated software. Although your TV should update on its own, if it encounters an error during this process your TV may require technical help.

Besides the software being outdated, here are some additional reasons your Smart TV is not working as expected;

  • Your TV is having hardware issues
  • A faulty power supply
  • Energy-saving mode is crashing your device
  • The device is overheating
  • Your device needs resetting

If any of these issues sound familiar or you are unsure of what is happening with your TV, follow our easy fixes below to get your TV working once again.

How do I restart my Hisense Smart TV?

girl watching tv

When trying to fix your TV a method that can be overlooked is a quick reboot of your device. If you’re unsure how to restart your TV all you need to do is unplug it from a power supply, leave it for at least a minute then plug it back in.

After you’ve plugged it in if it starts to reboot again, repeat the above step.

How to fix the Hisense Smart TV keeps rebooting error

If you are still experiencing the Hisense Smart TV keeps rebooting error after you have restarted your TV twice, here are some further troubleshooting tips to try:

Fix 1. Check your power supply

Your TV issue could be caused by an issue with the power supply. When checking for faults with the TV be sure to check:

  • All cables are securely in place
  • The plugs are working in the power socket (try an alternative plug if possible)
  • There are no frays or damages to any wires

Fix 2. Turn off energy-saving mode

Users have reported that the issue occurred on their Hisense TV after turning on energy-saving mode. Therefore to figure out if your TV is rebooting due to this error here’s how to turn it off:

Step 1. Head to Settings, followed by Picture

Step 2. Next, select Energy Saving and click off

Step 3. Then change to another option such as movie or documentary. If you find it doesn’t change, try another picture option.

Fix 3. Make sure your TV isn’t overheating

If the area around your Smart TV isn’t well ventilated or is close to a radiator or heater, your device may be rebooting as it is too warm. If the TV itself is getting too warm lowering the video settings can help. If you’re unsure how to do this, here’s how:

Step 1. Head to settings on your TV then choose Picture Settings from the menu

Step 2. Lower everything to 80% or less e.g. saturation and colour

Step 3. If your TV keeps rebooting, it may be that the heat is too high. In this case, turn the Hisense Smart TV off for a while to allow it to cool down.

Fix 4. Update the Firmware on your device

If your firmware is outdated, this may cause issues for your TV, therefore making sure both your Firmware and Software are up to date is key. Although this may seem complex, you can do this in just a few easy steps:

Step 1. Launch Settings on your TV via the control then select About or Support

Step 2. Choose System Update followed by Check Firmware Upgrade

Step 3. Select update, then allow a few minutes for this to install

If your system does not provide an update at this point, we’d recommend trying to install this manually via a USB.

Fix 5. Firmware update via USB

Updating your Smart TV manually via a USB is a great way to make sure your TV is running the latest software. Although this method can be significantly longer than doing this via the menu. Before starting this method make sure you have a flash drive or hard drive big enough to hold the software.

Once you are ready to update your firmware, here’s how to do so:

Step 1. Head on to the Hisense website and download the latest TV software.

Step 2. Unzip the folder onto your PC, then open up a separate window with your USB on.

Step 3. Then drag the files across to the external device. Allow a few minutes for this to copy over. The file should be called upgrade_loader.pkg 

Step 4. Make sure your TV is turned off, plug in the USB then switch on your TV again followed by standby mode on the remote

Step 5. Keep holding the standby button until the TV logo appears and a message appears saying updating software

Step 6. Allow time for this to update, usually, this takes around 15 minutes.

Once this is complete, your TV will restart. However, if you notice this does more than two times, then repeat the whole process.

If neither of the Firmware updates fixes the issue, next we’d recommend doing a factory reset.

Fix 6. Factory Reset your Hisense Smart TV

First things first, resetting your TV will remove any existing data on your device. Which will revert it back to its factory settings. Although this can frustrating for apps and picture preferences, it can provide an easy fix.

Step 1. Unplug your Hisense Smart TV from the power outlet and allow at least 15 minutes before plugging it in again.

Step 2. Allow your TV to start up again, then head to settings followed by Storage and Reset.

Step 3. When you select this you will be prompted to choose an option, select Factory Data Reset.

Conclusion

Although we believe these troubleshooting methods should resolve your TV issue. If you are still having technical issues we can offer further support.

But if you are concerned about your device overheating or require a replacement part you can contact Hisense for further advice. The best way to reach them is via their contact form. Alternatively, you can phone Hisense on 0333 800 2200 between 9:00 am – 6 pm Monday to Saturday.

How To Connect Chromecast To Hotel WiFi: Cast Away From Home

0

Are you planning a vacation with or without your family and want to stay in a hotel room? Are you wondering how to connect Chromecast to a hotel WiFi connection? Do you want to enjoy your favourite programmes on the hotel room’s big TV screen rather than on your portable device?

Enjoying a programme on a mobile’s tiny screen can sometimes cause frustration. Some of us are picky about extracting every graphical detail out of a scene which is not possible on a small display. A Chromecast device is an excellent way of casting content on larger screens and double the fun.

During your hotel stay, you would want to watch your favourite shows on Netflix or go through Youtube videos on a big screen. However, some hotels can put hurdles in your way that make it impossible to use and connect your Chromecast to their WiFi network. Let’s find out how you can do it.

Can you use Chromecast on public Wi-Fi?

samsung to chrome usb

A few hotels offer an open WiFi network that does not require you to log in. In this case, you can plug your Chromecast device into the hotel TV. Afterwards, and set it up over their WiFi network. Your Chromecast will connect to the WiFi as there is no welcome page on an unsecured network.

Furthermore, another device such as a laptop or mobile phone connected to the same WiFi hotspot of the hotel can also stream to the Chromecast.

How do I connect my Chromecast to hotel Wi-Fi?

mobile hotspot screenshot

If you have trouble connecting your Chromecast to a secure hotel WiFi connection, try the following methods.

Make a Windows hotspot

Your Chromecast device might work if you make an alternative hotspot on your laptop. To do this:

  • First, connect your laptop to the hotel WiFi network and fill out entries on the login page.
  • On your laptop, go to Start –> Settings –> Network & Internet, and click on “Mobile Hotspot.”
  • Under the Mobile Hotspot option, select “Share my Internet connection with other devices.”
  • Next, make sure that the “Share my Internet connection from” and “Share my Internet connection over” options are set to WiFi.
  • Finally, connect Chromecast to hotel WiFi using the Network name and password shown at the bottom of the window.

Make a hotspot on your phone

If you did not bring your laptop, your smartphone could share the hotel’s internet connection via a mobile hotspot.

  • Tap the Settings icon on your phone and go to Wireless & Network –> More –> Tethering & portable hotspot and tap on the ” Set up WiFi hotspot” option.
  • Next, type in the Network name and password of your choice and save the changes.
  • Finally, enable the Portable WiFi hotspot on your phone and finalize setting up your Chromecast device.

Connectify Hotspot app

In a hotel, you can use the Connectify hotspot software app with Chromecast. To do this, download the app on your Windows laptop and install it. The Connectify app serves as a Chromecast’s mediator and eliminates the need of looking for a WiFi connection.

However, you need to set up the Connectify hotspot so that your Chromecast remembers the settings every time you use your laptop with it.

Does Google Wi-Fi work with hotel Wi-Fi?

wifi device

Internet security is vital for everybody, and hotels are no exception. They have to manage their networks with options to make it difficult for the devices to communicate with each other. This phenomenon is called client isolation. Once connected, a device can not be conveniently seen by anything else on the network.

Google WiFi device operates by talking to other devices for its functions. Hotels usually boost security concerns. However, they also use network tools to make more money. Therefore, these general practices make it harder for a Google WiFi device to work properly.

Furthermore, you often need to get past the hotel login page, which you can’t do without a web browser. As Google WiFi does not have a browser; therefore, the device can’t create a usable connection on its own. Hence, Chromecast will fail to connect too.

How do you travel with Chromecast?

wifi devices

Some hotels allow connection for only one device per room. A quick way to get a Chromecast to work on Hotel WiFi is to buy a portable or travel router to counter the issue.

If you’ve never used a travel router, it is a compact wireless device that you can connect to a wireless hotspot. Afterwards, you can share the network connection through the portable router with multiple devices.

The network connection from the hotel comes to the room either wirelessly or via network cable. You can then connect the network cable to the travel router or use the router’s wireless function to connect to the hotel’s WiFi connection. Afterwards, the router broadcasts a single Wi-Fi signal for all your devices.

To get a better understanding, think of the travel router as a lone funnel, and the router sends everything through it. This way, the hotel thinks you are using only one device for the connection. However, in reality, it’s the sum of every device connected to the portable router.

Furthermore, because your devices are talking to each other over the Wi-Fi network created by your router, you altogether avoid the hazards of connecting directly to hotel Wi-Fi. Travel routers are handy when you use a Google WiFi device as it will simply connect to the router and create a mesh network of its own.

Conclusion

If you end up in a hotel that offers a WiFi network without any passwords, your Chromecast device will work just fine. Otherwise, this article has easier ways for you to find out how to connect Chromecast to hotel WiFi.

We recommend bringing a travel router with you while staying at a hotel. Otherwise, you can make a WiFi hotspot from your mobile phone and Chromecast with it to the hotel’s TV screen.

Virgin Media Router Wont Turn On: Here’s How To Get It Working

0

Do you have a Virgin Media router, but it wont turn on when you press the power button? This guide will explain why you witness no light or flickering lights on your Virgin Media router and how you can fix the issue with the help of easy troubleshooting steps.

The Virgin Media Hub replaces the need for a separate modem and router. Thus, you get all the tools you need to get online in one compact box, saving extra space in your home for other purposes. Many users have the old Virgin Media Hub 2/2ac and Hub 3, while others have upgraded to Hub 4 and Hub 5 that offers better WiFi antennae.

However, both old and new Virgin Media Hub users face an issue where the router won’t turn on and indicates flashing lights. Other times, the routes won’t show any light at all. Let’s figure out the troubleshooting steps for each cause of the issue.

Why is there no light on my virgin box?

different types of hubs

If you see no light when you turn on your Virgin Media router, it could be due to any of the following reasons.

  • Cables going in or coming out of the router are loose.
  • You are not using a compatible power adapter.
  • Virgin Media Hub firmware is either corrupt or downloading updates.
  • Virgin Media is too hot and needs to be cooled down.
  • The main switch supplying the power to the Hub is faulty.
  • The Virgin Media router is faulty and needs to be replaced.

What Colour should the light be on my virgin router?

virgin media router

When you turn on the Virgin Media router, the Hub displays a flashing white light which means it is booting up. After 5 minutes, the flashing white light turns to solid white light, indicating that the router is working fine.

However, a solid red light on Virgin Media Hub 4 and Hub 5 means something is wrong with the router’s cable connections. Also, flashing red light on Hub 3 can indicate that the Hub might be too hot due to poor ventilation.

What is the green flashing light on my virgin router?

virgin media router

In Virgin Media Hub 4 and Hub 5, a flashing green light indicates that the firmware is corrupt and the router is trying to download a software update to rectify the issue. Therefore, your router won’t turn on for a few minutes until it installs the updates and reboots itself.

Virgin Media Hub 3 users experience a flashing green light which means the Hub needs a reboot. The reason can be corrupt firmware or a temporary glitch in the router’s software.

How do I turn my virgin router back on?

back of router

Virgin Media router wont turn on, show no lights, or display a flashing red or green light? Try the following troubleshooting steps to fix the issue on all Virgin Media Hub models.

Power cycle the router

When you switch on the router and no light is visible on the Hub, it means that the Virgin Media Hub is off. Sometimes, power cycling the router can fix the system’s temporary bug, causing it not to switch itself on.

To do this, turn the router’s power off at the wall. Wait for a few minutes and switch on the router again. Wait another 5 minutes to let the router fully reboot. Next, verify that you see a solid white power light; otherwise, refer to other troubleshooting methods.

Check power adapter

Quite often, an incompatible power adapter can cause issues on the router. Therefore, ensure that you use the correct power adapter to connect your Virgin Media router to the main DC plug. Furthermore, your main DC plug can be faulty or not compatible with the router as well. Try changing the socket and see if this fixes the problem.

Check Router and Its Cables

The next fix would be to check for any damage to the router’s connectivity wires. If you witness any flickering lights on the router, inspect the cables going in and coming out of the Hub. Afterwards, finger tight the cables and see if the issue persists.

Also, check and firmly connect the white cable into the Hub and the Virgin media power socket on the wall. If you use a splitter, ensure that the cable connections at both ends of the splitter are nice and tight.

How do I reset my Virgin Media Router?

side photo of router

Resetting the Virgin Media router is an effective way to turn it back on. To do this:

  • Switch on the Hub from the back and the main wall as well.
  • Next, locate the pinhole reset button on the back of the Hub and press it for 10 seconds using a pepper clip or pen.
  • Now, wait for a few minutes to let the Hub reset its settings and reboot itself.
  • Finally, verify that the router is booting up and showing a flashing white light that turns to a solid white light after 5 minutes.

After factory resetting the Virgin Media Hub, you need to update some settings, such as your WiFi password.

Can I replace the Virgin Media router?

virgin media live chat

If the Virgin Media router doesn’t turn on after trying out the troubleshooting steps in this guide, your Hub or cables might be faulty. In this case, you need to contact Virgin Media support and ask them to change the cables or the Hub.

Virgin Media support staff is available to help you every day of the week. To complain about router issues, you can dial 150 from a Virgin Media phone or call on 0345 454 1111 from another mobile phone service to talk to one of the support representatives.

Furthermore, live chat is also available on the Virgin Media website for instant complaint submission along with the email option.

Conclusion

Virgin Media Hub binds the modem and router features in one box and takes less space in your home. However, the Virgin Media router sometimes wont turn on. We recommend checking the cables, power adapter, and DC plug before power cycling and resetting the router. Hopefully, one of the fixes will work in your favour. Cheers!