Home Blog Page 8

Natwest App Is Not Working: Fix Your Banking App With This Guide

0

Are you trying to access your online banking and your Natwest app is not working?

Are you concerned this is due to your app being outdated, or your browser is the crux of this problem?

Mobile banking has become the next best thing, bringing us the availability of our banking right at our fingertips. Gone are the days of having to physically go into your bank of choice, or even just needing a computer to be able to get access to your accounts.

With that being said, apps come with issues from not being able to load properly to error codes. If you are wondering to yourself, ‘Why is my Natwest online banking not working’, we have created this guide for you, to be able to get your app back to operating at an optimal level in a few simple steps.

Why is my Natwest online banking not working
illustration of man fixing a phone

If you are wondering ‘Why can’t I log into Natwest app’ because the app is just not loading successfully when you have attempted to log in, we have outlined the reasons as to why you are experiencing these problems;

Reason 1. Your browser needs updating

With the Natwest app being available via your PC, or you have decided to log into your app on your mobile via your browser, your login process will be unsuccessful if your browser is needing to be updated, or cleared of any built-up cache files.

Reason 2. Natwest app may be down

if the Natwest app is experiencing issues, or they are doing maintenance work on the app, it will affect the app from being readily available to you.

You can check to see if your banking app is down by using this link.

Natwest also has this page, where you can see if they have scheduled any maintenance work on the app, so you can plan your usage accordingly.

Reason 3. You have changed your details

Banking apps are thorough when it comes to ensuring adequate security when accessing your accounts via the app.

If you have entered an incorrect passcode or password, this will potentially hinder your app from granting you access as it will ‘lock’ you out if you have entered incorrect details too many times.

Reason 4. Your app needs updating

Ensuring your Natwest app is on the latest version will eradicate any possible malfunctions as app updates get rid of any potential bugs and improve security features.

If you are using an outdated version of the Natwest app, this can create interference with accessing the server.

Reason 5. Your operating system does not support the app

The Natwest app does have minimum requirements to be able to function correctly.

For Android, you would need to have at least version 7.0 ,and IOS is 12.0.

Reason 6. Your Internet is malfunctioning

Your Wifi or mobile data may be inadvertently experiencing connection issues that will interfere with the Natwest app loading successfully.

How do I fix Natwest app not working
cartoon of man and woman fixing

Troubleshooting your Natwest app can be completed in a few easy fixes, and should help get your app back to working properly;

Fix 1. Update your app

Updating your Natwest app will ensure you are up to date with the latest version, clearing out any bugs that may have arisen in previous versions, that could potentially interfere with the functioning of the app on your mobile.

Step 1. Go onto your play store (Android or IOS)

Step 2. Find the Natwest app and select ‘Update’

Step 3. Install the latest version

Try accessing your app once the app has been installed.

Note, if your app store does not give you the option to update your app, you are already on the latest version.

Fix 2. Check your Internet

If your network, whether you’re on Wifi or mobile data, is being sporadic, this will interfere with the loading of the app on your device and will hinder the processing time of the connection to the Natwest server.

Option 1

Step 1. Turn your mobile data/Wifi off on your device

Step 2. Wait around sixty seconds before switching it back on

Step 3. If you are connected to Wifi, turn your router off 

Step 4. Switch it back on after waiting for a couple of minutes

Once your device is connected again, try accessing the app.

Option 2

Complete a soft reset on your Wifi router;

Step 1. Turn your router off

Step 2. Unplug it from its plug point

Step 3. Wait a couple of minutes

Step 4. Plug your router back in and switch it on

You can now access your Natwest app

Fix 3. Uninstall and Reinstall the app

Uninstalling the Natwest app off of your mobile device can aid in getting rid of any potential interferences in the software of the application;

Step 1. Delete the app off of your device (Uninstall on Android)

Step 2. Access your app store and find the Natwest app

Step 3. Install the app

Step 4. Log back into the Natwest app

Your Natwest app should now work.

Natwest internet banking without app
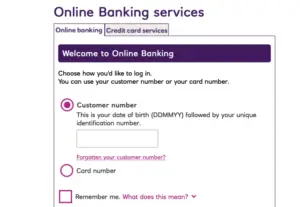
online banking services

If it is crucial that you get into your Natwest accounts while the app is not functioning properly, you can log into ‘Online Banking’ directly from their website.

Once you have selected ‘Log In’ it will ask you to put in your ‘customer number’ and ‘card number’

To ensure the online banking service works successfully for you, it is important that you are using the latest version of your browser.

Using Natwest’s online banking will give you exactly the same features as if you were on their mobile app.

Can Natwest app work on two devices
illustration of hands shaking

The Natwest banking app can work on multiple devices, so you don’t need to be subject to only being able to access your accounts on one platform.

Once you have downloaded the Natwest app on your desired device (mobile and/or tablet), you will need to select ‘I’m already a customer’

You will now be able to log in to your Natwest app as normal.

Conclusion

Having your Natwest mobile app on your device gives you the freedom of managing your accounts right in the palm of your hand.

We have become reliant on not needing a computer or having to physically go into the Natwest offices that it has become critical to always make sure our Natwest mobile app is functioning properly.

We hope this guide has given you everything you needed to know to be able to get your Natwest app back up and running as quickly as possible, as well as an alternative to access your accounts without the app.

BBC iPlayer Not Working On Firestick: Here’s How To Fix The Dongle

0

With the invention of Smart TV’s, it’s easier than ever to find something to watch around the clock. Whatever you fancy watching, you can find it on-demand or on a streaming service such as Netflix or Amazon Prime with a click of a button.

However, Sony Smart TV users have found an error which they are all too familiar with. Instead of the simple process, you’d expect when going to watch tv, you switch on your Sony TV and the TV decides to keep rebooting itself.

If you have a 2020 model of a Sony TV this issue has likely occurred due to the TV software crashing after a firmware update. Although a factory reset should fix the issue, there are occasions where your standard factory reset won’t fix the issue.

In order to fix the Sony error you are having with your Smart TV we have an easy troubleshooting guide that anyone can follow. With these easy steps, you have your tv back up and running in no time.

Why Does My Sony Smart TV keep rebooting?

couple watching netflix on tv

There are numerous reasons as to why your Sony TV will keep rebooting. Unplugging your TV from the mains, allowing it a few minutes to close down and then replugging it back in can offer a quick fix to this problem as it will trigger the settings in the TV to work correctly.

Although this is a common issue, here are some of the other reasons your Sony Smart TV keeps rebooting.

  • Your firmware did not install correctly
  • You have a faulty power cord
  • The device is overheating
  • A software update is required

How to fix Sony Smart TV keeps rebooting

man holding tv remote

We understand how frustrating the Sony Smart TV error is therefore we have rounded up the best fixes for your Sony TV issue.

Fix 1. Check the power supply

One of the easiest places to start is by checking the power supply. If there are any loose wires, bent cables or issues with an extension the TV may be glitchy and reboot. Wires placed under heavy objects such as TV units or speakers could cause problems for your TV wires. Therefore in order to make sure the power to your TV is ok, we’d recommend attempting to use a different plug, alongside checking all of your wires for any kinks.

If everything is ok with your power supply, our next fix involves power cycling your device. This is a way to reboot your device without deleting any data as a forced factory reset would. Here’s how to Power Cycle your Sony Smart TV:

  1. Unplug your TV from the main power socket and leave it for around 10 minutes
  2. Next press and hold the power button on your TV for 5-10 seconds
  3. Connect your TV back to the power, and turn it on

Fix 3. Make sure your TV isn’t overheating

Although it isn’t something you’d usually think about, your TV can overheat. There are two ways in which this can happen, your TV not being in a well-ventilated place and the settings on your TV making it harder to run.

In order to stop your TV from overheating on the outside make sure it is not near any heat sources such as radiators and heaters. If your TV is against a wall, you could consider moving it slightly forward as well to help with airflow to your TV. Lastly, keep regularly cleaning out the ports and behind the TV to avoid dust build-up.

From the inside, make sure your picture settings are turned down to below 80%, when your settings are all set to 100% this can be harder for the TV to function.

Fix 4. Update software

If your TV is connected to the internet your TV should automatically update. However, there are times when this does not happen, so checking for any updates on your TV is important to make sure it is running to the best of its capabilities. Here’s how to update your Sony Smart TV manually:

  1. Select the settings button on your control or via the menu on your screen
  2. Choose Customer Support
  3. Select Software Update
  4. Then choose Network and choose your WiFI network
  5. Then select yes or OK to install the update
  6. Allow 5-15 minutes for your TV to update

Fix 5. Turn off sleep settings

Another setting that may be causing an issue for your Sony Smart TV is the sleep settings on your TV. Although these should not impact your TV, users have reported turning off the Sleep timer or Idle TV standby function fixed their issue. If you are unsure how to change your sleep settings, we have a step by step guide for you:

To turn off sleep timers:

  1. Press the home button your remote control
  2. Next, choose timers in your TV settings
  3. Select sleep timers and set to off

To turn off idle standby function:

  1. Press the menu button on your control
  2. Select Settings followed by Setup and press OK
  3. Scroll down to Other Settings, and press OK again
  4. Locate auto-standby and use the arrows to set the option off.

Fix 6. Remove any unnecessary devices

If you have external devices connected to your TV, these may be causing your Sony Smart TV to keep rebooting. Therefore if you unplug additional devices such as Xbox, PlayStation or a further Smart TV device such as Firestick, remove these when they’re not being used.

By removing these you may find the issue was caused by one of these external devices.

Fix 7. Forced Factory Reset

Your Sony Smart TV may keep rebooting if it is encountering an error with the firmware. In order to get this resolved your device will need to perform a forced factory reset. The forced factory reset will reset everything on your TV so it performs like a whole new device.

Although this can be frustrating as all of your logins and app downloads will no longer be on the device, it is one of the fixes almost guaranteed to provide an end to the constant rebooting of your TV.

In order to do a factory reset of your TV, here’s what you need to do:

  1. On the TV remote select the home button
  2. Choose settings followed by Device Preferences > About
  3. Next select Factory Reset > Storage & Reset
  4. Following this choose Reset and then Erase everything
  5. You will then be advised it will remove all data from the device, simply press yes to continue

This may take a few minutes to close down, but once this has turned off, you can turn your device back on and set it up as a new device.

Conclusion

We hope you have found one of our fixes has been successful when it comes to fixing the reboot issue with your Sony Smart TV.

BT Sport App Not Working On Smart TV: Fix The Sports App Here

0

Is the BT Sport app not working on your smart TV? Does the app frequently crash on startup? This article will show you why the app fails to load, freezes, crashes, and displays poor picture quality.

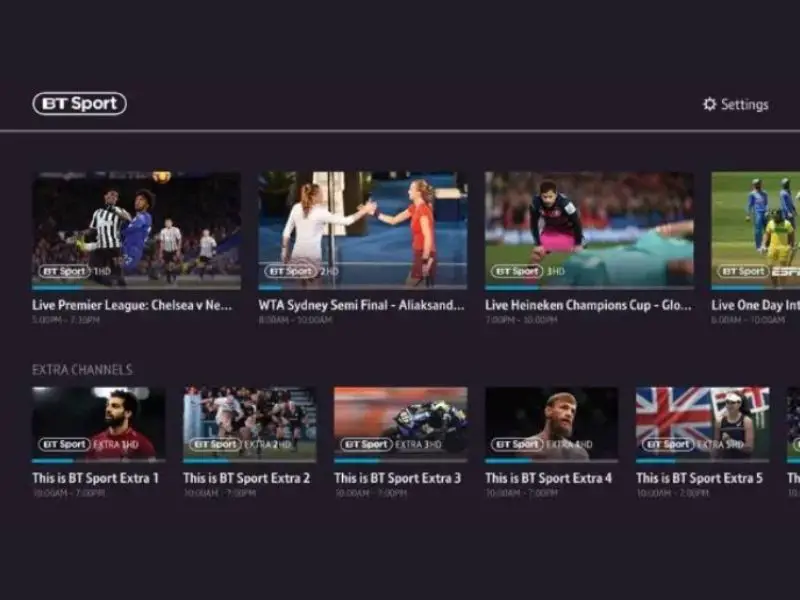
BT Sport app allows its subscribers to watch all their live channels, highlights, full replays, and clips. Furthermore, the subscribers enjoy the on-demand content in stunning high-definition picture quality. With BT Sport’s monthly pass, you can sign in on two different devices at once and cancel the contract anytime.

Recently, quite a few users have reported that the BT Sport app is causing issues on their smart TVs. The app either won’t load or crashes on startup, and they have to power on the TV again to watch the content. We’ll also be discussing why the BT Sport picture keeps breaking up on your smart TV.

Does BT Sport app work on smart TV?

BT Sport App

The BT Sport app is compatible with Android TV, Apple TV, NOW TV, Samsung TV, Sony TV, and Amazon Fire TV.

If, for some reason, your smart TV does not support the BT Sport app, you can cast BT content from a mobile device or computer to your TV through Chromecast.

The picture quality of the BT Sport app mainly depends on your network speed and any limitations of the smart TV you’re using. However, the app works with adaptive bit-rate technology to provide you with the best picture quality for your network connection that goes up to full HD.

How do I watch BT Sport on my smart TV?

BT Sport Channels

To watch BT Sport on your smart TV, refer to the following steps.

  • Head to the Home screen of your smart TV.
  • Now use the directional pads on the remote to select the Apps section. Depending on your smart TV, you can access the Apps section under Settings or Home screen.
  • Next, go to the App Store and search the BT Sport app.
  • Finally, select the app and select the “Install Now” option.
Afterward, you only need your BT ID and password to sign in to your Smart TV and watch BT Sport content.

Why can’t I watch BT Sport on my TV?

BT Outrages in the Uk chart

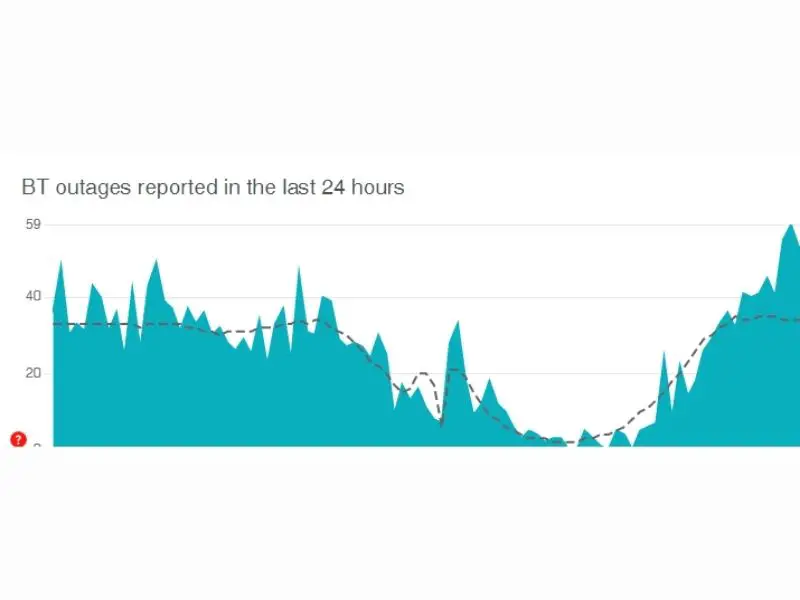
So you have downloaded and installed the BT Sport app on your smart TV but can’t enjoy your favorite sports programs on it? The first thing to check is the BT service status.

A common cause of BT Sport app malfunction is that BT servers can be experiencing an outage in your area. Therefore, rule out this possibility and contact BT support about service restoration. However, if BT service is up and running, move forward with the following troubleshooting steps that address a different fix according to each cause.

Power cycle your TV

Sometimes, power cycling the smart TV can fix various bugs in the BT Sport app. Depending on your TV model, you can do it in two ways.

  • Power off your TV and Unplug the power cable from the main wall.
  • Wait for 10 minutes and reconnect the power cable to the main wall outlet.
  • Alternatively, you can power cycle your smart TV by holding the power button on the remote for 5 seconds until the TV standby lights turn off.
  • Now power on the TV after 5 to 10 minutes.
  • Launch the BT Sport app and verify the fix.

Factory reset your smart TV

Factory resetting the smart TV reinstate its default settings and fix the TV software glitches that can cause the BT Sport app malfunction. The reset process is almost the same for all smart TVs except for a few steps. However, you can do it yourself on any TV quite quickly when you get a general idea.

  • Power on your smart TV and go to the main menu by pressing the Menu button on the remote.
  • Next, choose Support and then select Self Diagnosis.
  • Now select the Reset option (If asked, enter your security PIN).

Disconnect other devices

A few BT subscribers face screen tearing issues on the BT Sport app on smart TV.

To fix this issue, disconnect all other devices connected to the same network consuming the necessary bandwidth to stream BT Sport content flawlessly. It is worth mentioning that BT recommends a minimum of 3.5 MBPS speed to resolve the picture-breaking issue.

Turn on Motion Smoothing

Motion blur is a common issue when watching live BT Sports content on the smart TV. You can resolve this by enabling the motion smoothing feature of your smart TV. However, the motion smoothing feature is not ideal for movies or TV shows and primarily works for live sports events.

How do I update my BT app?

The BT App

If the BT Sport app is not working on your smart TV for any reason, updating the app can often fix the cause of the issue. To do this on a Samsung smart TV, you can enable all apps at once in the following way.

  • Press the Home or Smart Hub button on the supplied remote.
  • Select the “My Apps” option and then choose “Options.”
  • Now enable Auto update to update all apps along with the BT Sport app.
  • Finally, launch the BT app and verify that your specific issue is fixed.

Why is my BT Sport app locked?

BT Login Details

BT will lock your account automatically if you try to log in more than three times in a row with incorrect credentials.
You’ll have to wait 15 minutes before you can access your account with the correct login credentials.
During these 15 minutes, you may think something is wrong with your smart TV or BT Sport app. However, it can just be a case of a typing error. If you forgot your BT username and password, contact BT support to retrieve or reset it.

Conclusion

We hope you have fixed the BT Sport app malfunction on your smart TV by implementing the troubleshooting steps in this guide. However, if you still experience an issue, try updating your TV software as it might be compatible with the BT Sport app.

Facebook Something Went Wrong: How To Diagnose And Fix The Error

0

Recently Facebook has gone down numerous times, sometimes for hours at a time. Not only is this not ideal, but it leaves us wondering if it’s our device or if it’s a Facebook error.

To locate what is happening on Facebook when you get the ‘something went wrong’ error, we’ve compiled a guide of possible mistakes and how to resolve them. Whether you’re experiencing long term issues with Facebook or an issue that has just started, follow the below steps to get this looked into.

Facebook, something went wrong please try again

Sometimes when you try to access a page on Facebook or post content, you’re greeted with a screen that says ‘Something went wrong, please try again’.

For most users, this can be frustrating as the problem doesn’t often fix itself immediately. Sometimes this message can occur when a user is trying to post images or videos, so the error message stops them. 

When you find this error message on Facebook, there are a few different things you can do.

Firstly, we’d recommend checking the Down Detector to see if there is a known issue, as unfortunately, if this is the case, you will be unable to fix this yourself. However, if this isn’t an error on Facebook, try the following easy fixes. 

Sign in and out of your Facebook account

try signing out and back into your account. By doing this, your account can be reconnected to Facebook servers, so the content that wasn’t working may be available for you now. It’s straightforward to sign out and back in.

But if you’re unsure how to do this, please follow the below steps for more information: 

  1. Open Facebook; in the top right-hand corner, you’ll see a downwards arrow icon. Click on this.
  2. The following drop-down menu will give you a few different options. At the bottom of these options, there’s a button to sign out.
  3. Click this button. You’ll be brought back to the Facebook login screen.
  4. Re-enter your account details, and press log in again.

Clear your browser history and cache

Another fix that we’d recommend is clearing your browser history and cache. Although this sounds complicated, it is straightforward to do.

  • Open your web browser, then click on the menu icon on the right-hand side (this is usually dots or a cog)
  • Next, choose the option tools > then click clear browsing data (this removes any old versions of a site)
  • Then select the cookies and other site data that you want to remove.
  • Finally, please close your browser and then restart it again.

Facebook something went wrong when updating role

Facebook and Messanger logo

When using pages on Facebook, you can add other people to your page. Making it so they have different roles within your page, e.g. admin. This is great for people with businesses or organisations to run on Facebook.

Sometimes Facebook may not update your roles on a page. Here are a few suggestions when it comes to fixing your problem:

  • Ask people on your page to leave, and then you can re-add them. 
  • You can try to edit or adjust their roles.
  • Remove them on your page as admin and then re-add them back in manually

Demoting a role and then re-promoting them to the correct role is known to fix this problem. However, if you don’t know how to go about updating roles or changing them, here’s how to do it in 5 easy steps:

  1. On the left hand side, find the pages tab. 
  2. In the bottom left hand corner, click the settings tab. 
  3. You’ll be able to see the list of users and their roles. From here, you can add or remove people. And readjust their roles. 
  4. After you have changed roles, you’ll need to re-enter your password.
  5. Now, you’ll have to go back to step 2 and amend the roles.

Are you using Facebook dating and wondering where your match went? We have the of how to get it fixed so that you can get back to dating.

Is Facebook down today?

Facebook page on a laptop screen

Facebook may be down, and that’s why you can’t access it.

This is a common occurrence, especially at the moment, and it can become quite frustrating. However, Facebook usually comes back online shortly. However, if you’re not sure whether it is your issue or a Facebook issue, please follow the below steps to get this resolved:

To check, try checking on other social media sites such as Twitter. The reason to check on Twitter is that you can search any word and see other users posting using the word you searched for.

  • Open Twitter and find the search bar at the top of the page.
  • Search for a term like ‘Facebook’ or ‘Facebook Down’
  • Click to see the most recent posts.
  • If you see lots of users post about Facebook being down, likely, it is down.

Another method of checking if Facebook is down is a site called the Down Detector. This is a simple webpage where you can search web addresses, and it tells you if a page is down or not.

Why does Facebook not work

If your Facebook isn’t working, you can try clearing your browser’s cache and cookies. Cookies and cached files are both temporary files that are saved to your computer when you use the web. You’ll get these files from almost any website. 

The cookies save information such as your preferences, and the cached files contain things such as audio and video. They are stored on your computer to help web pages load quicker but don’t worry, and it’s very easy to delete them.

  1. Press CTRL + H to open your browser history. 
  2. In Chrome, you’ll find a tab for ‘clear browsing data
  3. Press this, and then you’ll see another tab pop up.
  4. This tab will give you the option to clear cookies and cached files in the form of a tick list. 
  5. Lastly, press ‘clear data’

Clearing these files will clear up some space on your device. It may not be much. However, it should be enough the help Facebook work again.

Facebook not letting me upload photos

Facebook ads on a laptop screen

There are several reasons why you might not be able to post any photos on Facebook. Some of these include: 

  • Poor wifi signal,
  • Low data mode
  • Large file types.

If it is a high-quality photo with a large file size, Facebook may struggle to upload it.

This is because the file size is too big for Facebook to handle. Facebook doesn’t recommend uploading photos in uncompressed formats such as PNG.

TOP TIP: Using a JPG is ideal for Facebook, as Facebook compresses photos anyway.

How to resize your photos for Facebook

  • Right-click on your files in whichever folder or location they are saved to check on the file type.
  • If you left-click on the files, then you’ll see a button for properties.
  • Click on properties, and you will see all the details for the file in question.
  • If you need to resize a photo, use a site like iLoveIMG for quick and easy image compression. 

Whether you’re a Facebook novice or an expert, we are happy to provide any further support you may need with Facebook something went wrong.

Hinge Error Uploading Video and How to Fix it

0

In today’s digital dating world, where the visual aspects of your dating profile play a crucial role in making a positive first impression, encountering issues with video uploads can be particularly frustrating

Whether you’re new to Hinge or a long-time user, this article aims to guide you through the various aspects of this error, its potential causes, and, most importantly, how to resolve it quickly, so you can put your best foot forward in the world of online dating.

Join us as we dive into the details of the Hinge Error Uploading Video error message and help you navigate this common issue with ease.

Hinge screenshot

Can you upload videos on Hinge?

If you’re interested in uploading videos to your Hinge profile, here’s how to do it:

  • From the settings screen on Hinge, click edit profile icon under your main picture.
  • Click on the photo you’d like to replace with video and tap ‘replace photo‘ in the upper righthand corner of the picture.
  • If you’re new to the platform, tap one of the + boxes to begin
  • Choose whether you’d like to upload video from Instagram, your camera roll or Facebook
  • Select the video from your profile and tap done once the video has compressed.

Your videos on Hinge should be at least 1 second long and no more than 30 seconds. You can choose whether you keep the sound on your video or mute it. However, you don’t have to upload videos on Hinge; this is just an option.

Why can’t I upload videos on Hinge? Hinge Error Uploading Video

Although uploading a video should be an easy process, you may encounter a Hinge error uploading video issue. First, make sure your app is up to date, as there may have been previous bugs that are now fixed. But if you still can’t upload videos on Hinge, here are some potential fixes to your issue.

Blocked permissions

When trying to access any video or pictures from your device or social media profile, you need to grant the app access to do so. This is usually a pop-up. However, if you don’t remember this or you’ve accidentally clicked no, follow these steps to access your videos on Hinge.

To fix your permissions issue on iPhone, all you need to do is:

  • Head on to your phone’s settings
  • Then scroll down to find the app you’re looking to use
  • In this case, click Hinge, and you will see 5 options
  • The 2nd option down is photos (which includes video). This is likely set to none or never.
  • So to change this, click, and you’ll be able to choose the option all photos.
  • You may need to close and open the Hinge app again to initiate these changes.

This should now fix your hinge error uploading video.

Hinge error message
@Harrycunningham via Unsplash

How do I upload photos on Hinge?

Hinge is different to other dating sites as it requires at least six pictures on your profile. If you do not upload six photos/videos/GIFs, you will not upload your profile. Hinge advises this process provides users with a more enhanced experience when using the app.

If you’re unsure how to add photos to Hinge, there are different ways to do so via camera roll and Instagram. Follow these simple steps to add pictures to your dating profile:

Via social media

Bring your profile to life by syncing your social media to Hinge. Using Instagram is a great place to start.

To connect Instagram to Hinge, you need to do the following:

Click on the Instagram icon on your Hinge profile to be redirected to Instagram.

You will then need to log in with your Instagram credentials and give access to Hinge.

Once you’ve done this, you should be able to select photos directly from your Insta account.

From your camera roll

If you don’t use Instagram or you prefer to use photos from your phone, you can do this by simply going to the ‘add photos’ section on Hinge. Click + on each of the boxes and add an image from your camera roll.

The first time you do this, it will ask for permission to do so. Be sure to allow Hinge access to your camera roll.

Once you’ve uploaded all 6, you will then be able to use the app.

Are you experiencing a Tinder error message? Here are 4 simple steps to fix this.  

Can’t upload photos on Hinge?

There are a few reasons you are unable to upload photos to Hinge. This can be frustrating when trying to update/launch your profile.

Here are some common issues on Hinge and how to fix them.

Permissions

When it comes to being unable to upload photos to any site from your camera roll, it is likely due to permissions. If you refuse permissions during the set-up stage, you won’t be able to upload pictures in your settings.

The first time you attempt to upload pictures, a pop up asks if Hinge can access your photos. You are provided with two options, don’t allow and OK on an iPhone. It is a similar pop-up for Samsung.

If you click don’t allow, your phone will block the app from accessing your photos.

Hinge screenshot

Not connected to Instagram properly

If you’re having issues syncing your photos from Hinge to Instagram, it is possible that you’re not connected to Instagram properly.

Check that you don’t have settings blocked to allow 3rd party access. If you’re unsure about this, follow the steps above. But instead of clicking Hinge, click the app you are trying to check. Then make sure the permissions are on for 3rd party apps.

If this has been declined prior, or you choose not to allow access now, your social media will not be able to sync. As this is blocked, the apps does not have any access to your account. Due to the permissions required.

Can you use GIF on Hinge?

In terms of using GIFs on Hinge, this is not yet a feature you can do within chats/from a keyboard. Despite the pleas from the users of the dating app on Reddit. However, similar to a profile picture and video, you can add a GIF of yourself in place of one of your photos/videos on your profile.

EE Router Internet Flashing Orange: What Does It Mean & How To Fix

0

Understanding how your router works is essential. Especially when it comes to understanding errors, wifi dropouts and how to fix these. There are a variety of different lights on a router, some of which require additional attention. But how do you know what they mean? We have the answers to your internet woes.

Although the lights vary depending on your broadband provider, we have an extensive guide on what the lights on an EE router mean. This includes your EE router internet flashing Orange, the different green lights and more.

If you’re unsure what the lights on your EE router means, here’s a rundown of all you need to know.

EE router internet flashing Orange

You may see an Orange light on your EE router. However, this isn’t a cause for concern. The EE router internet flashing Orange means one of two things- either it is synchronising with the broadband or trying to establish an internet connection after it has dropped out.

Both of these lights should disappear if left to connect themselves. Just be wary if it is trying to synchronise with the internet, as it may be doing an update on your router, which means it may stay present for some time.

However, if it does not disappear after a significant period of time, please switch off your router and reboot it.

After rebooting it, allow 5-10 minutes for it fully start up again. We’d expect a reboot of your router to resolve any of your issues with an Orange internet light. However, if it doesn’t, please reach out to us for further help.

EE router lights, what do they mean?

wifi connection

If you are with EE and have a Bright Box router, you can expect to see some of the below lights from time to time. This is likely to happen when setting up your router for the first time.

Solid Green

If you see a solid Green light on the router, your internet is connected to the router and functioning how it should be.

Flashing Green

A flashing Green light is perfectly normal. This means the internet is connected, and traffic is being sent between the internet and the router.

Fast flashing Green

If your router is fast flashing Green, this means that the WPS connection is running.

Slow flashing

A slow flashing light means that intelligent wireless is searching for a new wireless channel to connect to.

Red light

Like with most technology, Red lights are hardly ever a good sign. In terms of the EE router, a Red light of any kind means there is an issue. Whether your router is not turning on, the internet connection is down, or your router is faulty.

What does the Aqua light on EE mean?

Aqua flashing

If you see an Aqua colored light flashing after resetting your router, it may be a further issue with your router. Please try to reboot your router by unplugging this at the wall, waiting 30 seconds and then switching it on again.

EE wifi connected but no internet.

wifi router

If your internet appears to be connected but isn’t working, first, we recommend restarting the device you are using as it may be storing an old version of the browser. However, if this doesn’t work, EE advises you to turn your router off and on. This may be a simple router fix, but it does often fix your issue. You can reset your router by doing the following:

  • Head to the back of your router and turn it off at the wall.
  • Unplug the connection to the socket
  • Then allow 60 seconds before turning everything back on
  • Please be aware it may take up to 10 minutes to start back up fully.

If you’re still experiencing these issues, it may be worth checking the EE coverage checker to ensure the problem is with your router and not EE as usual. If you’re still unsure what the issue with your internet is, move on to the steps below to find out more.

Is your EE service active?

ee logo

If you’ve just joined EE, your broadband might not be live right away. Therefore allow up to 24 hours for the service to be live. After this time, if you’re still having issues, call EE for further advice.

Is your router set up correctly?

Make sure your router is set up correctly. If you’re unsure whether it is set up right, EE has a smart set-up guide that you can view here.

Is there a problem with my wiring

Sometimes the wiring between phone and broadband sockets can cause problems. If your phone line connects to a wall socket when it enters your home, try connecting it via a microfilter for a more robust connection.

But if your wiring appears to be correct, look into getting a wifi booster for the room where you are having issues. If your router is far away from the device you are attempting to use, it will likely cause problems.

Has your account been cut off

If your bill hasn’t been paid, EE may restrict your services until this issue has been resolved. Once you’ve paid this bill, you should expect your services to return to their everyday use.

Are you having issues with your EE text messages? Here’s how to fix it in just a few easy steps.

What is Smart Wireless on EE?

wifi speed test

EE Smart wireless helps you maintain the best connection on all of your wireless devices at all times. Your router automatically connects and should only be touched if required by a manual rescan as part of wifi troubleshooting.

A Smart Wireless hub has two wireless channels that allow you to get a more significant internet connection strength. Your device will automatically choose the wifi channel with the lowest traffic to resolve this issue.

If you need some help with refreshing the channels on your smart hub, here’s how to do it:

  1. Open a new browser on a device connected to your wifi hub, search 192.168.1.254 in the address bar, and enter. This will open up your task manager on the hub.
  2. Following on from this, choose advanced settings > wireless
  3. Next, enter the password from your router; this is an admin password instead of your wifi password. This should be able to be found on the bottom of your box unless it has been changed.
  4. Finally, in the channels section, choose to rescan. Then this will manually move you to a different smart channel, providing a new channel for better strength.

If you are experiencing further technical difficulties with your Smart Wireless or your EE router internet flashing Orange, don’t hesitate to contact Digi Help Desk for additional help.

Sky Connected But There Is No Internet On The Sky Box: Fix Here

0

Is your Sky Q box connected to your router but it shows no internet connection? Are ll your other devices such as mobile phones and laptops connecting to your router but not the Sky Q box? Do you know what causes this connectivity issue? In this article, we’ll deal with this problem through easy step-by-step fixes.

Sky Q box comes with TV bundles and mini boxes that act as a wireless repeater to help expand the range of your WIFI network and to run Sky TV programmes in other rooms of your house. Furthermore, You have the luxury to record four programmes at once while enjoying the fifth one.

Additionally, you can use a router other than the Sky Q hub to work with the Sky Q box as well. However, if one device malfunctions, it can compromise the integrity of the Sky mesh network in your home. Let’s find out what the “no internet” error means and why you get it on your Sky Q box even though it is connected to your router.

What does connected but no Internet mean?

Sky Tv Menu

The error means that your Sky Q box is connected to your router correctly but it is not connecting to the internet. Before you feel too panicky about it, know that there a quite a few Sky Q users who face the same dilemma as you.
Sky Q users are reporting that under Network connections in the Settings menu of the Sky Q box, they get the error message “It looks like you do not have an internet connection”. The Sky users see a ✔ (Tick) for the connection to the router but an X (Cross) for the internet.
Users also experience that some other functions such as Sky Store and Online Video do not work as Sky Q box notice the absence of an internet connection, but actually, there is one with the router.

Why does my Sky WiFi say connected no internet?

Router box with wires going into them

If your Sky Q box is connected to the router and you get an internet error, it could be due to the following reasons.
  • Sky Q box is overloading itself and needs a restart
  • The router needs to reconnect with the Sky Q box
  • Sky service is temporarily down
  • Network settings on Sky Q are not configured correctly
  • Your router is faulty and needs replacing

How do I fix no Internet connection?

Internet connection

To fix the no internet connection, first power cycle your router and Sky Q box. If the error persists, do the following troubleshooting steps.

Reconnect router to Sky Q

Sometimes, your Sky Q box can be partially connected to your router. To fix this, try reconnecting your box to your router by the following method.

  • Press the Home button on your Sky Q remote and navigate to Settings
  • Now select the Connections option
  • Next, reconnect your Sky Q box to your router again by following on-screen instructions

Manually change DNS server

Quite often, manually changing the DNS server number can help fix the internet connection issues on the Sky Q box. To do this:
  • Go to the Settings menu on your Sky Q box
  • Navigate to Setup and then select Network
  • Under Advanced Settings, select Set Manually
  • Change the DNS server number to 8.8.8.8
  • Next, power cycle your Sky Q box
  • Now try using your Sky Q box and check if this fixes the internet issue

Reset Sky Q box network

If the internet error persists after changing your DNS server, try resetting your Sky Q box network to fix the issue.

  • Long press the Home button to bring up the Settings page on your Sky Q box
  • Navigate to Network –> Setup
  • Select the Reset option and confirm it as well
  • Next, follow the on-screen instructions to set up your Sky Q box by connecting it via WPS
  • Press the WPS on the router for a few seconds
  • Now press the WPS on the Sky Q box for a few seconds to fix the error

Use the same name for 2.4GHz and 5GHz networks

To fix the “Sky Q connected no internet” issue, you must have the same names for both 2.4GHz and 5GHz networks. You might have changed one network name which is causing the internet error on the Sky Q box. To check and change this setting on your router:

  • Login to your router or hub home page
  • From the left menu, select WIFI Settings
  • Click between the 2.4GHz and 5GHz options
  • Make sure that the 2.4GHz network has the same name as the 5GHz network

Replace your router

Network hardware (Routers, hubs, cables) malfunction is a common cause for the internet error on the Sky Q box. Therefore, you need to check if the cables are firmly connected to the router and the SkyBox. Furthermore, inspect any physical damage to the cables as well. If all seems right, your router may be faulty.

If that’s the case, you may need to contact your router manufacturer and ask them to replace or repair it. Remember, you may have to pay for the router repair or replacement if it is out of the warranty period.

Is Sky having Internet connection problems?

Sky report

Your router is working fine but you can’t connect to the Sky Q box? Sometimes, when the Sky servers are down, you can expect different errors to pop up on your Sky Q box. If all of the above fixes fail to fix the internet issue, it’s maybe because the Sky service is down.

To check the status of the Sky service, you can visit a third-party website such as Downdetector or visit the Sky website. Most of the time, the service outage is temporary and Sky engineers resolve it within few hours.

Conclusion

We hope that this guide helped you fix the “Sky connected no internet” issue. Mostly, this error happens to the users who are using a router other than the Sky Q hub with their Sky Q box. Sometimes, Sky Q won’t pick up the IP address from the non-Sky router. Therefore, if you are using another router, change it with the Sky Q hub.

Chromecast Keeps Flickering: Heres How To Fix The Picture

0

A Chromecast is a fantastic way to watch TV on demand without a lengthy (and costly) subscription.

But what about when your Chromecast picture stops working or you notice it is flickering. If you’re stuck trying to figure out how to fix your Chromecast, here are some simple troubleshooting tips to get your Chromecast back up and running. 

Chromecast keeps flickering- How to fix this issue? 

Chromecast blinking orange

If your Chromecast keeps flickering, this could mean a range of different things. It varies depending on the generation of Chromecast. A Chromecast blinking orange means that the device is performing a short update.

This applies to Chromecast second generation, Third generation, and Chromecast Ultra. The Chromecast with Google TV displays a blinking orange light when it is experiencing a diagnostic. Generally, a blinking orange light on your Google Chromecast should go away shortly. However, it may highlight a fault you didn’t know existed. 

But if not, a Chromecast blinking orange also may indicate that your device needs to be reset. 

A red light on Chromecast 

If your Chromecast keep flickering it can indicate the device is updating. There can be times when Chromecast displays a solid red light instead of a flashing red light. Generally, this is also an indication of an error. 

However, in some instances, the Chromecast won’t play, and it won’t work correctly. You may see the red flashing light and a black screen, which you will have to resolve before you can watch content with your Chromecast. 

How to resolve Chromecast issues

Google chrome cast

Restart your Chromecast

To restart your Chromecast, all you need to do is hold the button on the side of the device. Once you hold it down, the light will display orange, and when the light turns white, you can let go of the button. The white light indicates that the device is restarting. 

Check your wifi is connected.

If you find your Chromecast is not working correctly, firstly, check that it’s connected to the wifi and the network connection is working. If your wifi isn’t the problem, the next easiest thing to do is to restart the Chromecast and see if it reconnects itself to your wifi connection. 

A Chromecast can be controlled using the Google Home app. Try adding the wifi connection and reconnecting your Chromecast in the Google Home app. To do this, press the settings icon, press wifi, and choose the ‘forget’ option. Next, you can manually reconnect the wifi.

Alternatively, if you have a  dual-band router with 5ghz or 2.4ghz bands, you can try connecting your Chromecast to one of these. Dual-band routers are designed to help spread out the Internet connection, so it becomes less congested. 

To find out more about how to fix your Virgin Media router issues, we have an easy step by step guide here.

Update your Chromecast

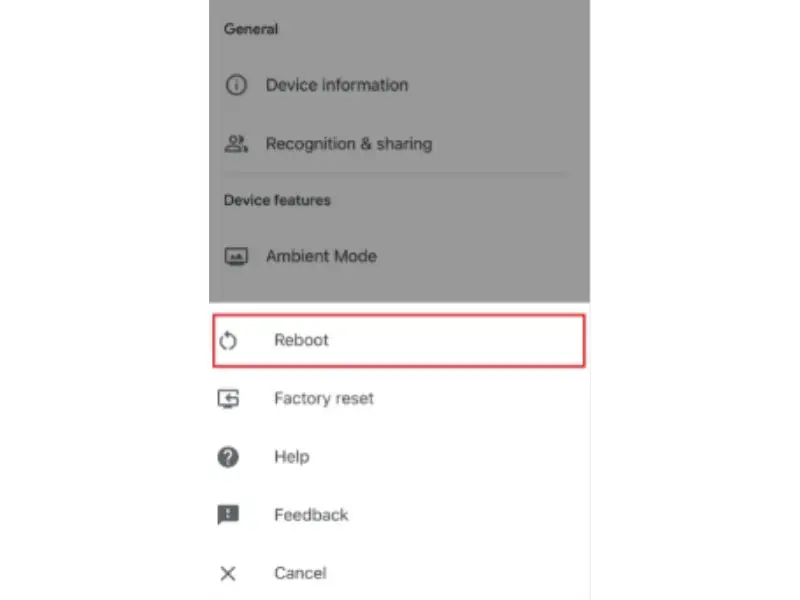
You can quickly force updates for the Chromecast if you can’t connect to it. Once your phone or tablet is connected to the Chromecast, open the Google Home app. Find your Chromecast and press the three dots by the Chromecasts’ name. It will give you an option for settings. In device settings, you can press ‘reboot’. Doing this will force update your Chromecast and download the latest update. 

Make sure your Chromecast and other devices are connected to the same network.

You’ll need your phone or tablet to be connected to the same wifi connection as your Chromecast. To make sure your Chromecast and other devices are connected to the same wifi, you’ll need to access the Google Home app. In the Google Home app, click the settings icon and access ‘wifi’ to check your device is connected to the same wifi as your Chromecast. 

If they aren’t connected to the same wifi, you won’t be able to connect any other wireless devices to the Chromecast.

Chromecast keeps flickering red, how do I resolve this? 

tv and tv remote

Although a red light on a device can be concerning, fixing the red light on your Chromecast has never been easier. Here are the steps to fix your flashing red light

  • Firstly, unplug your Chromecast from its power cable. Allow it to reboot. 
  • Then plug your Chromecast back in (ideally to another TV, so you can work out if the error is the Chromecast) 
  • If this doesn’t work, you need to do a factory reset on your Chromecast.

How to reboot your Chromecast device?

tv with gone girl

Perform a factory data reset on your Chromecast

If you’re unsure on how to reboot a Chromecast, follow this easy steps and your Chromecast will be fixed in no time.

  • Head on your phone and find the settings icon on the Chromecast app.
  • Next, select an option for ‘System’, then ‘about’, and lastly, you’ll see an option for ‘Factory Reset.’

To reset your device

You can do the same for the Chromecast device. Hold the power button down until the light begins to flicker yellow. It should take about 25 seconds for the light to change colour. The yellow light will turn white, and the Chromecast will reset.

Please keep in mind that factory resetting the Chromecast will erase all your data from your device. All history, apps, and accounts will no longer be associated with the device. 

How to set up apps on Chromecast 

On the Chromecast menu, find the apps tab at the top of the page. Once you press the apps menu, you can search for whatever app you may like. 

Always check that you have Chromecast enabled apps, as these apps will be functional from your smart device to your Chromecast. 

Can I watch Netflix on Chromecast? 

woman eating popcorn and watching tv

You can watch Netflix on Chromecast. To watch Netflix, all you’ll need to get is the app and a Netflix account.

From your Google device, you’ll see a little icon of a square that says ‘Cast’ you can use this to connect to your Chromecast.

If you’re still struggling to resolve your issues with your Chromecast, please get in touch as we’d be more than happy to help you with this.

Virgin Media Router Flashing Green: What Does This Mean

0

Virgin Media Router Flashing Green

Whether you’re a new customer of Virgin Media or you’ve been with them a while, you know the struggles of your internet going down. However, there are some super easy fixes to stop this without calling Virgin Media customer service. This post will look into why your Virgin Media Router is flashing green, why can you not get signal in other rooms, and how to access the advanced settings for your router.

Virgin Media Router Flashing Green

There are various combinations of lights on the Virgin Media routers, especially on Superhub 3 and 4. If you notice your Superhub Virgin Media router is flashing green, here’s what it means:

White power light is on and internet light is flashing green

This means everything is all good with your hub and also your wifi connection. However, if you notice this isn’t working how it should be, check your postcode to make sure there are no issues in your area.

Green power light is flashing and WiFi light is green

This means the hub has power to it, however, it isn’t getting WiFi signal. If you’re unsure about why this is, it is likely due to a loose connection in your home. Make sure your white cable is firmly plugged into the hub and socket at all times. If you’re using a splitter this may be faulty, especially if this is an ongoing issue.

White power light is on and WiFi light is flashing green

This means the Hub is online and working. However, if you are struggling to connect to it, try disconnecting and reconnecting to the hub.

Why is my Virgin Media router not working in other rooms

wires going into router

Virgin Media customers often find they have issues with their routers when they’re not near the router. Although this shouldn’t be an issue, Virgin customers are seeing more of this issue. If you’re unsure why your Virgin Media isn’t working in other rooms, here are some quick fixes for you.

Virgin boosters

Virgin introduced wifi boosters to allow easy transmission of the wifi from the router. As often, homes have ‘ wifi black spots’ which stops your connection from working entirely. If you’re with Virgin, you may be able to get their specialist boosters. However, you can also buy them from places such as Amazon, Currys and Argos.

Get the router in the room you are going to use it most

If you are yet to get your router fitted, be sure to consider the router’s location. The closer you are to the router, the stronger your signal strength will be. Aim to have the router as close to your devices as possible. E.g. in your living room or bedroom.

Connect via ethernet cable

If you struggle to connect via wifi to a device, you can connect directly to your router with an ethernet cable. By plugging one of these into your router and the other into your device, such as a PC, you’ll have a strong connection as it doesn’t need to travel wirelessly.

Work out if there is a problem with your device.

Occasionally wifi may stop working on a particular device. If your device is struggling to connect or keeps dropping out, attempt to reboot your device before your router. Although rebooting your router can fix many issues, it is likely to be the device if the rest of your house is connected.

Need help with your Virgin Superhub 3 in modem mode? Here’s all you need to know right here.

How to fix my Virgin Media wifi issues

wifi router with lights on

Virgin always recommends rebooting your router before any further troubleshooting, as you can fix many errors this way. However, if you are still getting errors after doing this, we’d recommend accessing your hubs advanced settings. If you’re unsure of how to do this, here’s how to do it with ease:

Virgin Media Hub 3

  1. Enter 192.168.0.1 into the address bar of your browser, then press enter.
  2. Following this, a settings page will load
  3. When prompted to, enter the settings password on the bottom of your router. The password is different to your wifi password.
  4. Once you’ve entered this, you should gain access to advanced settings on the left-hand side.
  5. You can choose to run the network diagnostic tool, which runs tests on your router.
  6. If you’ve previously changed your password or wifi name, you can reset this by going on advanced settings > wireless > security. This can sometimes fix an issue. Therefore it may be worth setting it to the original settings.

Superhub 1,2 or 2ac

If you have one of the earlier hubs, the settings are slightly different when it comes to your hubs advanced settings.

  1. Enter 192.168.0.1 into the address bar of your browser, then click enter.
  2. You should gain access when prompted to enter the settings password on the bottom of your router (not the wifi password).
  3. If you want to change your wifi settings, change the password or view details on your Superhub, this information can all be found here.

Virgin media lights meaning

web design infographic

Understanding what the lights mean on your router can be confusing. If you have a Superhub 3, this is what the lights may look like on your device:

Hub 30 flashing green wifi light no internet

This light is a standard error with Virgin Media customers, and it just means the hub is looking for a WPS connection. An easy fix for this is to hold the hubs WPS button for around 30 seconds to see if this fixes the issue.

Virgin media hub three power light flashing

You are most likely to see this when your device is starting up, whether it’s been rebooted or you’ve lost power to your device. This should go away once your device is up and running again.

Finally, if you’re still having issues with Virgin Media, we recommend getting in touch with Virgin. You can also check any further problems with the Virgin Media App. Plus you can also run tests on your router, which, if required, can provide you with the information for booking an engineer.

Chromecast Not Showing Up: How To Detect Your Chromecast

0

Sitting down to watch TV on your Chromecast should be a simple thing to do. However, when you’re trying to connect your Chromecast, and it’s not showing up?

This can be frustrating, especially when it’s your first time connecting. However, not to worry, as here at Digi Help Desk, we have some troubleshooting tips to get you up and running.

Whether you’re a tech novice or a pro, these tips are super easy to follow.

Chromecast not showing up. 

Chromecast not showing up
@nina_p_v via Twenty20

If you can’t find your Chromecast, check your Chromecasts network setting. Your Chromecast and the device you wish to cast from need to be connected to the same wifi. Either your devices are connected to the wrong connection, or one device may not be connected to the Internet. 

Once both devices are connected to the same network, try again by pressing the cast button to find your Chromecast. Your device should appear.

If you’ve named your device with any special characters such as symbols or Emojis, the Chromecast won’t display this. Make sure you remove any special characters from your device’s name. 

Chromecast not showing up on iPhone.

Your device should automatically pick up your Chromecast in the Home app. To check this, open the Home app, and your Chromecast should be listed. If you don’t have the Google Home app, you’ll need to download that to connect to your Chromecast. You can download the Google Home app from the App Store. 

Try restarting your Chromecast device if it’s still not showing up. Often, this can be an easy fix for a device that doesn’t show up in the Home app. 

Not showing up on Android Phone

If your Chromecast is not showing up on Android Phone, try restarting your Chromecast. 

  • Unplug your device from its power supply, and wait at least 15 seconds
  • Plug your Chromecast back in and turn it on
  • Retry connecting to your Chromecast from your Android phone

If you can’t see a cast icon on content, there may be a connection issue between your device and your Chromecast. Any content that is compatible with a Chromecast will have the cast icon ready.

Note if your Android device has location services turned off, it will need to be turned back on. You can set it up so only Chromecast can’t access your location. Without location services, the Chromecast won’t work correctly. 

How to set up your device

To set up a Chromecast, you’ll need to plug the Chromecast into your TV’s HDMI port and attach the power supply cable to your device.

  1. From here, turn on your TV and switch to the HDMI port that is being used
  2. Instructions to set up your Chromecast will appear on your screen. You’ll need to connect to your wifi.
  3. Download the Google Home app.
  4. Once the Chromecast is set up and you’ve downloaded the Home app, you’ll be able to connect your device to the Chromecast. 
  5. You’ll be given a temporary name and a code to connect to the Chromecast initially. 

Why does my cast not show Disney plus

Chromecast not working
@5byseven via Twenty20

It’s easy to play Disney+ from your device to a Chromecast. The process of connecting your device is the same for other streaming platforms.

To access Disney+, you’ll need a subscription to the service, ranging from £7.99 a month to £79.80 a year.

  1. First, install the Disney+ app onto your iPhone or Android device 
  2. Make sure that you are connected to the same wifi signal on both your device and the Chromecast, and you won’t be able to use the Chromecast if it’s not connected to the same wifi. 
  3. Open Disney+ and sign in.
  4. Find something to watch and press the ‘cast to’ icon. Select your Chromecast
  5. Disney+ will now be streamed to your Chromecast

Are you trying to get Disney Plus on an older Panasonic TV? Here are some useful tips and tricks to assist you.

Why is my Chromecast not showing up on YouTube? 

If no devices are available for your device on YouTube, try restarting your phone or tablet. Once your device is back up, try connecting to YouTube on the Chromecast again.

You can also try closing and reopening the YouTube app or disconnect and reconnect to your wifi connection. A common error is not knowing that your phone or tablet isn’t connected to wifi. Instead, they’re connected to their mobile data. Without connecting to the same network, you will experience issues. 

Chromecast needs to be on the same wifi signal as the device that it’s connecting to. Check your phone or tablet isn’t using mobile data. 

Chromecast not detected

If your Chromecast is not detected, check the Chromecast on the TV to see if there’s a ‘Set me up’ button on the screen. If there is, then the set-up for the Chromecast didn’t finish properly, and you’ll need to go through the set-up. The set-up is easy to follow and should take no longer than 5 minutes.

Are you still experiencing issues? Contact the Chromecast support team for more info.

What do the Chromecast lights mean?

Chromecast
@kpeterson0892 via Twenty20

If a different colored light appears on your Chromecast, there could be an issue. If your Chromecast isn’t detected or doesn’t appear to be working, be sure to check the LED lights on the device to figure out what’s wrong.

The Chromecast typically displays a solid white light when connected and a pulsating white light when it is disconnected. 

Flashing orange light can mean the device is updating. However, a flashing orange light with a black screen means there’s a further problem. To fix this, it’s recommended you restart your Chromecast.

A solid orange light means there is an error, and again it’s recommended you restart your device. If restarting the Chromecast doesn’t fix the problem, you may need to factory reset your Chromecast. 

If you require further help from Digi Help Desk, please get in touch as we’d be more than happy to assist with your issues.